Hola, Shopify mates. ?
Welcome to MageComp Shopify Tutorials.
Today, in this tutorial, we will learn to remove or edit Shopify payment icons on your Shopify store.
Shopify is the best eCommerce platform in every way possible. Shopify supports 100+ credit card gateway integration. Because of that, it is important to have control over which Shopify payment icons are displayed on your store. Place them in the footer, under the add to cart button, or even under the checkout button.
These payment icons inform shoppers about the payment methods they can use to buy your products, building their confidence and trust in your store and ultimately increasing your conversion rates.
However, it’s easy to forget about them, and you may need to change the icons you want to display from time to time.
Steps to remove payment icons
Step 1 –
Log in to your Shopify account and access your Shopify store backend.
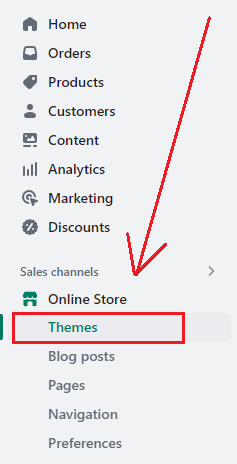
Go to the Shopify admin panel → Online Store → Themes
Step 2 –
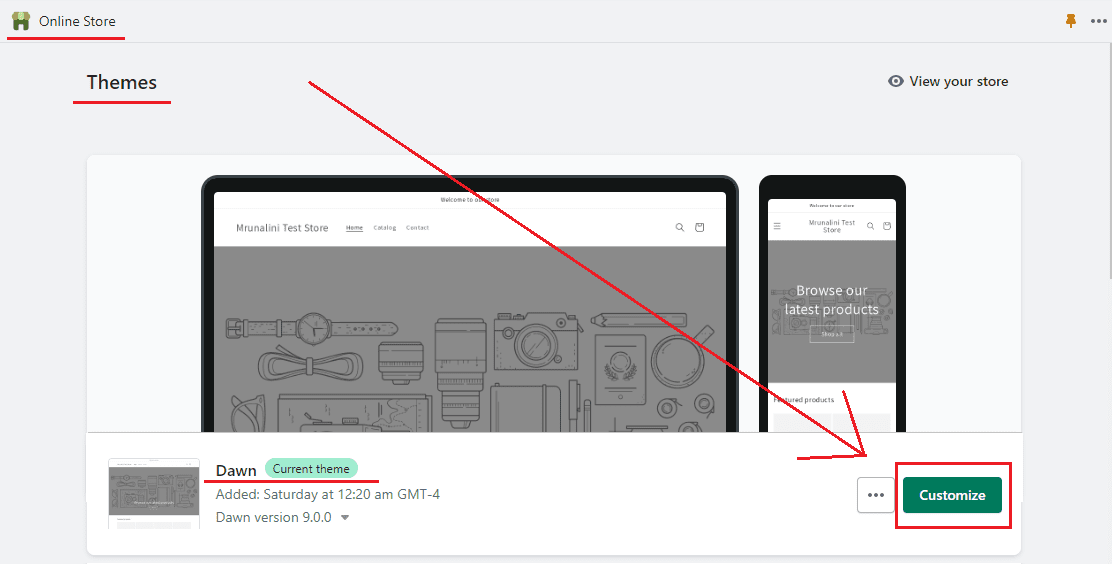
Choose the Customize option.
Step 3 –
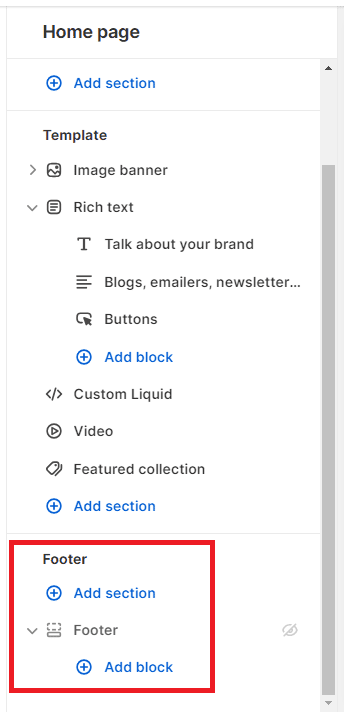
Go to the Footer section on the theme customization page.
Step 4 –
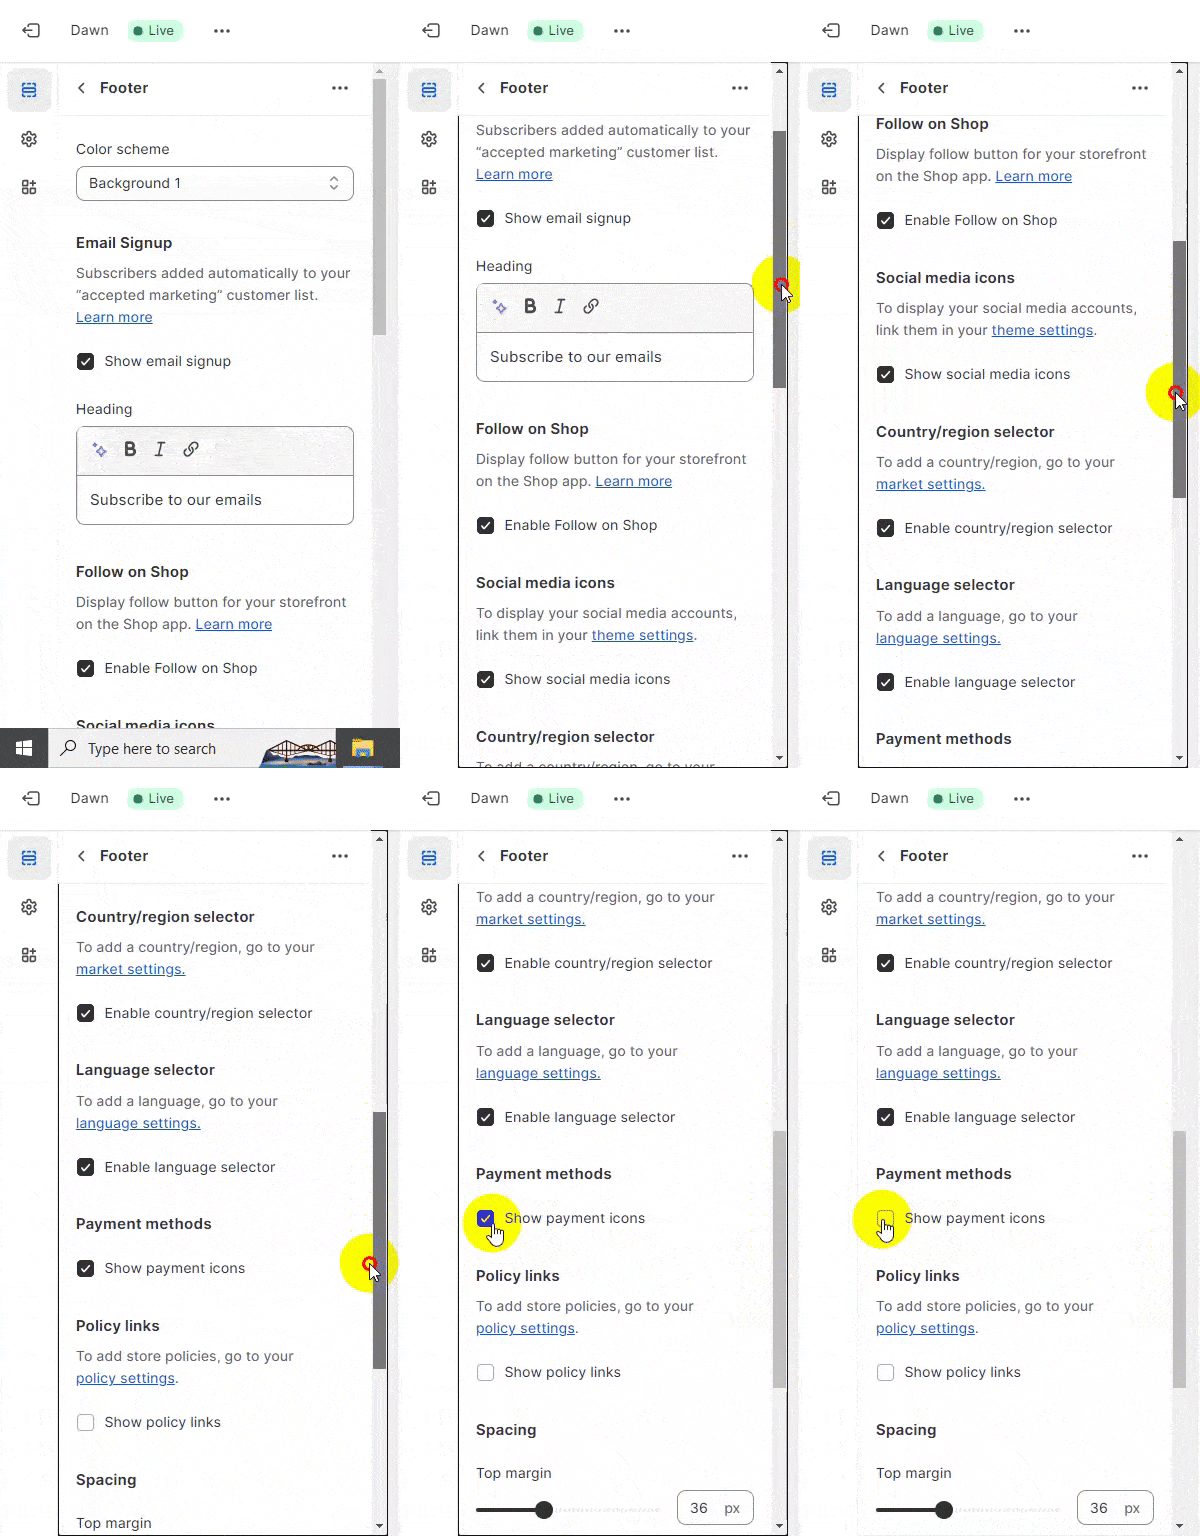
In this footer area, search for the Payment Methods option and uncheck the box: Show payment icons.
Step 5 –
Save your changes made and proceed.
Learn more about Shopify payment methods
How To Add Payment Methods On Shopify?
How to Change the Payout Schedule Date on Shopify Payments?
Conclusion
As a Shopify store owner, you want to make sure that your customers know exactly how they can pay for the goods and services you offer. With Shopify, adding, removing or editing payment icons in your footer is a breeze. This way, not only will your visitors know that you are a trustworthy and legitimate business, but you will also be able to cater to a wider audience from around the world.
Hope this tutorial was helpful for you. If you need any further Shopify assistance, kindly contact us or text us on our official Facebook page.
Happy Shopifying!!!


