
Hello Magento Friends,
Due to the rapid growth of E-commerce, it’s important to provide customers with a variety of shipping preferences for their purchase. Handling multiple carriers for your Magento 2 store helps to provide a flawless customer experience. One such shipping carrier is FedEx. So today let’s learn about, Magento 2 Shipping Carriers – How to Configure FedEx Carrier.
FedEx is one of the well-known and world’s largest shipping service companies that offer domestic and international deliveries by land and air to over 220 countries. Before you can offer shipping options to your Magento 2 customers, you must create a shipping carrier merchant account and configure shipping settings from the store admin.
Eliminate these lengthy configuration steps by integrating Order Tracking Extension for Magento 2. Sit back and relax, let our professionals handle your store shipping while you concentrate on other important tasks.
Let’s look at the steps to Configure FedEx Carrier for Magento 2.
Steps to Configure FedEx Carrier for Magento 2:
Step 1: Create/Register for FedEx Merchant Account
First, you need to create FedEx Merchant Account and register for FedEx Web Services Production Access. After you have created a FedEx account, from the Production Account Information Page, click on Obtain Production Key available at the bottom. The key you obtain is required to configure FedEx in your Magento 2.
Step 2: Enable FedEx for your Magento 2 store
- From the Admin Dashboard, navigate to Stores > Settings > Configuration.
- From the left pane, enlarge Sales and select Shipping Methods.
- Now, enlarge the FedEx section.
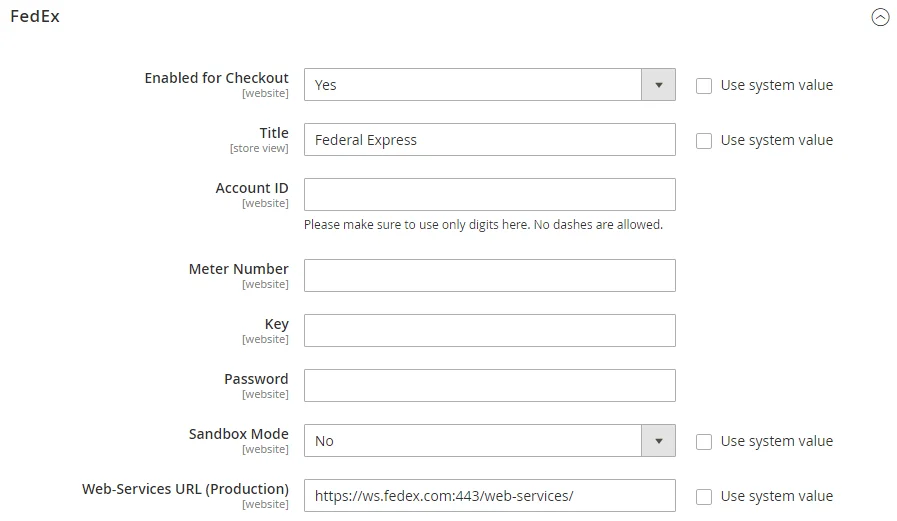
- Enabled to Checkout – Set Yes to show FedEx shipping method in the storefront.
- Title – Give a relevant title to be shown at the checkout time.
- From your FedEx account, enter details for Account ID, Meter Number, Key, and Password.
- Sandbox Mode – Set Yes to work with FedEx in the test environment. When you are all set to provide the FedEx shipping method to customers, set it to No.
- Web-Services URL – URL based on the sandbox mode.
Step 3: Setup Package Description
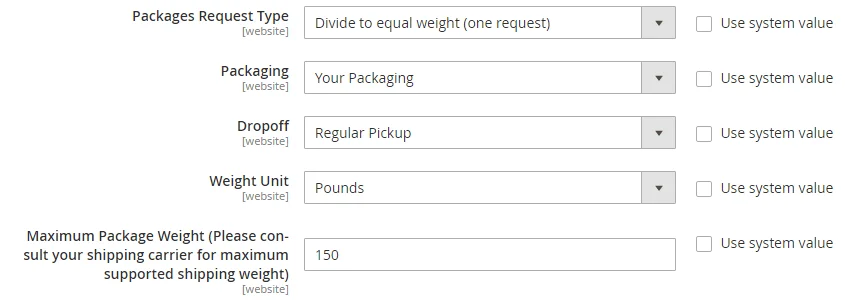
- Packages Request Type – Select the appropriate option that describes how multiple shipments will be carried on: Divide to equal weight (one request) or Use origin weight (few requests).
- Packaging – Select the type of packaging for the shipment of products.
- Dropoff – Select the desired option that will be the pick-up option for delivery.
- Weight Unit – Set the weight unit to Pounds or Kilograms.
- Maximum Package Weight – Set the maximum weight allowed for shipments. Default is 150.
Step 4: Setup Handling Fee
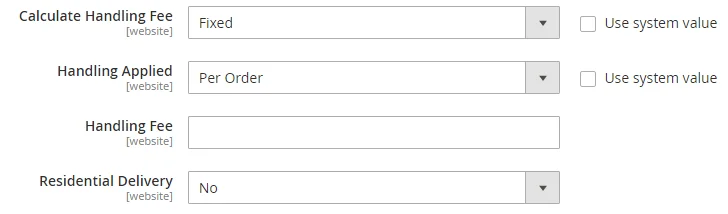
- Calculate Handling Fee – Set the handling fee calculation in the form of Fixed or Percent.
- Handling Applied – Set how the handling fee will be calculated as Per Order or Per Package.
- Handling Fee – Enter the amount of the handling fee based on the method of handling fee.
- Residential Delivery – For B2C deliveries set this option to Yes. For B2B deliveries set it to No.
Step 5: Assign Allowed Countries and Applicable Countries
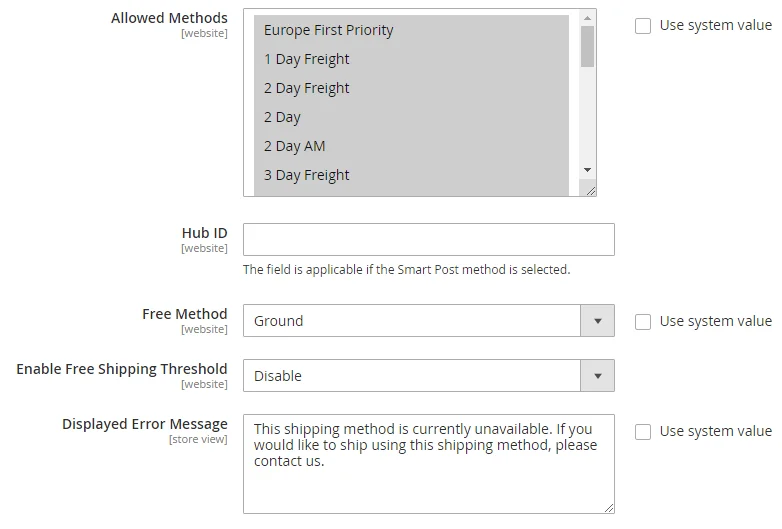
- Allowed Methods – Select methods that you want to offer to your customers. There is no restriction on the number of method selection.
- Hub ID – This is only required when the method is Smart Post.
- Free Method – Select the method you want to offer for free. Select None to not provide free shipping.
- Enable Free Shipping Threshold – Enable this field to set the minimum number of quantities for free shipping and enter the minimum value in the Free Shipping Amount Threshold field.
- Displayed Error Message – Enter the message to be shown when the FedEx Shipping is not available. You can even use the default message.
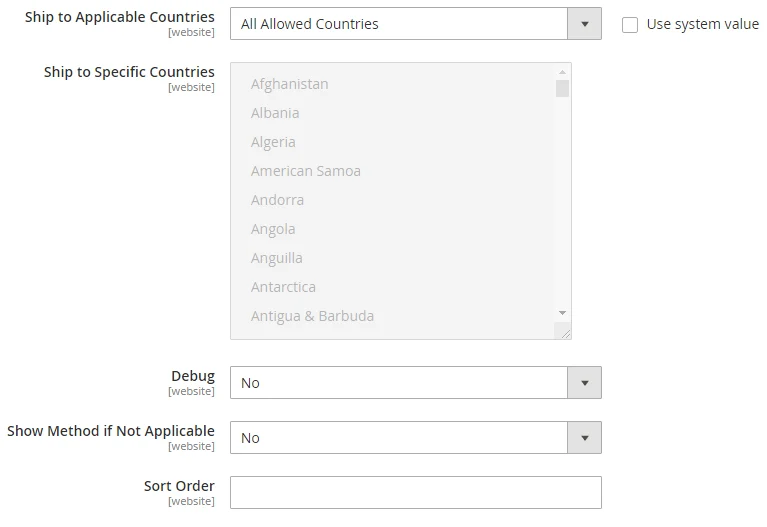
- Ship to Applicable Countries – Set the option to All Allowed Countries or Specific Countries
- Ship to Specific Countries – Select the country if the above option is set to specific countries.
- Debug – Set this field to Yes to create a log file of all the communications between your store and FedEx.
- Show Method if Not Applicable – Set it to Yes to show all shipping methods or No to show methods based on the order.
- Sort Order – Enter the number to display the FedEx delivery method with other delivery methods at the checkout page.
At last, click Save Config.
Final Words:
Hopefully, with the above steps all are easily able to configure FedEx Carrier for Magento 2. Comment your queries and I will be right there to help you out. If you found the article helpful, hit that 5 stars and share it with your Magento friends. Stay tuned for more solutions.
Happy Reading!
how we go live tracking using sendbox for fedex
hello,
I am using Magento 2.4.7-p2 and I don’t have the same field names:
I have APi Key and Secret Key for Fields.
Which is the latest?
Yes it is based on the Magento version you are using.