Do you know? In Magento 2 you can also set Locale, Language, and Country. So, hold on till the very end of this tutorial blog and we are going to explain everything how you can do all the configurations related to setting locale, in Magento 2.
The Locale option displays additional information about your store. The locale options can ascertain the time zones, the languages, and the working days around your neighborhood.
As you provide all this information to the spectators, your store will become more amiable to them. Also, you can take firm action in making your store functioning in other countries. Let’s see what you can do!

Steps to get started with setting store locale in Magento 2
Step 1 – Configuring the Locale Options
- Navigate to Stores > Settings > Configuration.
- From the left-hand side General panel, choose General.
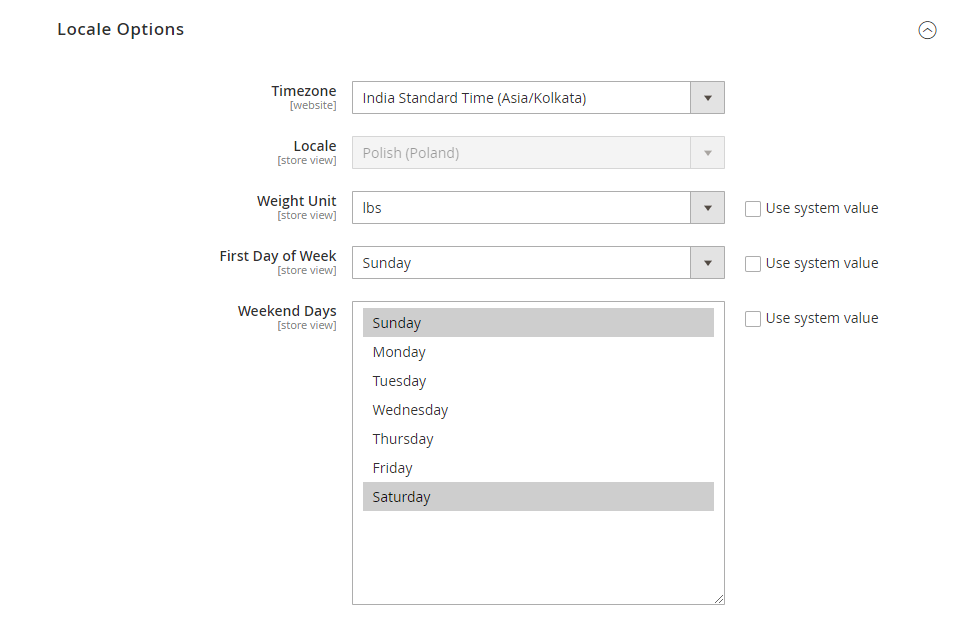
- Navigate to the Locale Options Section.
- Choose your Timezone from the list.
- Select your store language in the Locale field.
- Next, set the measurement unit that is generally being used for shipments from the Locale in the Weight Unit field.
- Choose your First Day of the Week of working in your sare.
- Next, select the days that are considered as Weekend Days in your region. To choose numerous days, hold the Ctrl key.
- On completing all the configurations, Save Config.
Step 2 – Configuring the State Options
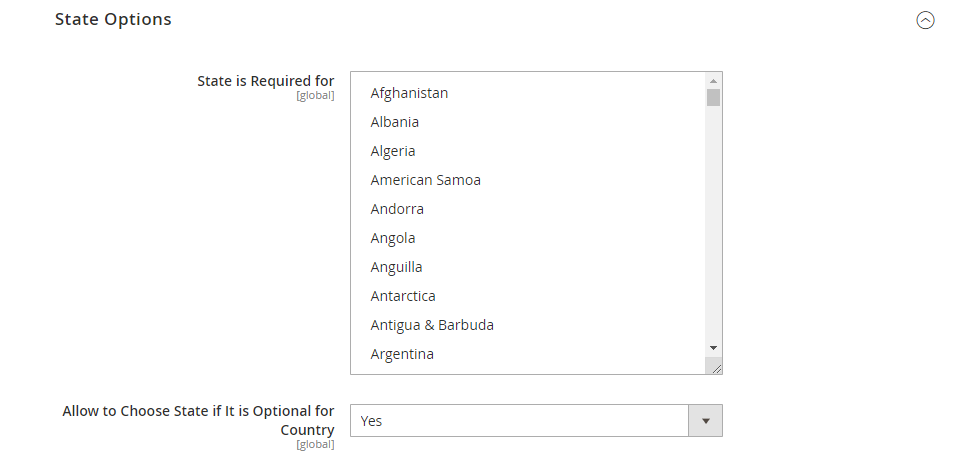
- Navigate to the State Options Section on the admin panel.
- In the State is Required for field, enter the state/region that is required.
- Choose from the options Yes or No in the Allow to Choose State if it is Optional for Country.
- Choose Yes if the state field is optional to enter in the country that you have specified.
- Choose the No option if the country omits the state option.
- On completing all the configurations, Save Config.
Step 3 – Configuring the Country Options
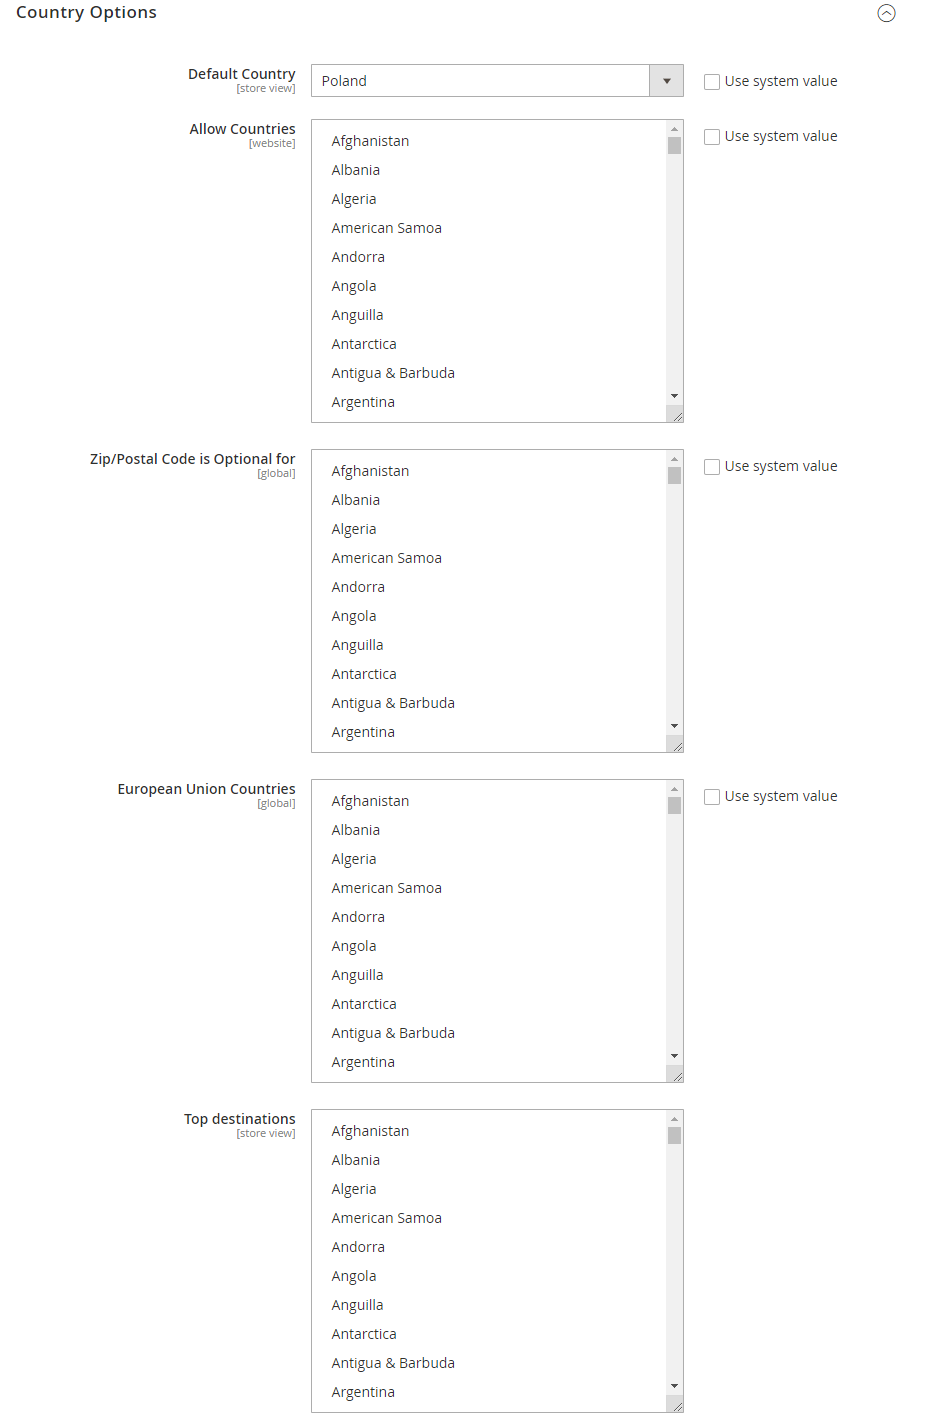
- Navigate to the Country Options Section on the admin panel.
- In the Default Country field, select the country where you are originally located.
- In the Allow Countries field, choose the nations you want to accept orders from.
- In the Zip/Postal Code is Optional for the field, pick the country names in which the zip codes are optional.
- In the European Union Countries field, select all the nations of the European Union where you carry out trading.
- In the Top destinations field, select your prime countries of business.
- On completing all the configurations, Save Config.
Step 4 – Review the Results
You must be able to notice the outcomes on the front end now. Make sure you have reindexed and flushed the cache before checking on the frontend it is suggested to view the results via the anonymous browser.
Summing It Up!
The locale settings in Magento 2 can assist your customers to know your business better resulting in improved relations between you and customers. This is because locale options configuration provides more comprehensive details about your business. Allow customers to translate any page of your store in their preferred language by integrating Google Language Translator for Magento 2.
If you require more details about anything explained above, just buzz us out and we will be ready to assist you.
Happy Reading!