

Hello Magento Folks,
How are you all working? Today I am going to illustrate to you all How to Configure Amazon S3 with Magento 2. Also, make sure you don’t forget to check our last article where I have illustrated Set up Google Analytics eCommerce tracking in Magento 2. Let’s Get Started?
Introduction:
What is Amazon S3(Simple Storage Service)?
Basically, Amazon S3 (Simple Storage Service) is cloud storage that helps to upload your images, downloadable products and catalog into the AWS servers. There are many benefits of the Amazon S3; it just connects your Magento 2 Store with the Amazon AWS Servers. It will help you in increasing the performance of your website and improves the loading speed of your Magento 2 website. We choose Amazon cloud service because it is one of the best storage services provided by Amazon.
Why Magento 2 Amazon S3 Extension?
- The extension connects your Magento 2 store with Amazon S3 AWS servers.
- The module automatically syncs and uploads the images on Amazon S3 Servers.
- Capable of uploading and syncing all your images, downloadable products and catalog on the Amazon Server.
- Enhanced facility to verify the bucket availability via backend.
- Customers can directly download the downloadable products with the Amazon Server link.
- Advanced setup of time-out manually available.
- Boost your website performance and improve the loading speed of your Magento 2 store.
Steps to Configure Amazon S3 with Magento 2:
Step 1: Install Magento 2 Amazon S3 Extension on your Magento 2 Store and find the Amazon S3 in your Admin panel.
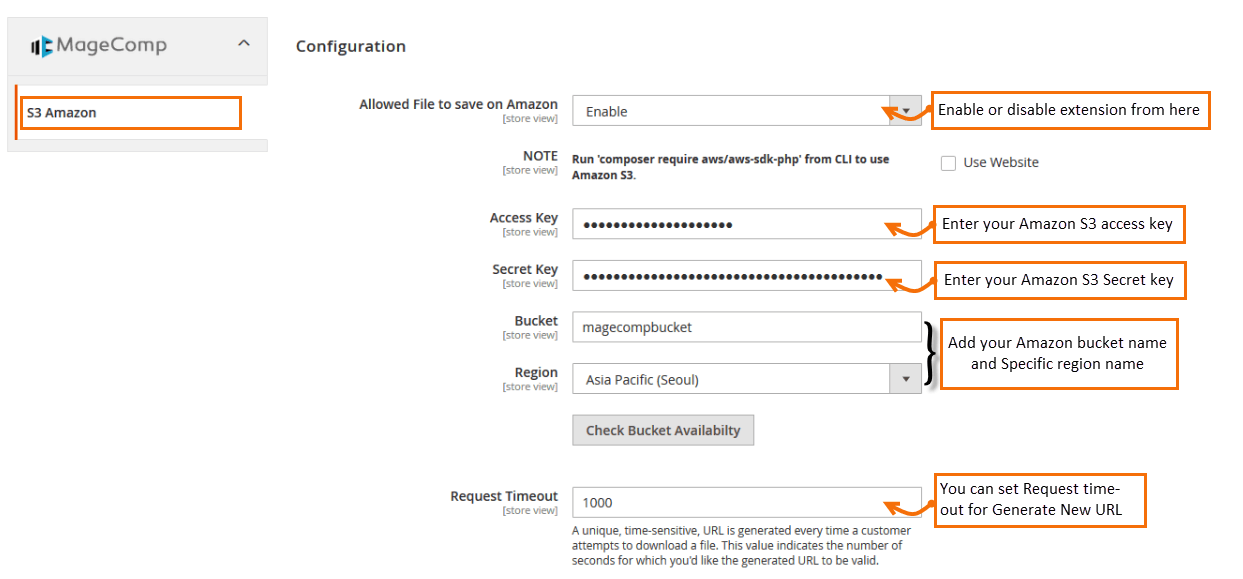
Step 2: Enable the extension from the backend and add appropriate details in the configuration part as per given below instructions.
- Allowed file to save on Amazon: From here admin can easily enable or disable Amazon S3 extension.
- Access key: Admin needs to add the access key of Amazon S3.
- Secret key: Admin needs to add the secret key of Amazon S3.
- Bucket: Admin needs to add the name of their Amazon bucket.
- Region: Admin needs to add the name of a permitted region here for checking the availability of the bucket.
- Request timeout: From here admin can setup the request timeout period.
Step 3: Uploading Media Files to Amazon S3 server
You will have to Install Amazon Library, for that run the given below command
composer require aws/aws-sdk-php
Step 4: For syncing all your media files to the Amazon S3 Server
For that, we will require to enable the module by using the backend and fill out your Amazon S3 information. Also, make sure you run the below-given commands in your Magento Root Path.
To upload previous data files:
php bin/magento amazons3:export
Make sure you check that you haven’t run the enable command because you have to run the export command for syncing all the existing data files to S3. In case you run the enable command then no worries you can fire the disable command before firing the export command.
For enabling the Amazon S3 Extension
php bin/magento amazons3:enable
For Disabling the Amazon S3 Extension
php bin/magento amazons3:disable
Step 5: Setup the base media URL in the system configuration.
For setting up the base media URL navigate to System->Configuration->General->Web-> Base URLs / Base URLs as shown below.
Admin can also review the URL of all your product images that are uploaded on your Amazon S3 Server.
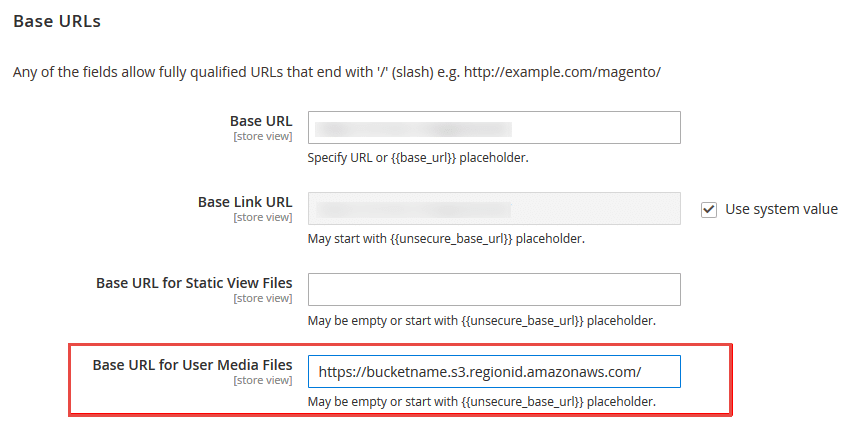
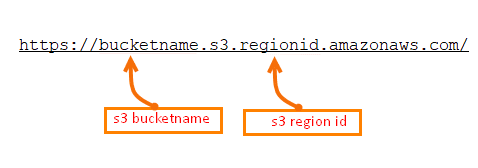
Admin can also set the URL manually as displayed in the below screenshot.
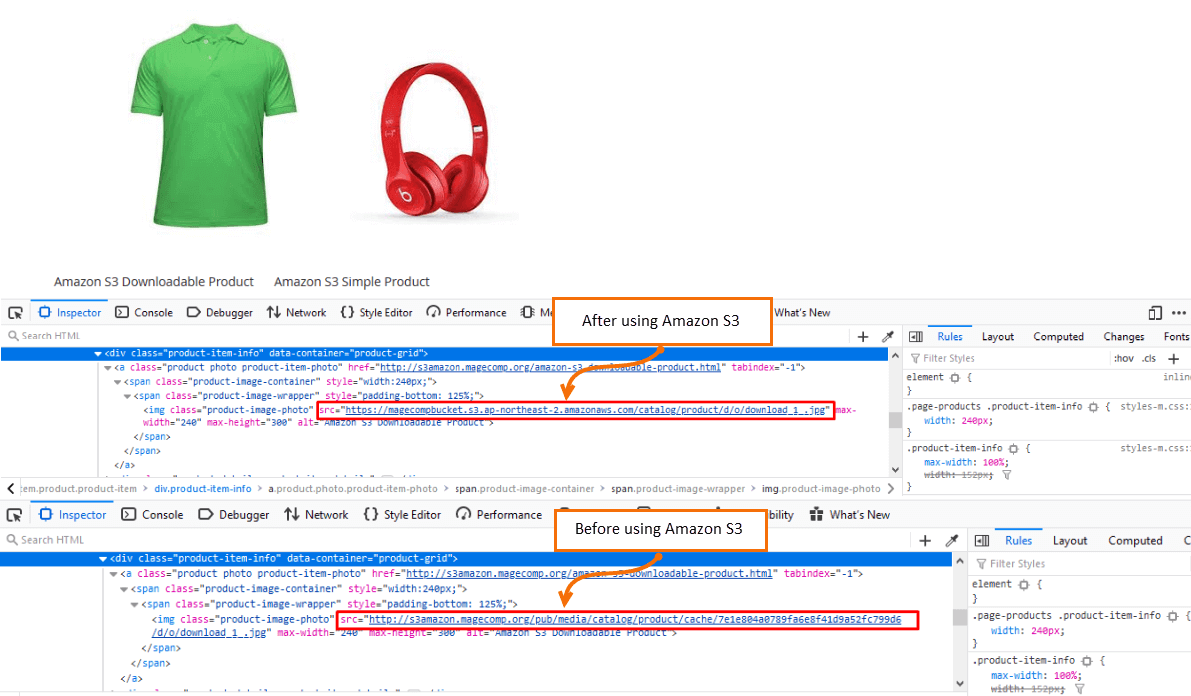
After the completion of uploading, you can view the images of your products as per given below screenshot.
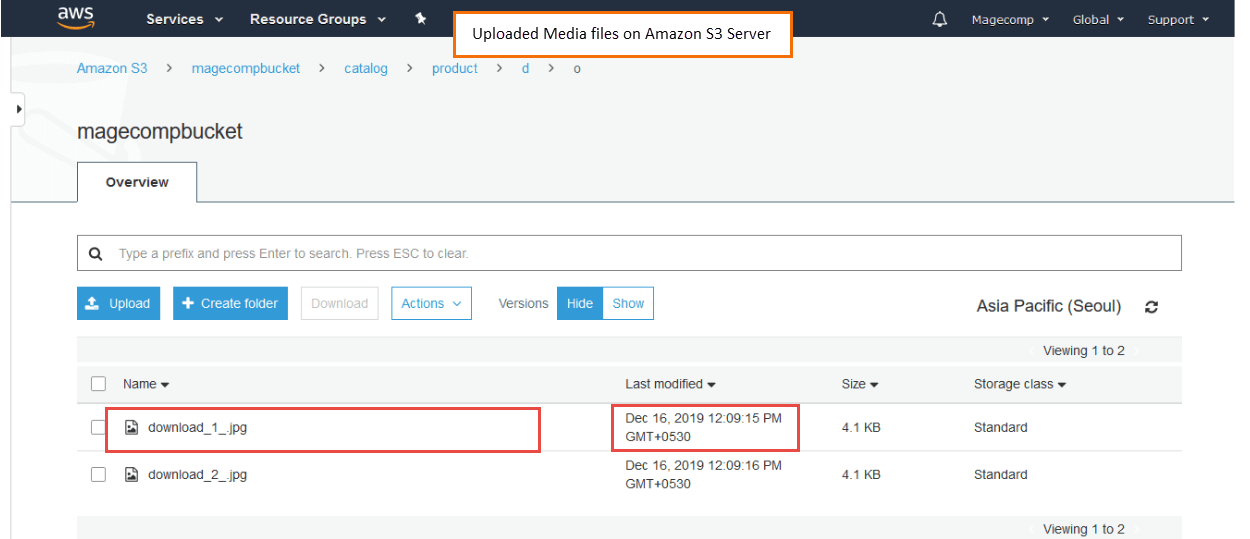
After the completion of uploading, you can view the images of your products as per given below screenshot.
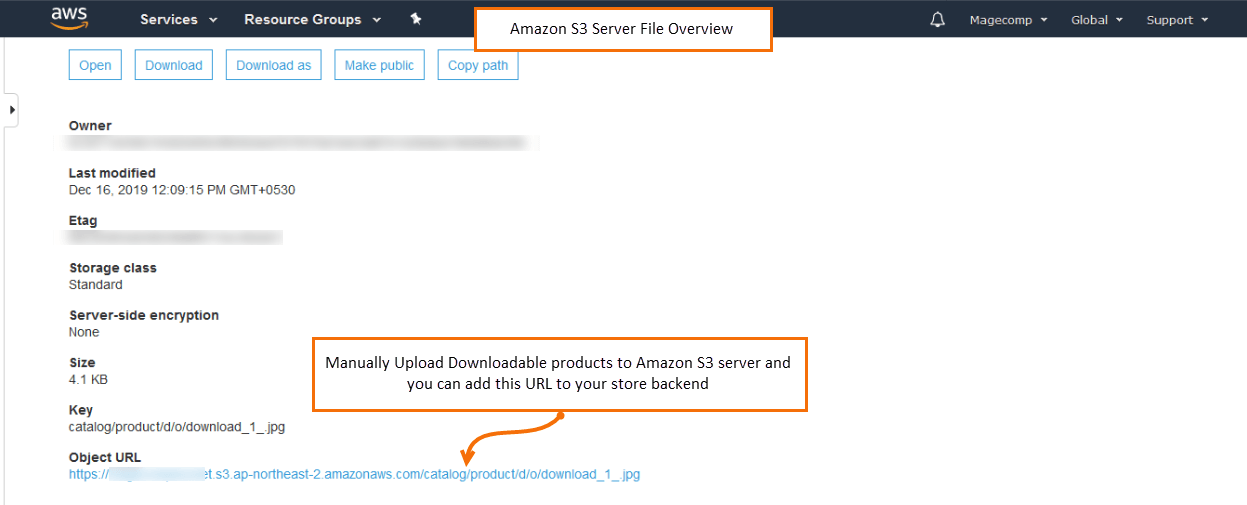
Step 6: Upload Downloadable Products on Amazon S3
Admin can upload all the downloadable products on their Amazon S3 server for that Navigate to Amazon AWS account and upload files in your bucket. After that, you will get the URL of the downloadable product from the Amazon S3 servers as shown in the screenshot below.
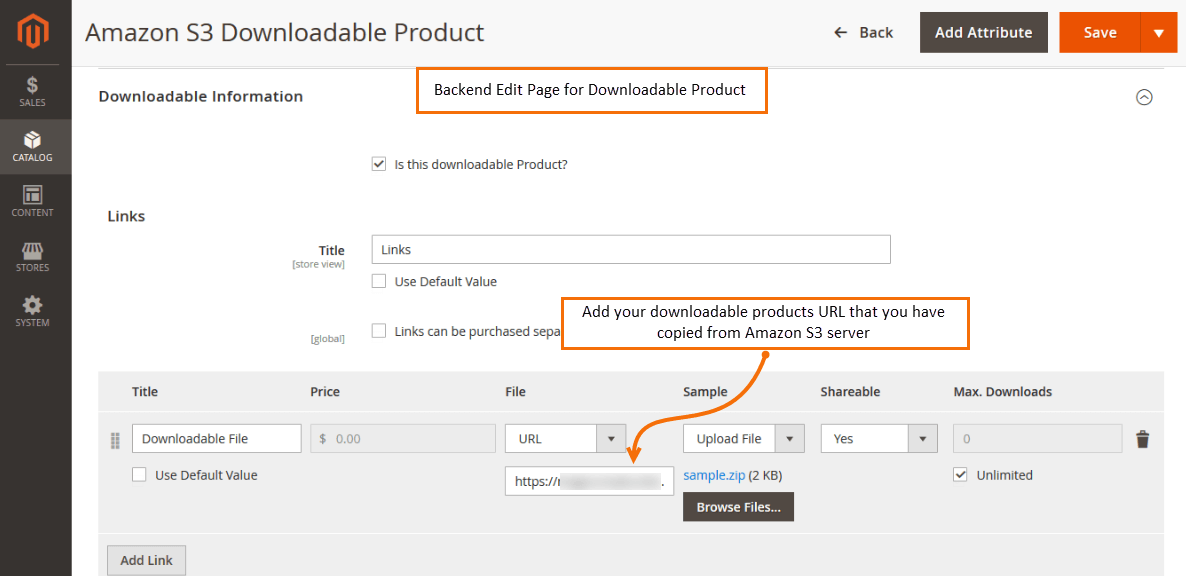
Step 7: Add URL in the Back-end Product Edit Page
Once you upload the downloadable product copy that URL and paste it on your downloadable product’s file URL in Magento 2.
That’s It.
Final Words:
Hopefully, with the above steps, you will be able to configure Amazon S3 with your Magento 2 store. In case of any difficulties feel free to write it in the comment box I am solving there. Also, share the blog with your E-commerce friends who are willing to configure Amazon S2 in Magento 2. Till then Stay Happy and Stay Safe.
Happy Configuring.


it’s an exceptionally accommodating and useful post for me. a debt of gratitude is in order for sharing it.
Success in business depends on a variety of factors, including skill level, effort, market factors, and much more. Thus everyone’s results in an Amazon business will differ. So no promises or claims are made as to your income potential or lack thereof. And, of course every business has some risk involved. That said, Amazon is an huge opportunity and has helped my family and I have the lifestyle and freedom we want. Maybe it can do the same for you, if you apply some effort and energy to it.
Hey thanks for posting this useful content on configure amazon s3 with magento-2 presented here, I really hope it will be helpful to many. I hope you keep update us with such great tips and information in future too. This is a great post; I will share as much as I can. Appreciative content!!