
Hello Magento Friends? ,
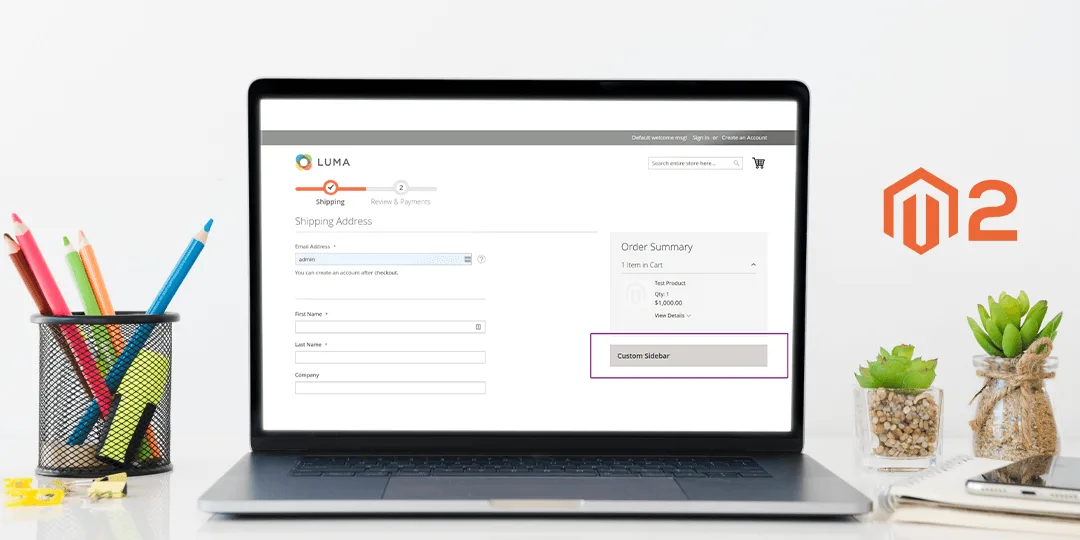
Hope you are doing pretty well with your Magento 2 store. In this blog, I am going to emphasize on How to Add Custom Sidebar On Checkout Page. Previously I published an important solution, Solved – Undefined Index jobs Error While Running Cron After Magento 2 Migration.

Preface:
Sidebars on the checkout page are used to show information about the products that are added to the shopping cart. It includes a number of items in the cart, product name, the quantity of the products, product image, price of the products, etc. In short, it displays a brief list of the products. The Magento 2 store admin can customize the sidebar according to the need and requirements. Also, install Custom Checkout Fields which helps the store admin customize the checkout page by adding extra fields.
Steps to Add Custom Sidebar On Checkout Page in Magento 2:
Step 1: Create a “Registration.php” file inside the following path:
app\code\Vendor\Extension
Now add the below code:
<?php
\Magento\Framework\Component\ComponentRegistrar::register(
    \Magento\Framework\Component\ComponentRegistrar::MODULE,
    'Vendor_Extension',
    __DIR__
);
Step 2: Create a “module.xml” file inside the following path:
app\code\Vendor\Extension\etc
Now add the below code:
<?xml version="1.0"?>
<config xmlns:xsi="http://www.w3.org/2001/XMLSchema-instance" xsi:noNamespaceSchemaLocation="urn:magento:framework:Module/etc/module.xsd">
    <module name="Vendor_Extension" setup_version="1.0.0" schema_version="1.0.0">
    </module>
</config>
Step 3: Create a “checkout_index_index.xml” file inside the following path:
app\code\Vendor\Extension\view\frontend\layout
Now add the below code:
<?xml version="1.0"?>
<page xmlns:xsi="http://www.w3.org/2001/XMLSchema-instance" layout="1column" xsi:noNamespaceSchemaLocation="urn:magento:framework:View/Layout/etc/page_configuration.xsd">
    <body>
        <referenceBlock name="checkout.root">
            <arguments>
                <argument name="jsLayout" xsi:type="array">
                    <item name="components" xsi:type="array">
                        <item name="checkout" xsi:type="array">
                            <item name="children" xsi:type="array">
                                <item name="sidebar" xsi:type="array">
                                    <item name="children" xsi:type="array">
                                        <item name="custom_sidebar" xsi:type="array">
                                            <item name="component" xsi:type="string">Vendor_Extension/js/view/custom_sidebar</item>
                                            <item name="displayArea" xsi:type="string">summary</item>
                                            <item name="config" xsi:type="array">
                                                <item name="template" xsi:type="string">Vendor_Extension/custom_sidebar
                                                </item>
                                            </item>
                                        </item>
                                    </item>
                                </item>
                            </item>
                        </item>
                    </item>
                </argument>
            </arguments>
        </referenceBlock>
    </body>
</page>
Step 4: Create a “custom_sidebar.js” file inside the following path:
app\code\Vendor\Extension\view\frontend\web\js\view
Now add the below code:
define([
    'uiComponent',
    'ko',
    'jquery'
], function (Component, ko, $,) {
    'use strict';
    return Component.extend({
    });
});
Step 5: Create a “custom_sidebar.html” file inside the following path:
app\code\Vendor\Extension\view\frontend\web\template
Now add the below code:
<div id="opc-sidebar" class="custom" style="background-color: #d6d1d1;">
    <h3 style="padding:20px;">Custom Sidebar</h3>
</div>
Summary:
That’s it for today! You have successfully implemented How to Add Custom Sidebar On Checkout Page in Magento 2 and you are free to customize this code according to your need for fetching data. Lastly, if you found this blog beneficial, share it with your colleagues and Magento Programmers and let us know if you are facing any issue while implementing this code. Have a great weekend!
Happy Customizing ??

thank you, its helped me