
Hello Magento Pals,
The Digital era seems to have kicked in like never before. More and more people are found storing and retrieving information from the server due to the increase in need. Gone are the days when we need to pass through long website buffering delays. With the use of CDN and faster hostings, things have become much easier when compared to traditional hosting services.
Introducing Amazon Web Services
If you are looking for highly flexible, reliable and secure cloud computing products for your hundred and millions of active customers, look no further than Amazon Web Services (AWS). And since it gives so much peace of mind, more and more eCommerce merchants are found running Magento on AWS.
Speaking of Magento, the platform is considered as one of the most powerful eCommerce software across the globe. If you get a chance, do not miss the opportunity of building your eCommerce store the way you want and the option to scale. However, this is certainly not it! I mean you also need to have the most optimized hosting platform with the best infrastructure to host your Magento store. Which one to choose, you may ask? Well, Magento cloud hosting is the right solution for you.
Let’s Get Started with Magento AWS hosting:
1. Set up a server on Amazon:
First and foremost, you need to go to Amazon and set up an account. Next, what you require doing is navigate to AWS management console and what you will see is this:

In case, if you are unable to see it. Try searching it in “Find services” and click on it. You will surely find this.
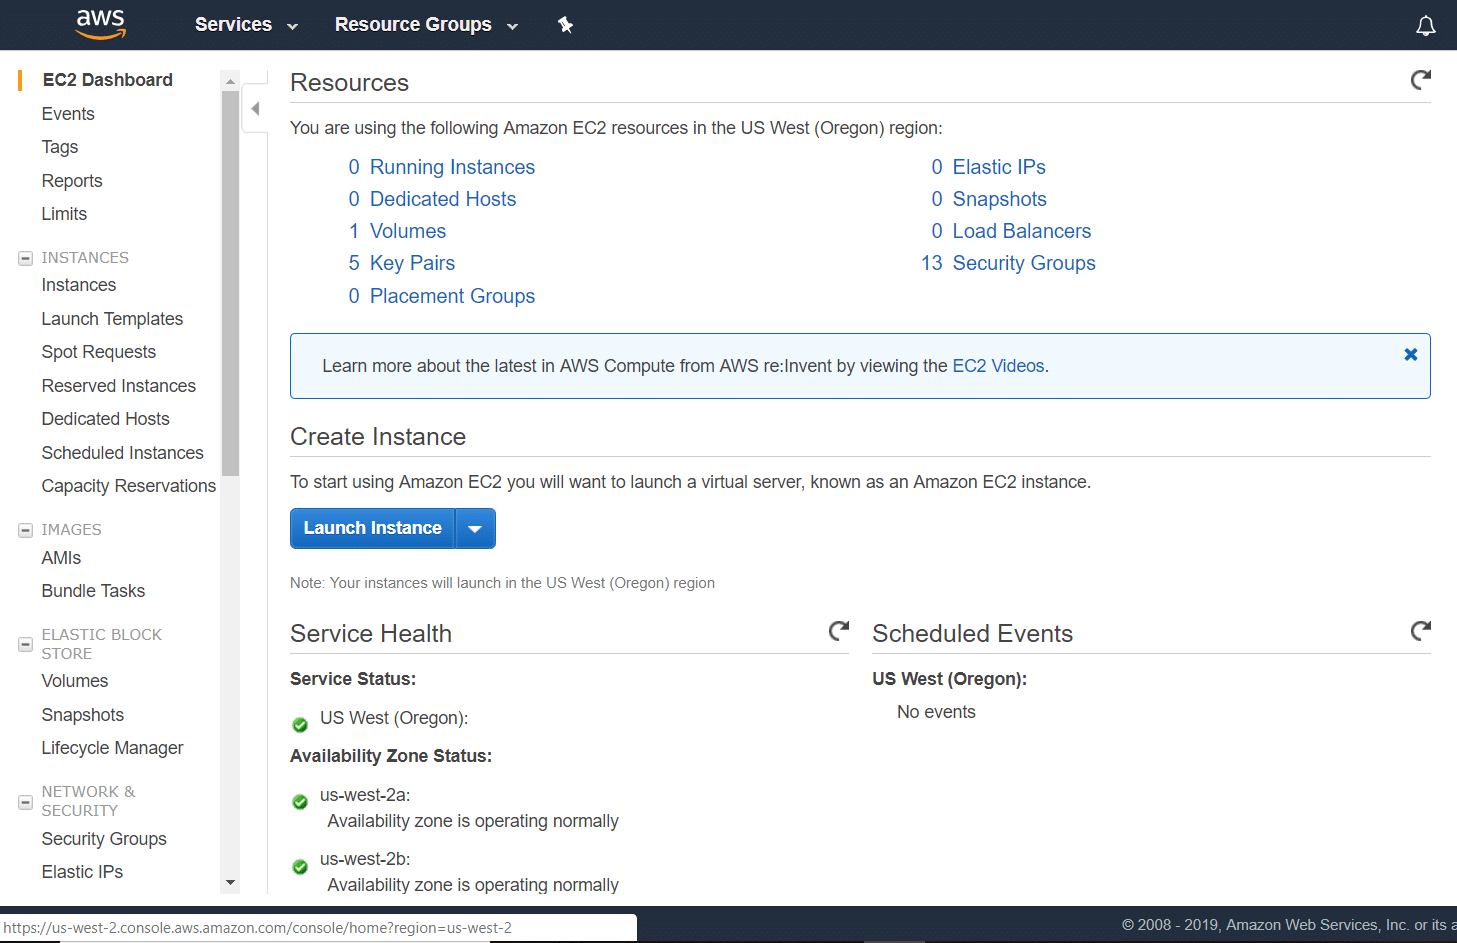
Click on Launch Instance
Select a machine with the default operating system (OS) such as Linux, Ubuntu, or Windows, etc.
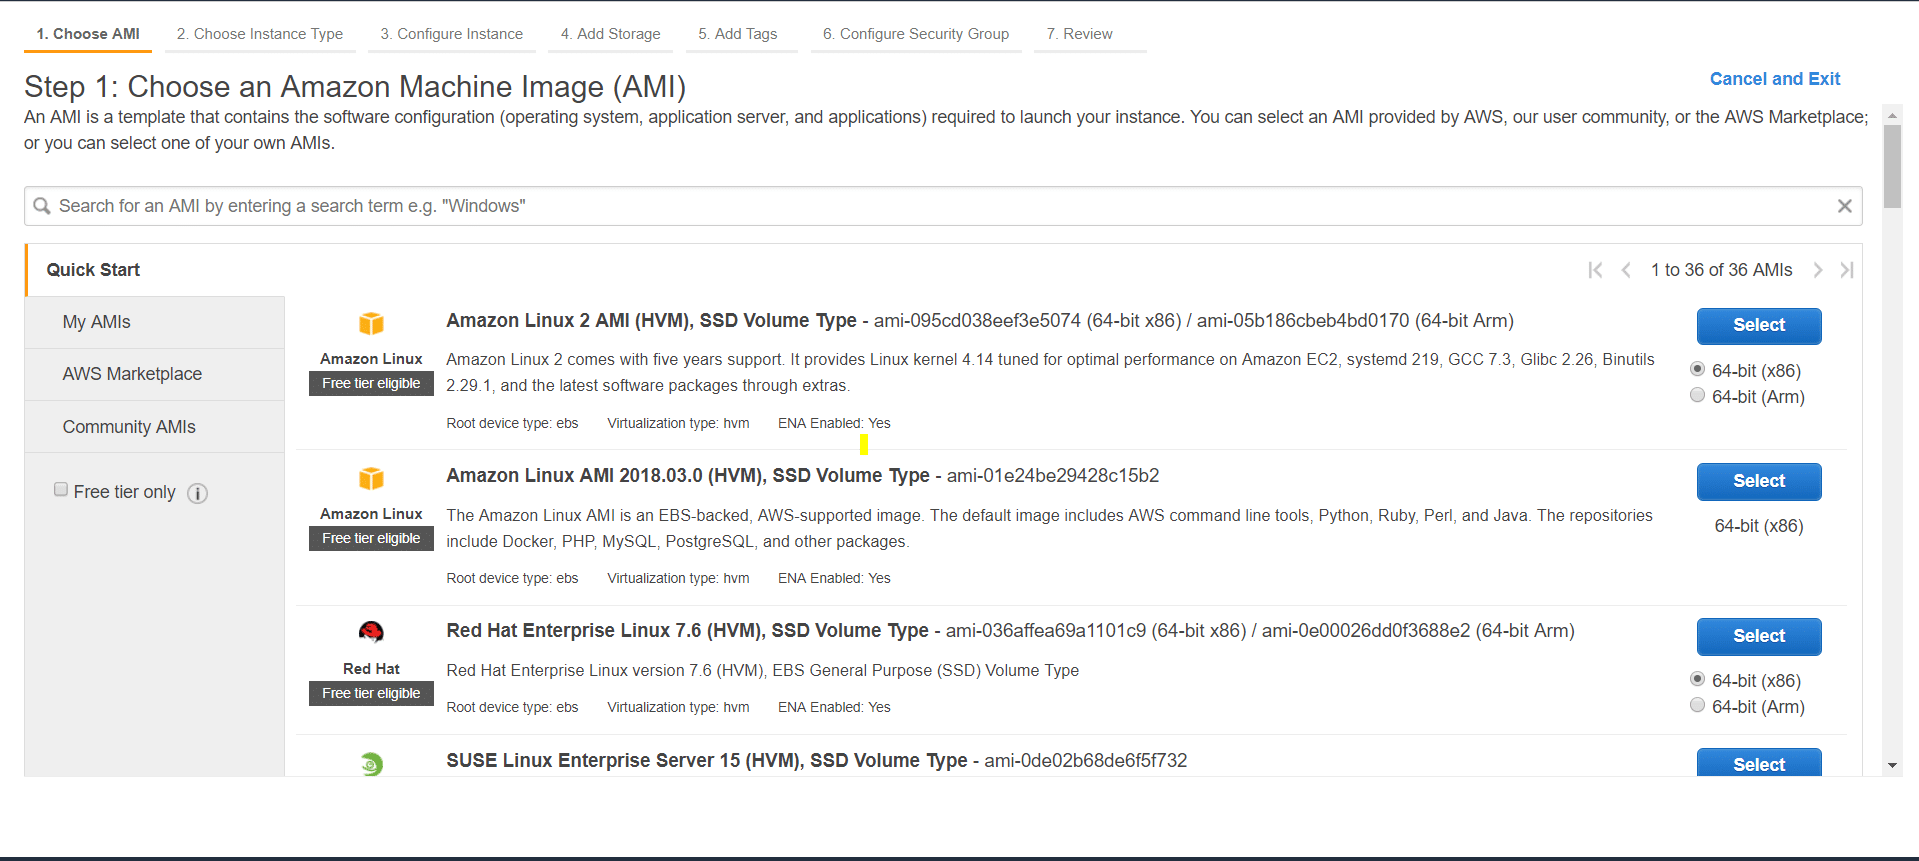
All you require doing is to select the Ubuntu server. However, you can certainly choose Linux or windows as there is nothing wrong with choosing that. I personally prefer Ubuntu. The configurations are almost same. Just make sure you match up with Magento 2 system requirements – 2G of RAM. But I personally advise to have 4 GB RAM.
Select Type t2 medium
Click on Configure Instance details and you will see:
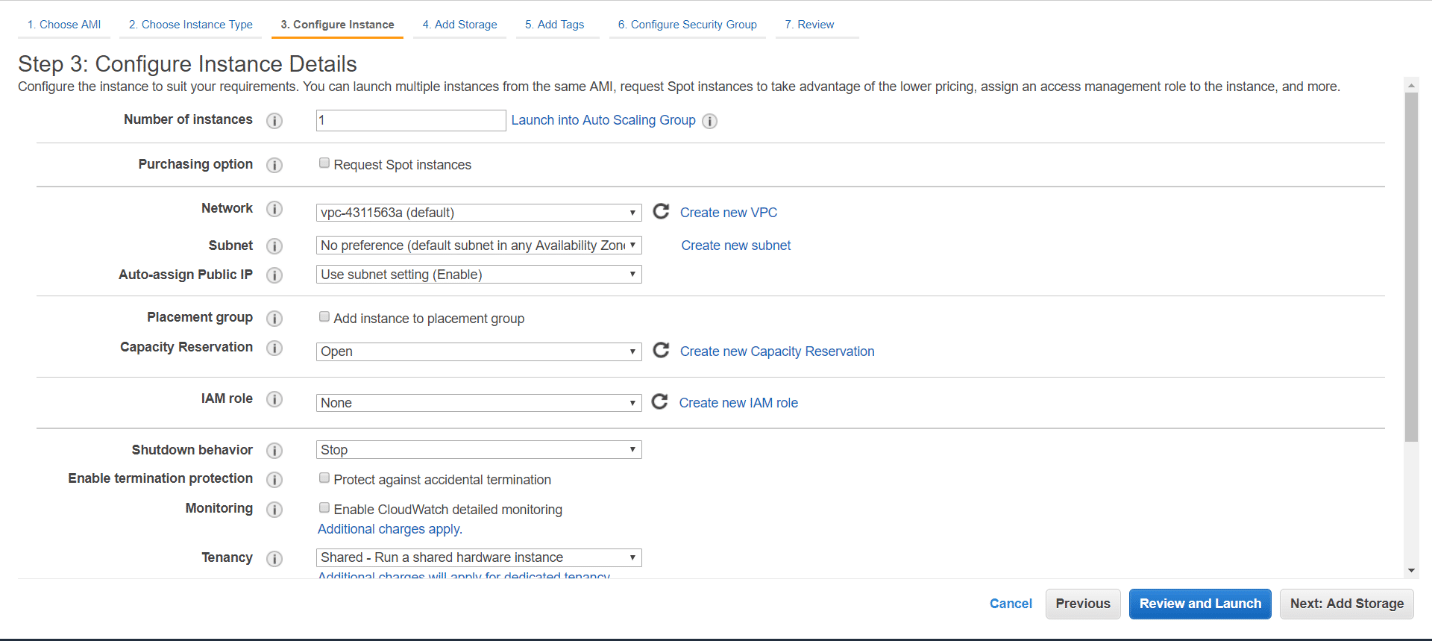
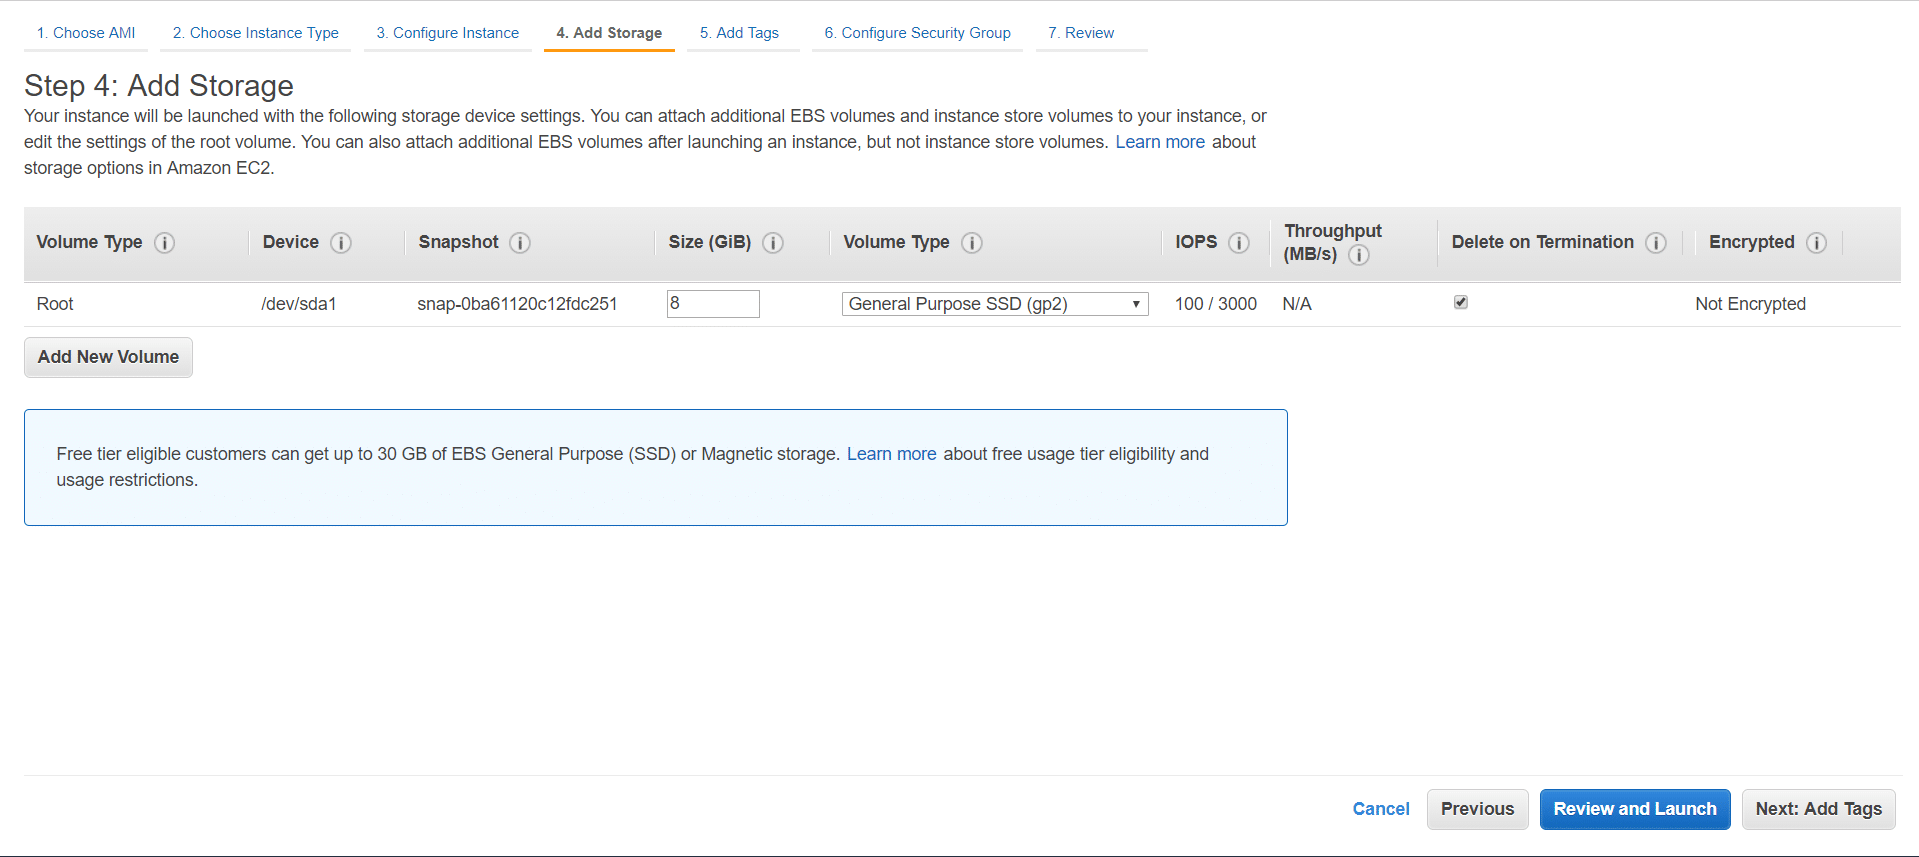
It’s time to configure your machine. And fret not, there is nothing much to do here. Simply proceed further with add storage options. By default storage size is enough though. But even if you want to increase then just increase the size.
Now it’s time to click on Add tags and try configuring the security group button. No matter how simpler it seems, it is very crucial though!
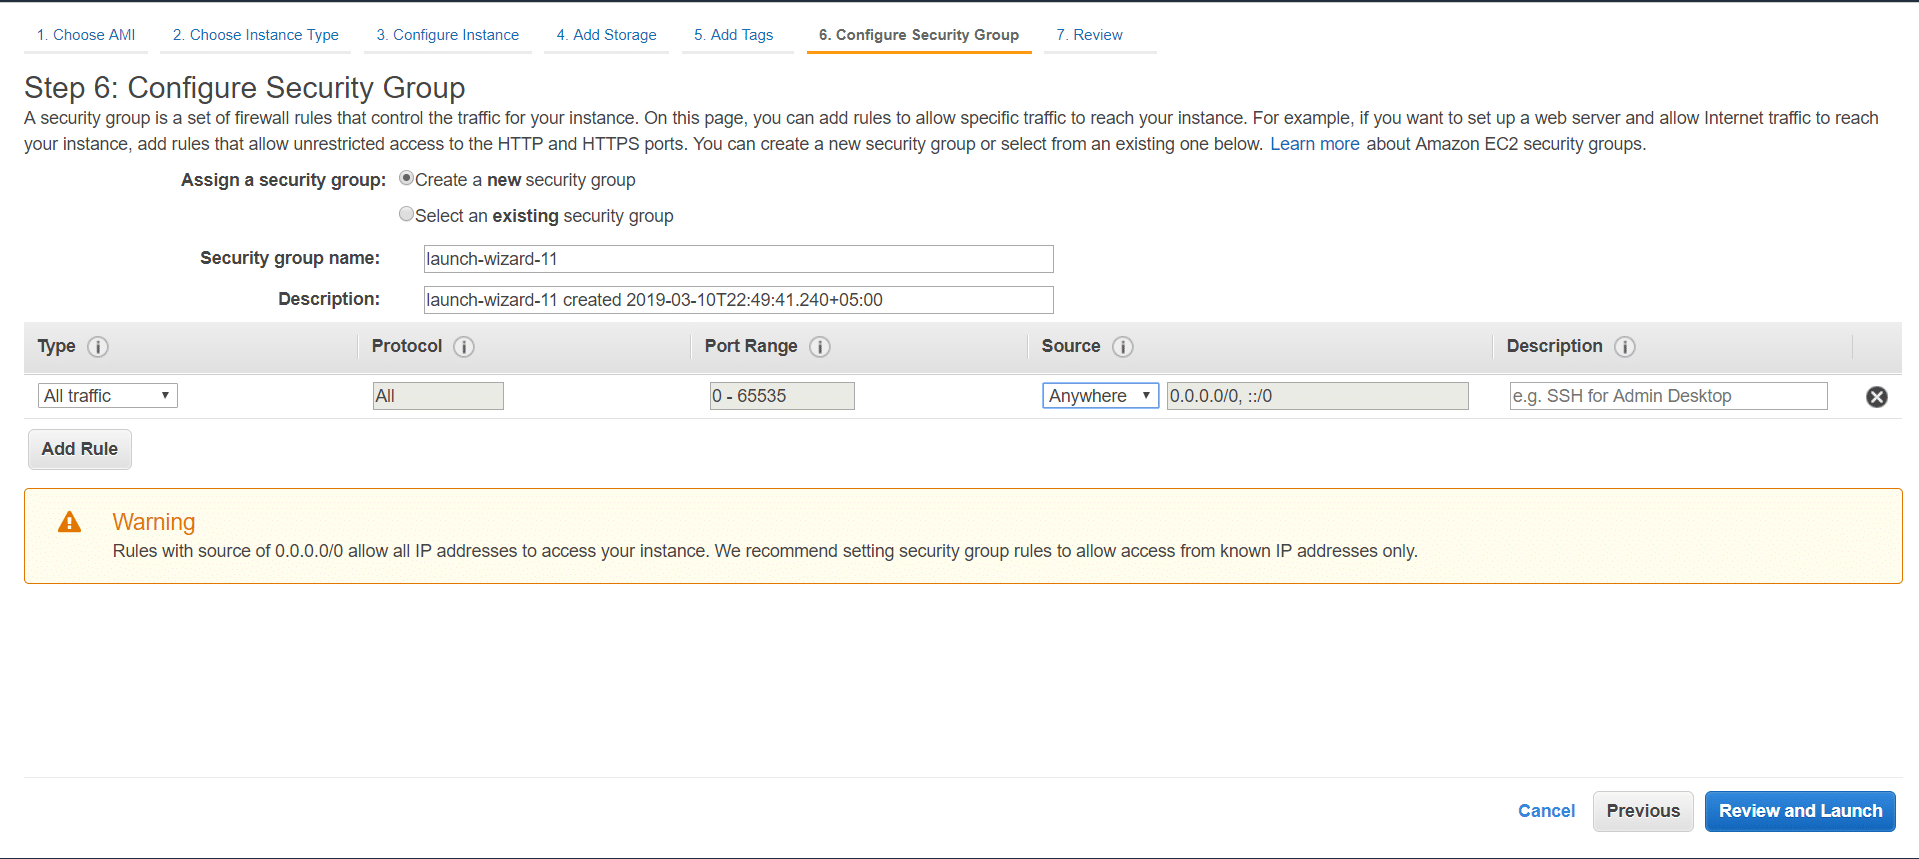
Adding the details comes next. It’s time to add rules about which people from across the globe will be able to access your server. Are you following a protocol? It’s time to make your server accessible to all traffic. Here, we can put security rules or try navigating the type and select all traffic. You can click anywhere you want.
Click review and launch. Then you will have the opportunity to review your configuration again. Click launch. You will see the following:
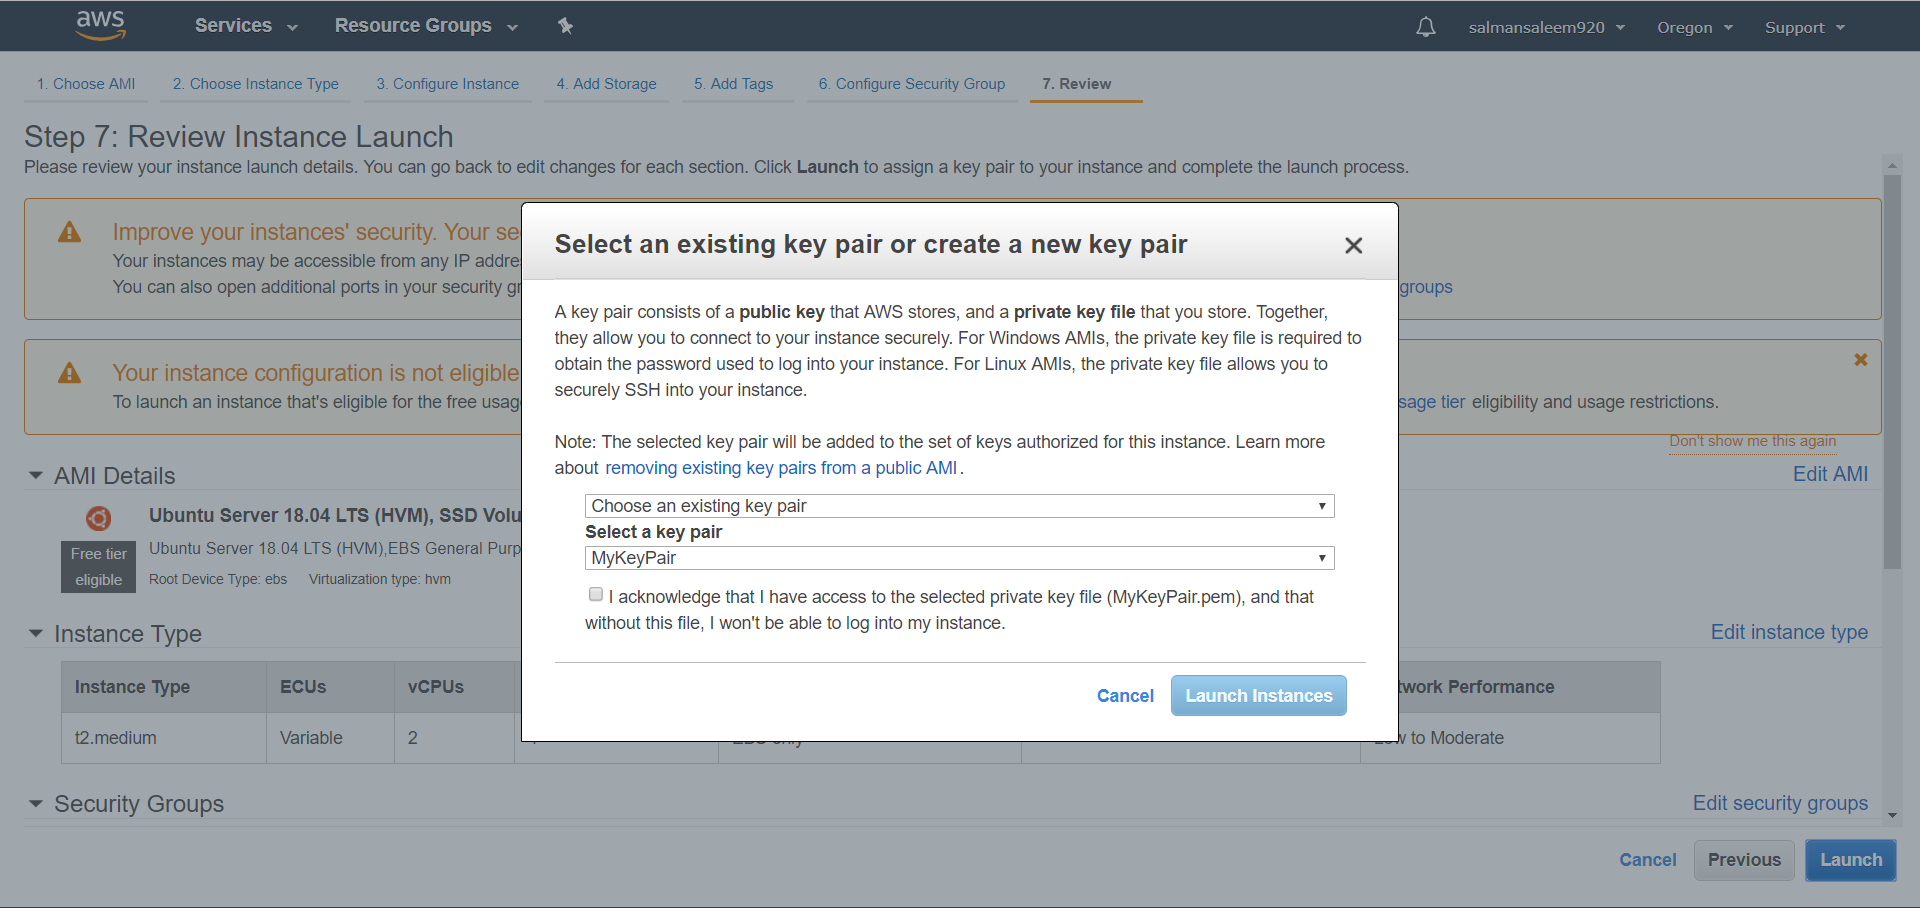
Now I am sure you must be wondering regarding the column, select key pair. Well, simply put a key which lets you connect to your server machine securely. Technically speaking, it comprises of a public key that AWS stores and a private key file that you store. Together connection can be established in a secure manner. Download the key pair and keep it secure as without it you won’t be able to access your server. A new screen will be seen.
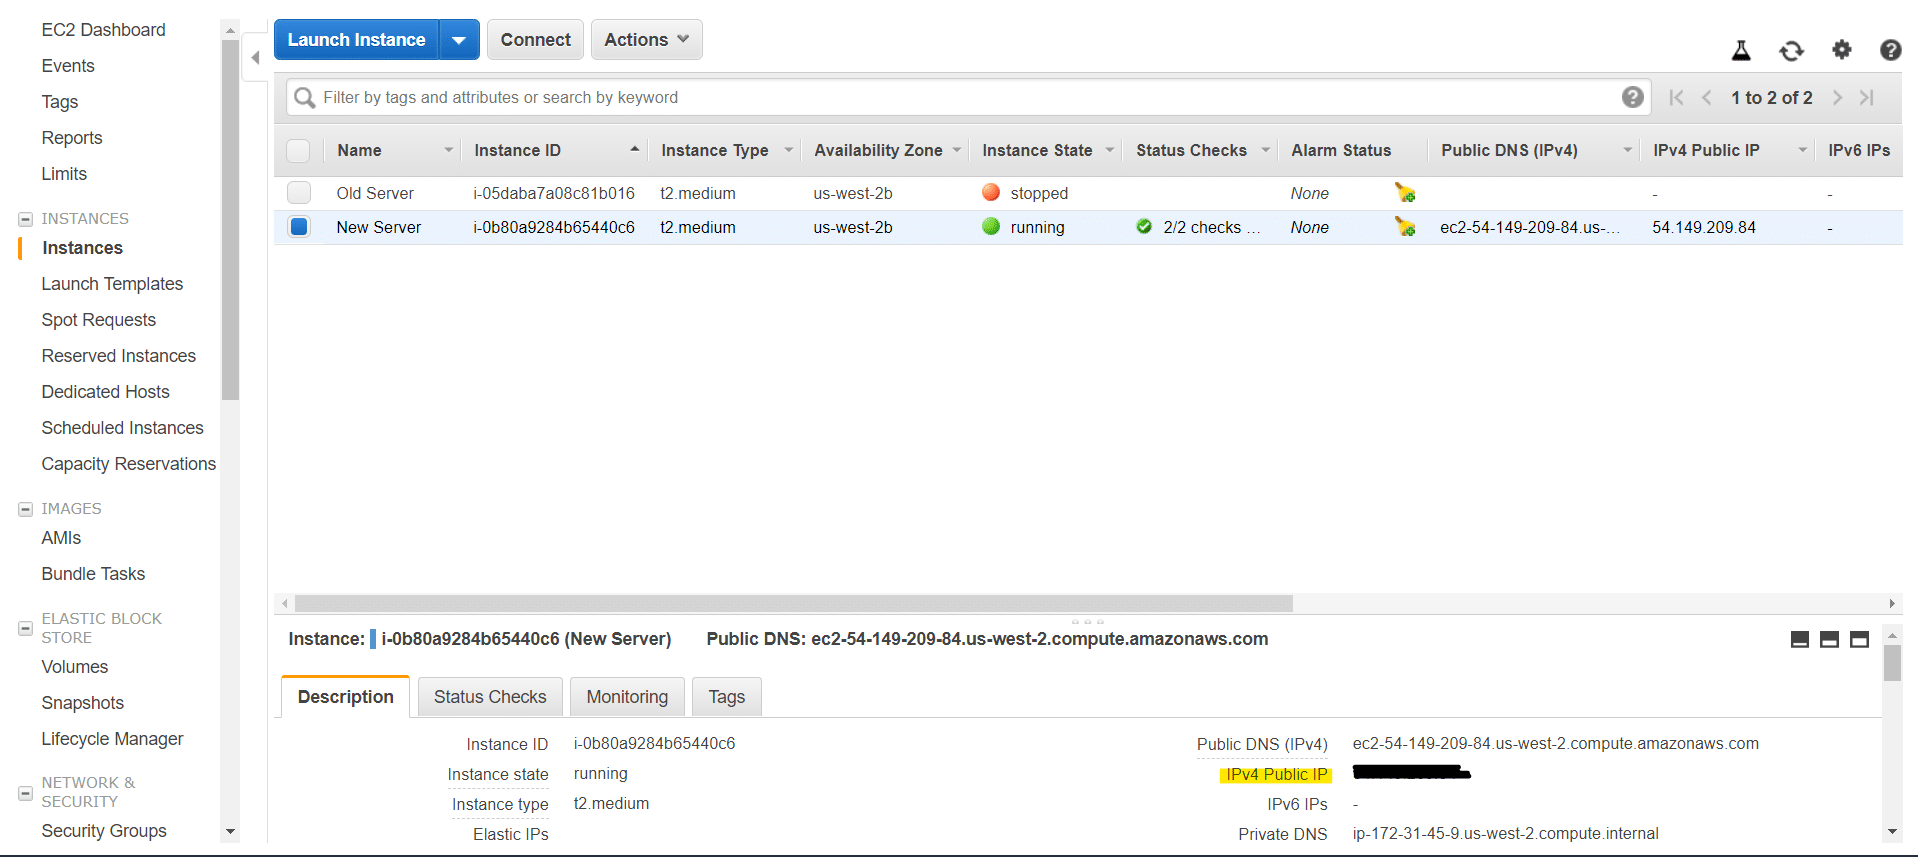
Now click New Instance and in status check, you can see things getting initialized. Just forget about the old server and navigate to the empty space. Do you find any notice a pencil write an icon? Simply click on it and name your server. Can you check your system status?

Lastly, as you are connected to a new server time to opt for an easy way. Here’s the time when you need to look for the key pair the one you downloaded earlier. I hope you must be having git installed. So select git bash here and copy this line.
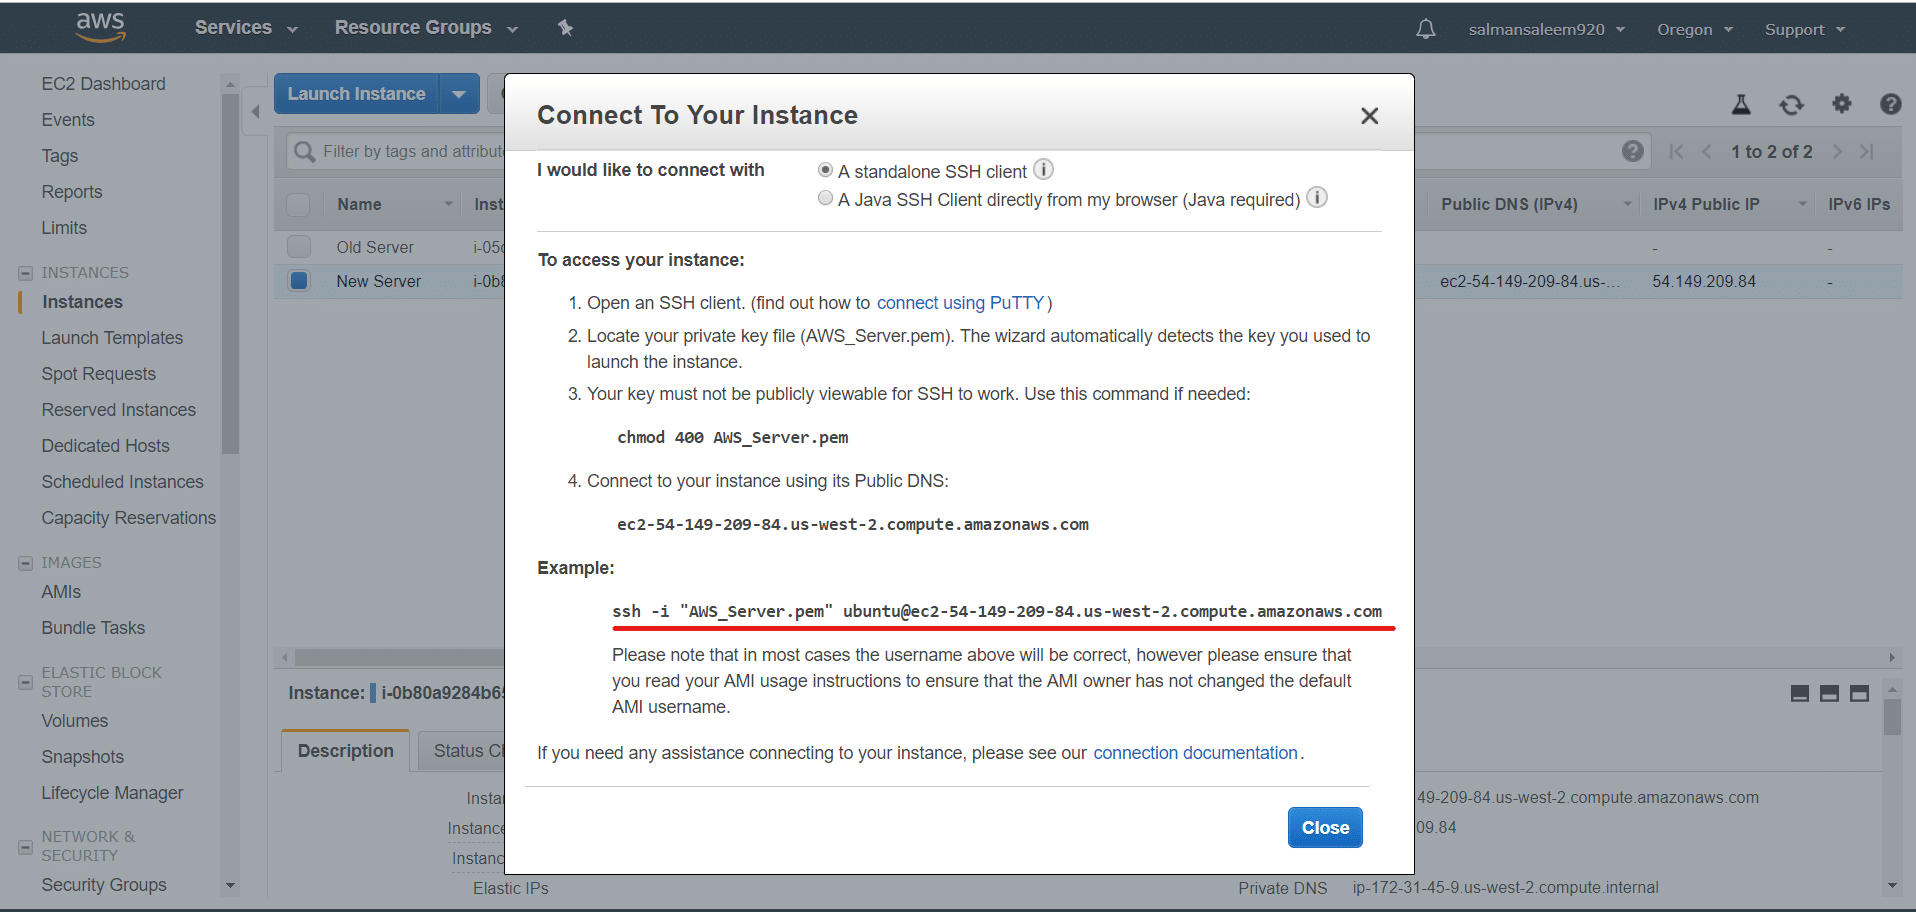
Do not forget to paste it in git bash:
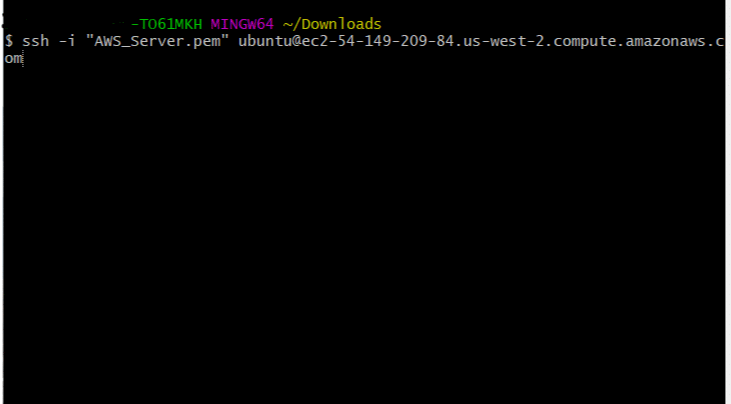
And we are done! Press enter and you will find on your server.
2. Install Pre-requisite tools on the server:
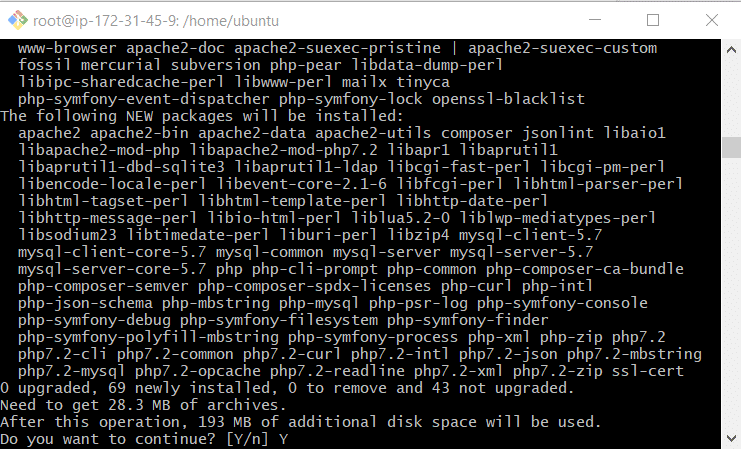
Install PHP gd extension
apt-get install php7.2-gd
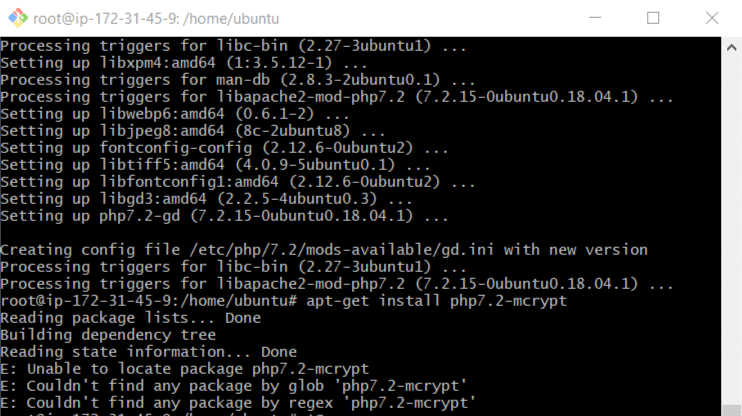
Now Restart the Apache:
Now Restart the Apache:
systemctl restart apache2
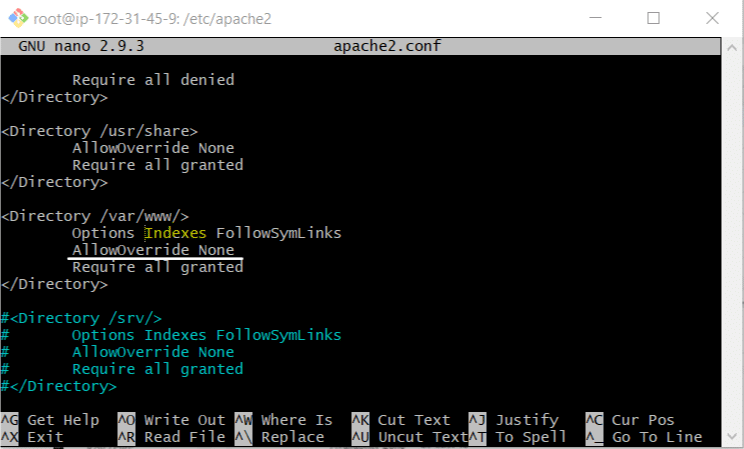
And then navigate
cd /etc/apache2/
sudo nano apache2.conf
Press ctrl+w and search indexes
Now just install composer:
composer install
If you come across an error
Now you have to change the permissions of the folder so that Magento setup can installed required files:
| 12 3 4 5 | chmod -R 755 /var/www/html/Magento2/chmod -R 777 /var/www/html/Magento2/var/ chmod -R 777 /var/www/html/Magento2/pub/ chmod -R 777 /var/www/html/Magento2/app/etc chmod -R 777 /var/www/html/Magento2/generated |
sudo service Apache2 restart
Otherwise, php extension will be missing.
3. Setup Database:
Login MySQL by this command
mysql -u root -p
It will ask you a password. By default it’s none, so just press Enter. Now you are in MySQL terminal.
- show databases: shows you current table.
- create database Magento: it will create a database for Magento
- exit: it will exit from MySQL terminal
4.Install and configure Magento on AWS
Navigate to your public IP address and Copy and paste it your browser like xx.xxx.xxx.xx/Magento2/setup
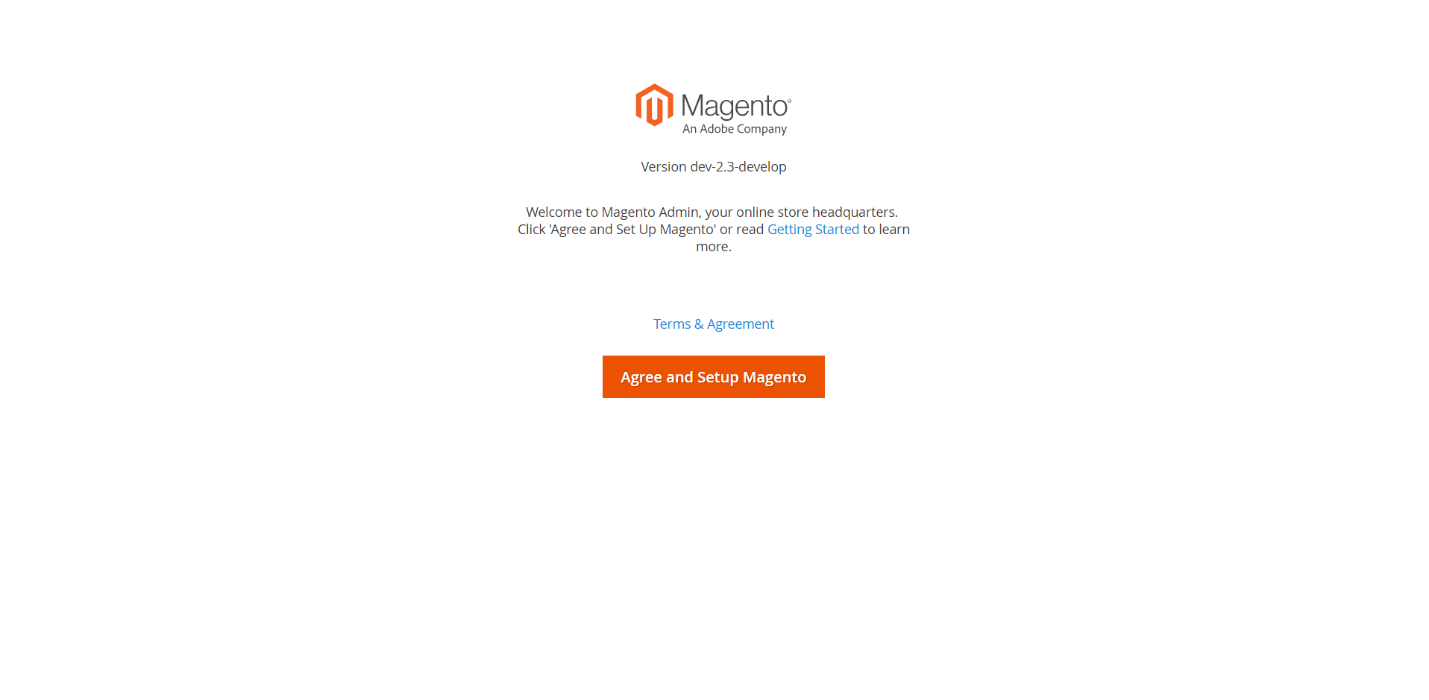
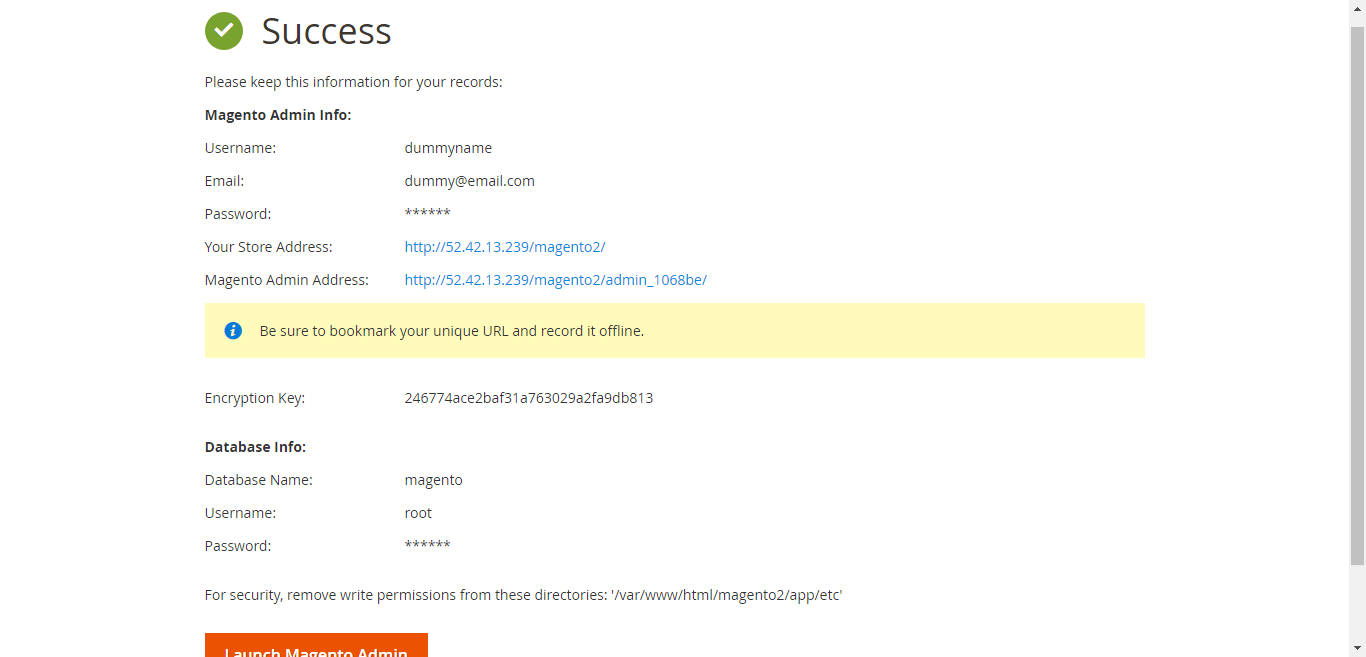
And you are all set to set up your Magento on AWS. And it’s time for you to install.
Faster Way to Install Magento on AWS using Managed Magento Hosting:
Because it can be done with just 1-click. Yes, all you have to do is just one click and Magento can be installed in the AWS cloud. However, you can also prefer to directly host but it might turn out to be quite challenging. After all, the SysAdmin oriented functioning of Amazon is not everyone’s cup of tea. Here’s when cloudways comes in with its platform. Thus, I am sure now you will be able to easily and successfully launch pre-configured development software like Magento on the AWS cloud.
Performance
Speaking in high regard to eCommerce stores, performance nowadays turns out to be of utmost importance. It seems like Amazon has invested hundreds, thousands and even millions of dollars in their data centers to provide the best infrastructure to Magento owners. When combining Amazon and Magento, what you get is flawless integration on the cloudways platform. If simply put, faster load times, optimal performance on your Magento store are some of its perks that cannot be avoided.
Flexibility
Another exciting feature of AWS on cloudways is its unimaginable flexibility. By incorporating cloudways to host your Magento on AWS means you are allowed to scale your server whenever there is a need. So basically, now you don’t have to worry in case if you find any sudden influx of traffic on your Magento store during the upcoming holiday season.
Pricing
Of course, there was a time when pricing was given great importance but not as of now. Today, the pricing is more based on the pay-as-you-go model. When hosting Magento on AWS using cloudways, all you require doing is simply pay for the services you use. Also, you have this chance of familiarizing yourself with the console and test its capabilities without paying for the whole month or even the year. The most interesting part here is, there is no risk, no obligation, no credit card required- you can back off anytime you want.
Other salient features include:
- 24/7 tech support and server management
- Optimized servers with an advanced caching mechanism
- Dedicated IP’s
- Ability to host multiple eCommerce stores with dedicated SSL protection on the same IP
- Simple to manage Server and Application Control panel
- Real-time performance monitoring
- Server cloning scaling
- Secure hosting
- Automated offsite backups
- Git, SSL, SSH, and Cron Job Managers
- Addons for email, DNS, load testing, etc
Here’s the best extension which can be most-useful for Amazon web services for Magento developers.
Meet Magento 2 Amazon S3 by MageComp:
Offered by Amazon Web services (AWS), Amazon Simple Storage Service (S3) provides developers and IT teams with high end secure and highly scalable object storage. Apart from this, S3 is quite easy to use and features a simple web services interface to store and retrieve any amount of data from anywhere on the web.
Magento 2 Amazon S3 extension developed by Magecomp developers which helps you to upload and sync your Magento 2 store’s downloadable products, photos, and catalog to the Amazon S3 AWS servers.
How to integrate Amazon S3 Server into your Magento store?
First of all, you need to create an Amazon AWS account to get things started in the right manner. For more, you can even try using the Amazon S3 integration extension that certainly assists you to upload and sync your catalog images and downloadable products directly with Amazon S3. As soon as you are done with this, you will easily be able to connect with the server account; just put the secret key right!
And you are done! All your files will be saved on a remote server and syncs all the product and catalog images directly with Amazon S3.
So, that’s all for now! I hope you like reading the post. Keep an eye to get a better perspective regarding the same.


thanks it was really helpful to buy managed aws server