
Hello Magento Folks ?,
? Ding, dong! Welcome to MageComp’s tutorial blog series. This time we hit upon Magento 2 Categories. Episode 1 describes How to Create New Categories in Magento 2 (Including Root Category). Before starting up let us learn about Magento 2 Categories.
Magento 2 offers the option to set categories to the products in order to sort them accordingly. This helps in enhancing the user experience of your store. The customer can easily search for the products based on the categories. Magento provides a default root category but the admin can also create a new root category and give a custom name. The root category contains one or many subcategories for Magento 2 and the parent categories have subcategories as per the need. The following is the category hierarchy:
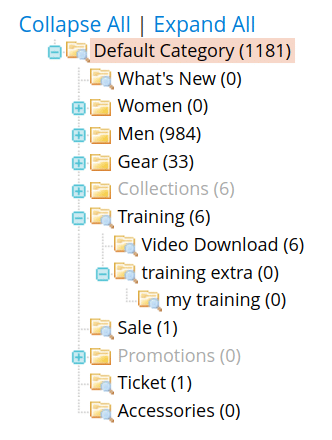
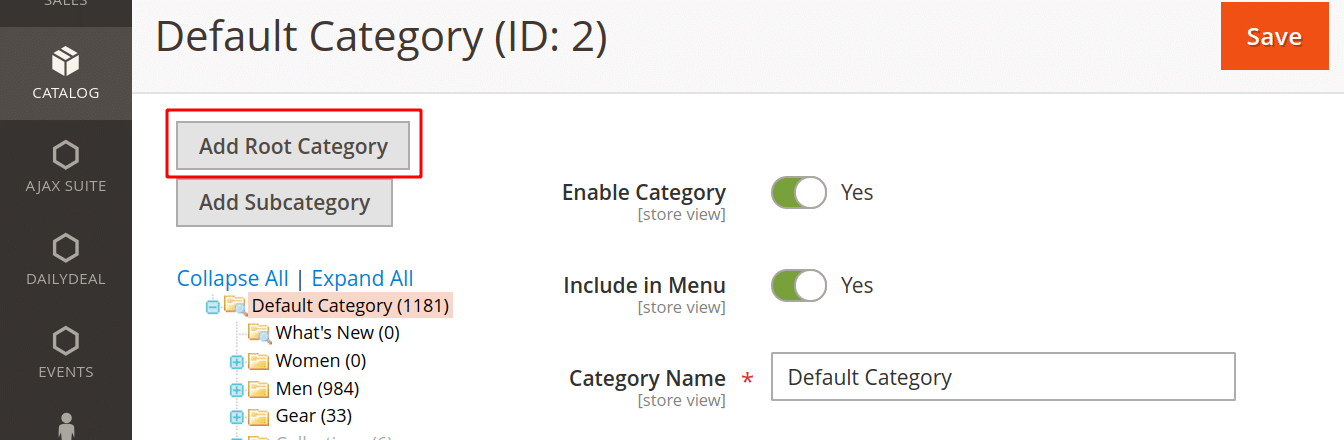
In the above picture, the Default Category is a root category of the category tree. The root directory has parent categories namely What’s New, Women, Men, Gear, Training, etc. Video Download and training extra are the subcategories of Training. Furthermore, training extra again contains a subcategory named my training.
Let’s look thoroughly about creating categories in Magento 2 ?
How to Create New Category in Magento 2:
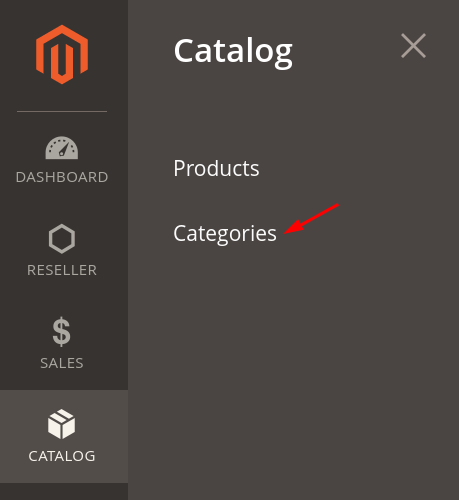
Step 1: From the Admin Dashboard, navigate to Catalog > Categories
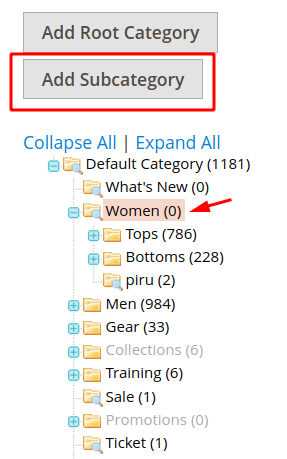
Step 2: Select the Parent Category in which you want to add the subcategory you are creating and then click the Add Subcategory button.
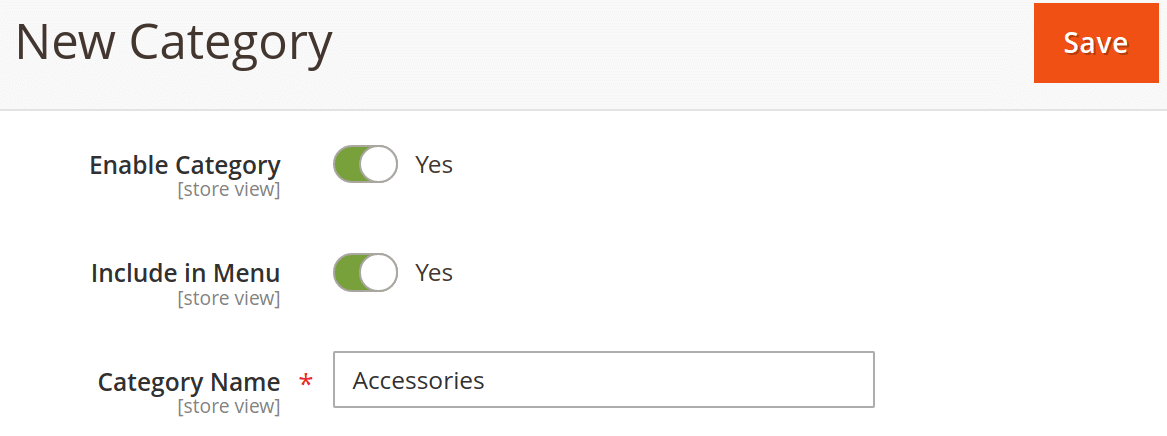
Step 3: In the New Category page, give a name to the category, set enable category, and set whether to include in the categories menu or not.
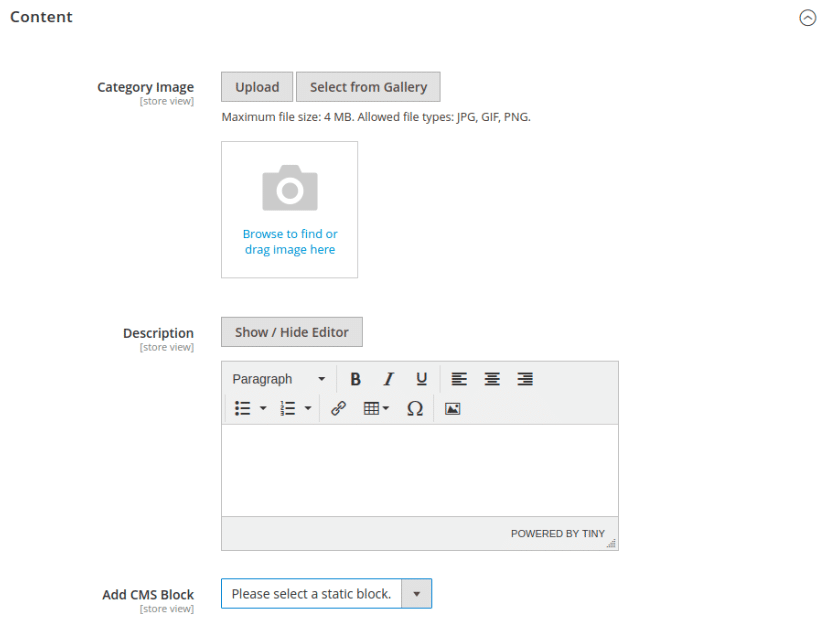
Step 4: Next, expand the Content tab. Set the image for the category considering the size and types mentioned, give a description, and select the CMS block for the category.
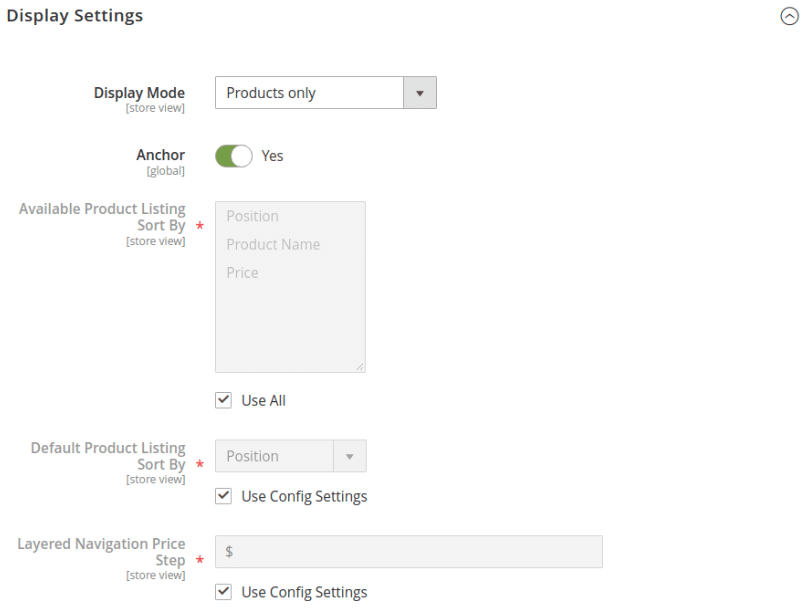
Step 5: Next is the Display Settings. Choose the Display Mode from the options given. Set the Anchor to Yes. Also, set the product listing and layered navigation price step as per your need.
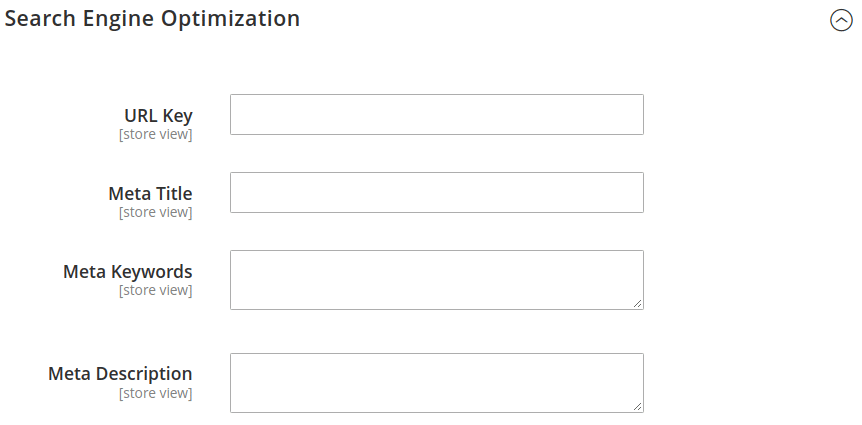
Step 6: Then set the URL key, meta titles, keywords, and description into the Search Engine Optimization section.
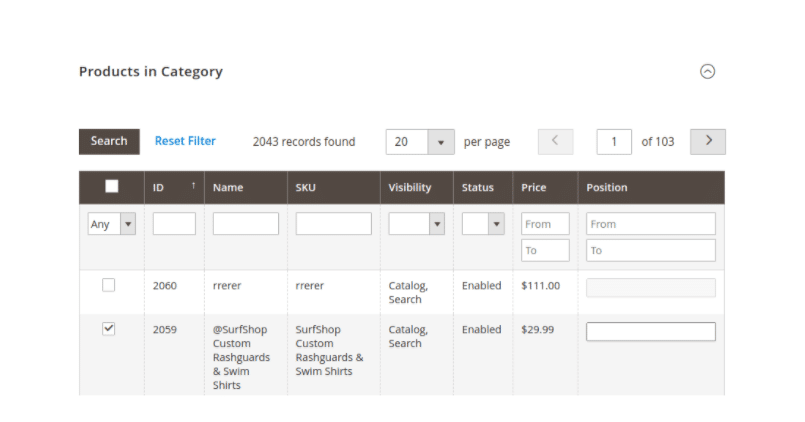
Step 7: Now its time to add products in the new category. Mark the checkbox to include the product into the new category.
Step 8: One can also set the theme and layout of the category different than the parent category under the Design tab.
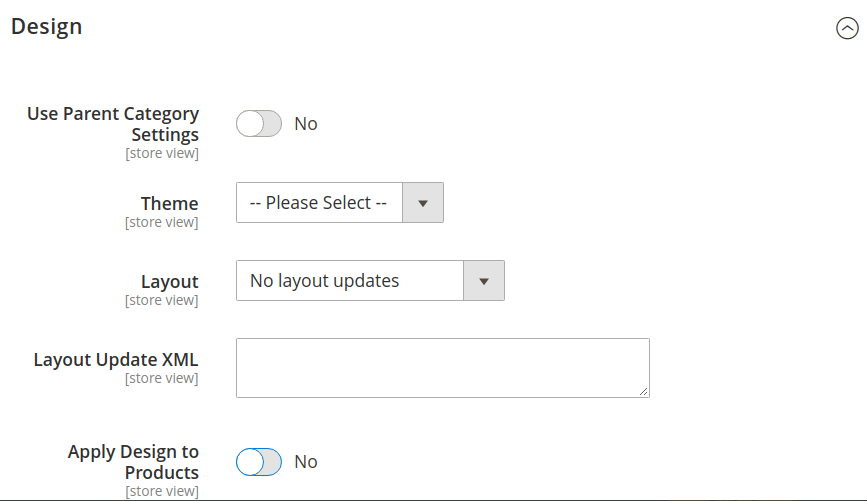
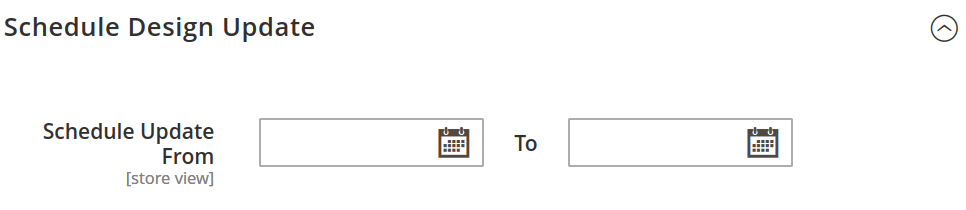
Step 9: You can even set the from and to date for the specific period of design update into the Schedule Design Update section.
At last, Save the category and check in the store front-end.
This way you can add as many subcategories according to the requirement.
All About Root Category in Magento 2:
Create a New Root Category in Magento 2
From the Admin Dashboard, Go to Catalog > Categories
Press the Add Root Category button
Then follow the same steps as you did for creating a new subcategory.
After creating the new root category, add subcategories to it.
Enable the New Root Category on your store:
From the Admin Panel, navigate to Stores > Settings > All Stores
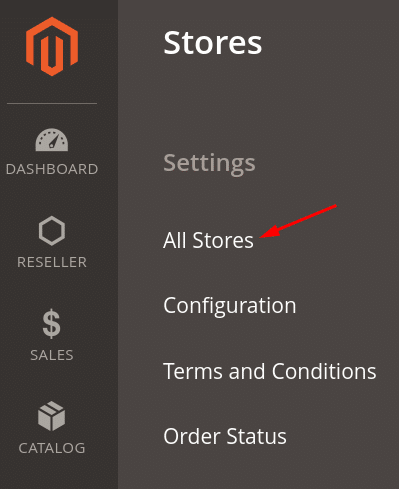
Press the Main Website Store,
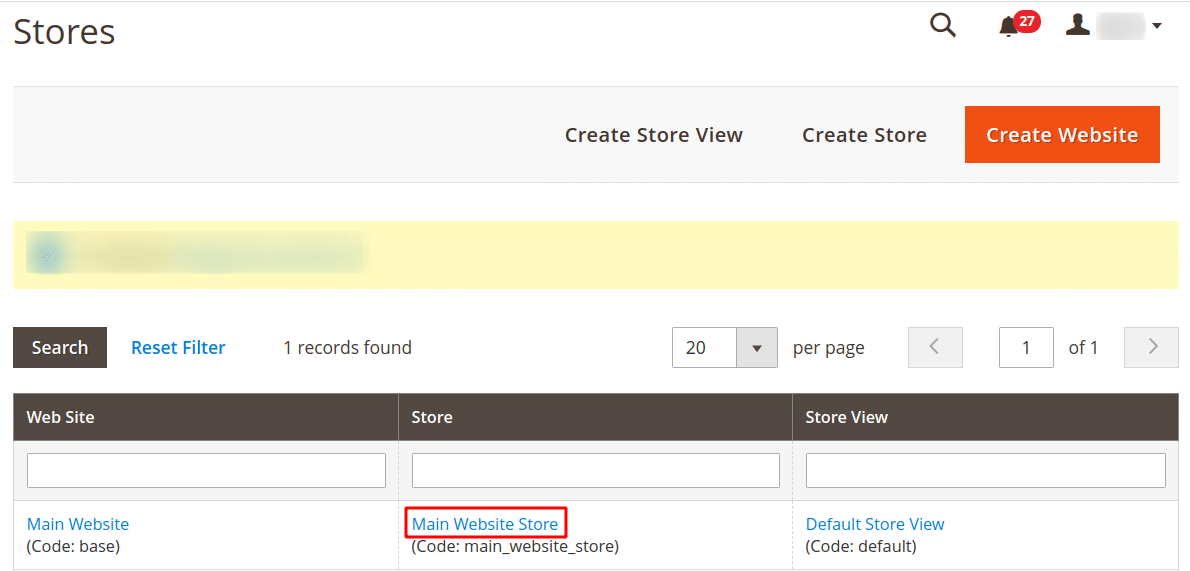
Set the Root Category to the new root category created. Lastly, select Save Store.
Final Words:
This was a whole lot about creating categories in Magento 2. Moreover, integrate Magento 2 Subcategories Slider plugin into your store, to make the product category navigation smooth and enrich the user experience for your store.
In case you face any challenges while creating categories in Magento 2, let me know in the comment section. Share the article via social media platforms and Stay tuned for the next episode of Magento 2 Categories!
Happy Reading?