Hello Magento Friends ?,
Hope you are going well with your Magento 2 stores. Today’s subject matter is How to Move Apply Coupon to Order Summary in Magento 2. Check our earlier published blog in case you missed out. Magento 2: How to add WYSIWYG Editor in Admin Configuration.
Preface:
Magento 2 provides a default design for the cart page and checkout page. Many a time, requirements arise to move some fields to another field instead of the default design. The apply discount code is displayed after the shopping cart items list in default Magento 2. Look at the below image:
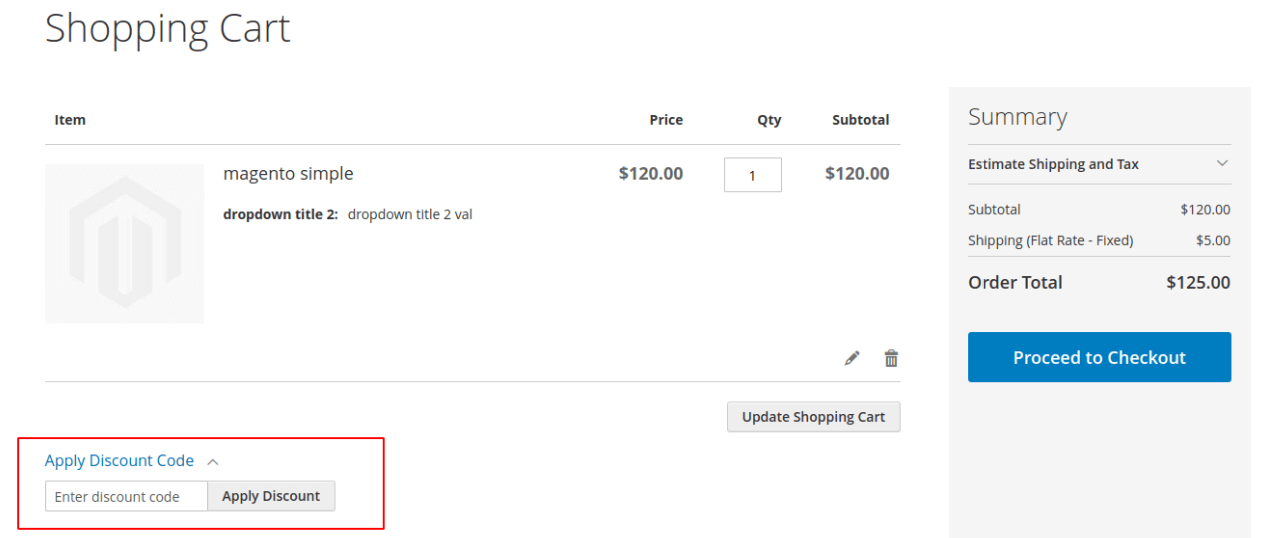
The chances are customers may miss out to look at the apply coupon code section as it is displayed at the bottom. The order summary is the area where the customers definitely look up to before proceeding for checkout. Moving apply coupon code to order summary is an ideal solution to grab customers’ attention.
Let’s start ?
How to Move Apply Coupon to Order Summary in Magento 2?
Step 1: Move to the below path:
app\code\Vendor\Extension\view\frontend\layout\checkout_cart_index.xml
Now, add the below code:
<?xml version="1.0"?>
<page xmlns:xsi="http://www.w3.org/2001/XMLSchema-instance" layout="1column" xsi:noNamespaceSchemaLocation="urn:magento:framework:View/Layout/etc/page_configuration.xsd">
    <body>
        <referenceBlock name="checkout.cart.coupon" remove="true"/>
        <block class="Magento\Checkout\Block\Cart\Coupon" name="checkout.cart.showcouponbefortotal" as="coupon" template="Magento_Checkout::cart/coupon.phtml"/>
        <move element="checkout.cart.showcouponbefortotal" destination="cart.summary" before="checkout.cart.totals.container"/>
    </body>
</page>
Step 2: Now, clean the cache and check the output.
Output:
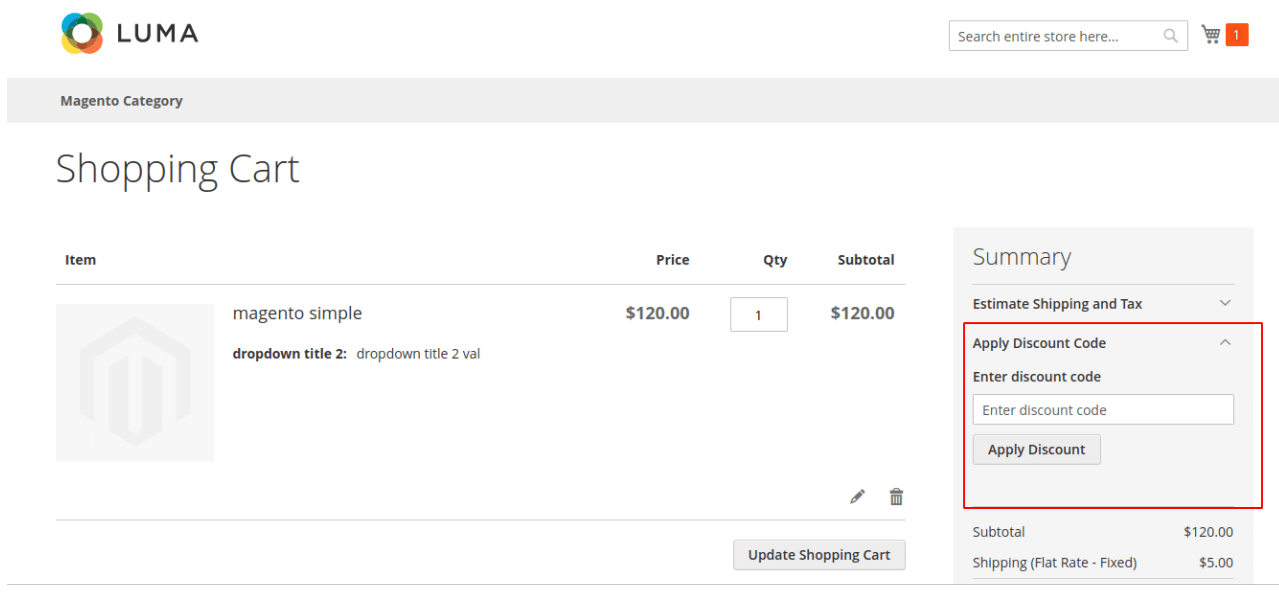
Conclusion:
Simple as that. This way you can Move Apply Coupon to Order Summary in Magento 2. Display a dropdown list of multiple coupons and manage it easily with the help of Easy Coupon Manager Extension for Magento 2. In case you find any issue while executing the code, mention in the comment part and I will be right back to you. Ensure you share the article with your friends and colleagues. Stay connected for more such Magento solutions.
Happy Coding ?




how to move in checkout page
On the checkout page, this block usually available, where exactly you want it on the checkout page.
Thanks so much! This stopped displaying in the default location for the Porto theme for me but this fix got it back and working. I actually prefer it visible in the Summary section myself.
Blog is to show it in summery only.
hiw i can move gift card option to the right side i.e cart order summary
Find the block of the gift cart and use the same code as above by replacing the block name