Hello Magento Friends ?,
Hope, everyone is doing good. In this article, I will be justifying, Magento 2: How to add WYSIWYG Editor in Admin Configuration. In case you missed to check out our previous blog, have a look. How To Get Last Executed Cron List Programmatically in Magento 2.

Introduction:
WYSIWYG stands for “What You See Is What You Get”. The content displayed in the WYSIWYG editor is exactly what will appear on the frontend. Using WYSIWYG editor exclude the need for HTML tags to design and edit page. You simply have to add the things and can be previewed how it will look after it’s launching.
Many times we need a powerful editor in system configuration for our extension. There comes the requirement of WYSIWYG editor in the admin configuration of Magento 2 since default Magento does not provide WYSIWYG editor in admin configuration.
To fulfill the above requirement, let’s get started to add WYSIWYG Editor in Admin Configuration of Magento 2 ?
Steps to add WYSIWYG Editor in Admin Configuration of Magento 2:
Step 1: First you need to add system.xml in the following path:
app\code\Vendor\Extension\etc\adminhtml\system.xml
Now, add the below code:
<?xml version="1.0"?>
<config xmlns:xsi="http://www.w3.org/2001/XMLSchema-instance"
        xsi:noNamespaceSchemaLocation="urn:magento:module:Magento_Config:etc/system_file.xsd">
    <system>
        <tab id="vendor" translate="label" sortOrder="100">
            <label><![CDATA[Vendor]]></label>
        </tab>
        <section id="extension" translate="label" type="text" sortOrder="40" showInDefault="1" showInWebsite="1"
                 showInStore="1">
            <class>separator-top</class>
            <label>Extension</label>
            <tab>vendor</tab>
            <resource>Vendor_Extension::config_extension</resource>
            <group id="general" translate="label" type="text" sortOrder="10" showInDefault="1" showInWebsite="1" showInStore="1">
                <!-- WYSIWYG editor field code start-->
                <field id="editor_textarea" translate="label comment" sortOrder="1" type="editor" showInStore="1" showInDefault="1" >
                    <label>WYSIWYG Editor</label>
                    <frontend_model>Vendor\Extension\Block\Adminhtml\System\Config\Editor</frontend_model>
                </field>
                <!-- WYSIWYG editor field code end-->
            </group>
        </section>
    </system>
</config> 
Step 2: Now you need to add Editor.php file in following path:
app\code\Vendor\Extension\Block\Adminhtml\System\Config\Editor.php
Finally, add the below code:
<?php
namespace Vendor\Extension\Block\Adminhtml\System\Config;
use Magento\Backend\Block\Template\Context;
use Magento\Cms\Model\Wysiwyg\Config as WysiwygConfig;
use Magento\Config\Block\System\Config\Form\Field;
class Editor extends Field
{
public function __construct(
Context $context,
WysiwygConfig $wysiwygConfig,
array $data = [])
{
$this->wysiwygConfig = $wysiwygConfig;
parent::__construct($context, $data);
}
protected function _getElementHtml(\Magento\Framework\Data\Form\Element\AbstractElement $element)
{
// set wysiwyg for element
$element->setWysiwyg(true);
// set configuration values
$element->setConfig($this->wysiwygConfig->getConfig($element));
return parent::_getElementHtml($element);
}
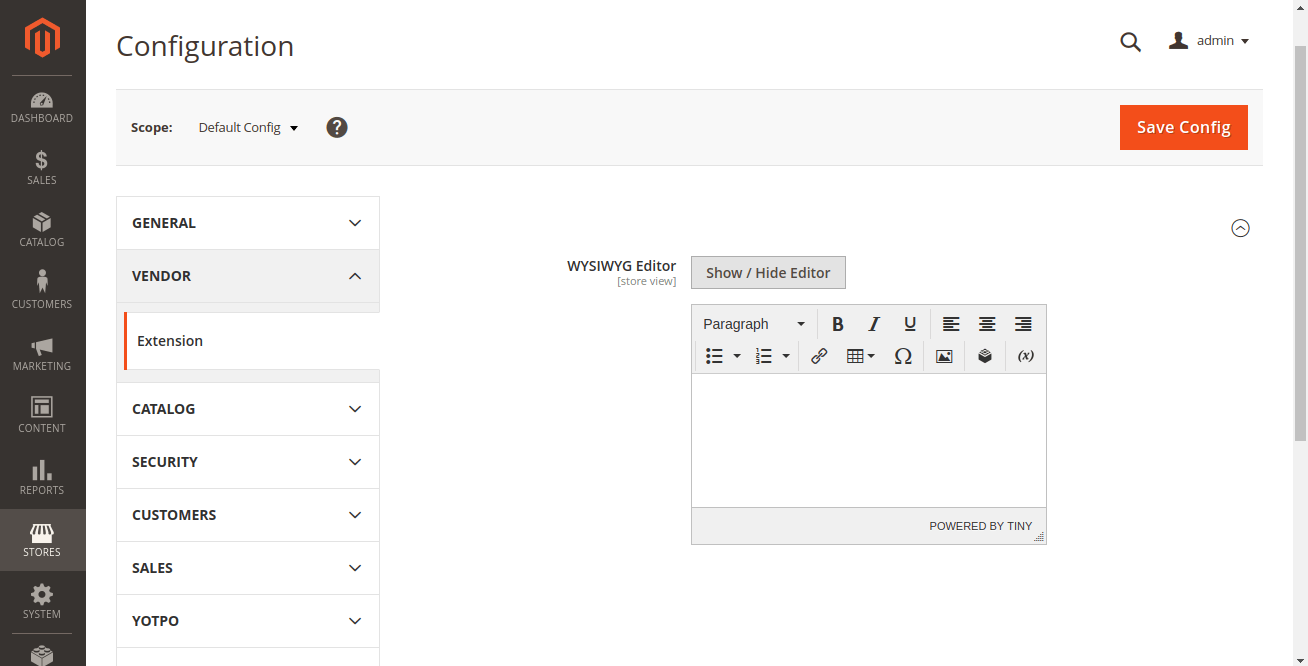
}That’s it!
Finally, WYSIWYG Editor is added to the Admin Configuration of your Magento 2 store.
Final Words:
Thereby, everyone is successful to add WYSIWYG editor in the admin configuration of Magento 2. You can also add a WYSIWYG editor from Magento 2 admin panel, How to Configure WYSIWYG Editor in Magento 2 (updated 2020).
If you face any difficulty while executing the code, notify me in the comment part below. Make sure to share the article with your Magento friends. Stay connected, stay updated!

Happy Coding ?