Hello Magento Friends ?,
In this article, I am going to explain Magento 2: How to Add Custom Mass Action in Product Grid. Look at our previously published blog, Magento 2: How to Redirect on Checkout Page After Add to Cart.
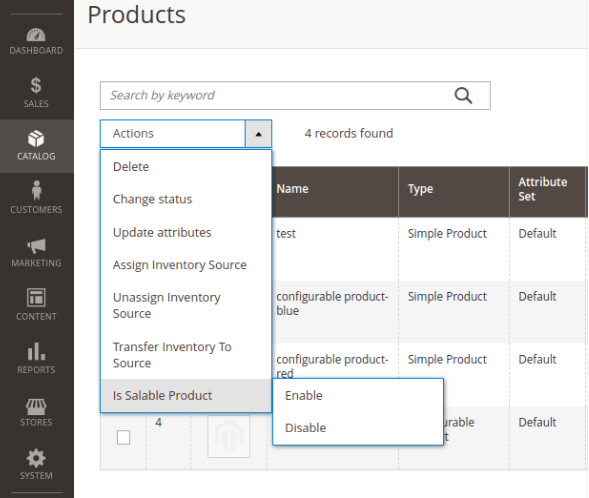
Magento 2 comes with UI components that allow adding columns, filters, and mass actions. In Magento 2 there are some mass actions available in the product admin grid. You need to extend the product_listing.xml file, to add custom mass action in the product grid as shown below. By this, custom mass action will be displayed in the dropdown of Action.
Let’s start with the steps to Add Custom Mass Action in the Product grid in Magento 2 ?
Steps to Add Custom Mass Action in Product Grid in Magento 2:
Step 1: Go to the following path:
app\code\Vendor\Extension\view\adminhtml\ui_component\product_listing.xml
And add the below code:
<?xml version="1.0" encoding="UTF-8"?>
<listing xmlns:xsi="http://www.w3.org/2001/XMLSchema-instance" xsi:noNamespaceSchemaLocation="urn:magento:module:Magento_Ui:etc/ui_configuration.xsd">
    <listingToolbar name="listing_top">
        <massaction name="listing_massaction">
            <action name="is_sale_products">
                <settings>
                    <type>is_sale_products</type>
                    <label translate="true">Is Salable Product</label>
                    <actions>
                        <action name="0">
                            <type>enabled</type>
                            <label translate="true">Enable</label>
                            <url path="extension/index/massSalable">
                                <param name="issalable">1</param>
                            </url>
                        </action>
                        <action name="1">
                            <type>disable</type>
                            <label translate="true">Disable</label>
                            <url path="extension/index/massSalable">
                                <param name="issalable">0</param>
                            </url>
                        </action>
                    </actions>
                </settings>
            </action>
        </massaction>
    </listingToolbar>
</listing>
Step 2: After that, create MassSalable.php file at the below path:
app\code\Vendor\Extension\Controller\Adminhtml\Index\MassSalable.php
Finally, add the code as mentioned underneath:
<?php

namespace Vendor\Extension\Controller\Adminhtml\Index;

use Magento\Backend\App\Action;
use Magento\Backend\App\Action\Context;
use Magento\Framework\Controller\ResultFactory;
use Magento\Ui\Component\MassAction\Filter;
use Magento\Catalog\Model\ResourceModel\Product\CollectionFactory;

class MassSalable extends Action
{

    /**
     * @var Filter
     */
    protected $filter;

    /**
     * @var CollectionFactory
     */
    protected $prodCollFactory;

    /**
     * @var \Magento\Catalog\Api\ProductRepositoryInterface
     */
    protected $productRepository;

    /**
     * @param Context                                         $context
     * @param Filter                                          $filter
     * @param CollectionFactory                               $prodCollFactory
     * @param \Magento\Catalog\Api\ProductRepositoryInterface $productRepository
     */
    public function __construct(
        Context $context,
        Filter $filter,
        CollectionFactory $prodCollFactory,
        \Magento\Catalog\Api\ProductRepositoryInterface $productRepository)
    {
        $this->filter = $filter;
        $this->prodCollFactory = $prodCollFactory;
        $this->productRepository = $productRepository;
        parent::__construct($context);
    }

    /**
     * Execute action
     *
     * @return \Magento\Backend\Model\View\Result\Redirect
     * @throws \Magento\Framework\Exception\LocalizedException | \Exception
     */
    public function execute()
    {
        $salableValue = $this->getRequest()->getParam('issalable');
        $collection = $this->filter->getCollection($this->prodCollFactory->create());
        foreach ($collection->getAllIds() as $productId)
        {
            $productDataObject = $this->productRepository->getById($productId);
            $productDataObject->setData('is_sale',$salableValue);
            $this->productRepository->save($productDataObject);
        }
        $this->messageManager->addSuccess(__('A total of %1 record(s) have been modified.', $collection->getSize()));
        /** @var \Magento\Backend\Model\View\Result\Redirect $resultRedirect */
        $resultRedirect = $this->resultFactory->create(ResultFactory::TYPE_REDIRECT);
        return $resultRedirect->setPath('catalog/product/index');
    }
}
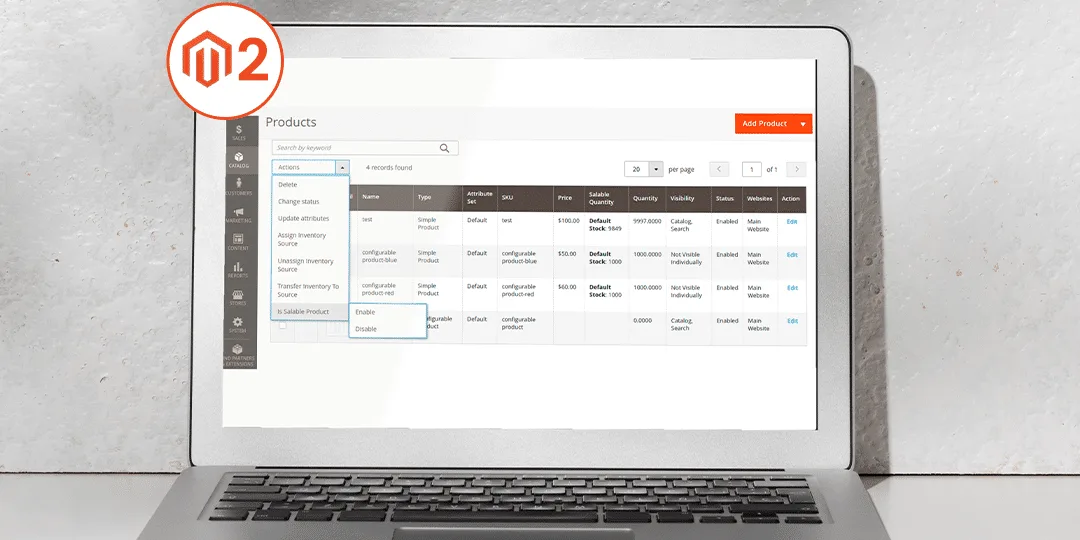
Output: In this way, you can set value enable/disable of “Sale” attribute value in the product grid and will get the result as shown in the below image.

Conclusion:
Accordingly, you can add custom mass action in the product grid in Magento 2. As per your requirement, you can add any custom mass action. Similarly, you can even Add Custom Mass Action to the Admin Grid in Magento 2.
For any doubts and questions, kindly mention in the comment part. Keep sharing and stay connected!
Happy Coding ?


