
Hello Magento Folks?,
What are you up to? Today I will help you to learn How to upload WebP images with Magento 2. Also, review our last published article where you may learn How to get Customer Collection in Magento 2. Let’s Begin?
Introduction:
Mainly everyone is well known with .jpg, jpeg, and .png images formats that are developed before many years. There are many issues faced by all in this format like the images are not compressed properly, resolution issues, and much more. So to overcome these problems Google has provided a modern image format that equally provides lossless and lossy image compression functionality. Using the WebP image for Magento 2 all web developers and webmasters can create tiny in size and superior quality images that make the web faster. WebP image for Magento 2 also helps in improving your Magento 2 website performance.
Why use WebP images?️
WebP is the latest image format provided by Google. It is specially designed for better optimization of the image even after reducing the file size by offering minimal quality loss. When your high-quality images are compressed then there are chances where the images can look ugly. With the help of this, your website will be faster and the less bandwidth internet users will be benefited. With the help of the WebP image for Magento 2, you can overall increase the performance of your website and improve the user experience to your store.
WebP support browsers?
Images over years ago are just recognized as PNG, JPEG, or GIF. Many image formats were developed from that one which was popped out from all that is WebP by Google. Generally, WebP offers a smaller and superior image. But there is only one disadvantage of this image that it is not compatible with all browsers. Firstly, the WebP image was only supported by Google Chrome browsers. But in this time the support has increased and according to the latest estimation, more than 75% of browsers are supporting WebP image support.
How to Upload Webp Image with Magento 2?
Step 1: Download Magento 2 WebP Image Support extension given below.

Step 2: Install the WebP image for Magento 2 extension.
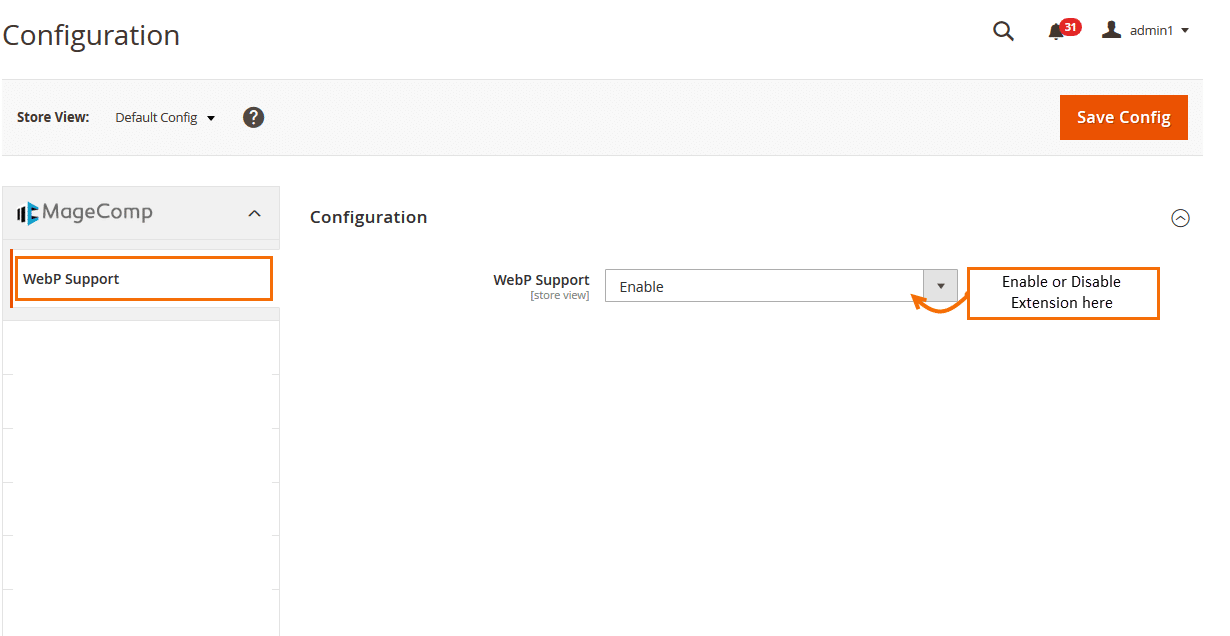
Step 3: After the installation just enable the extension as given below. Now, once you’ve enabled it, you are ready to use the features of the module.
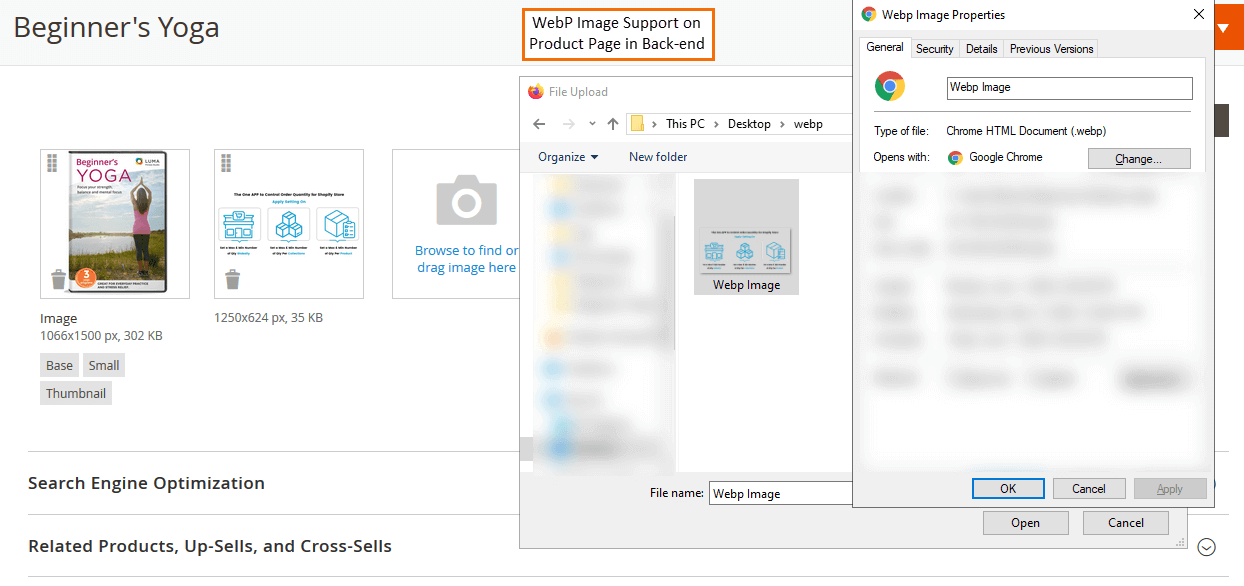
Step 4: WebP image support on the product page at the backend. Admin needs to upload the images for their product page from here.
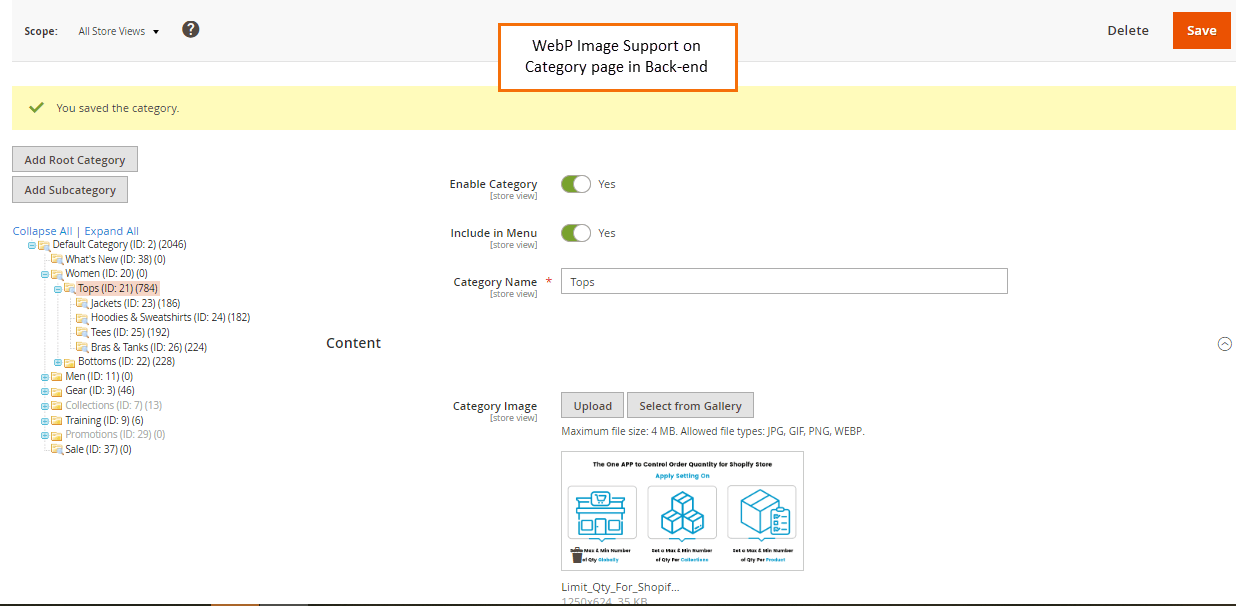
Step 5: WebP image support on the category page at the backend. Admin needs to upload the images for their category page from here.
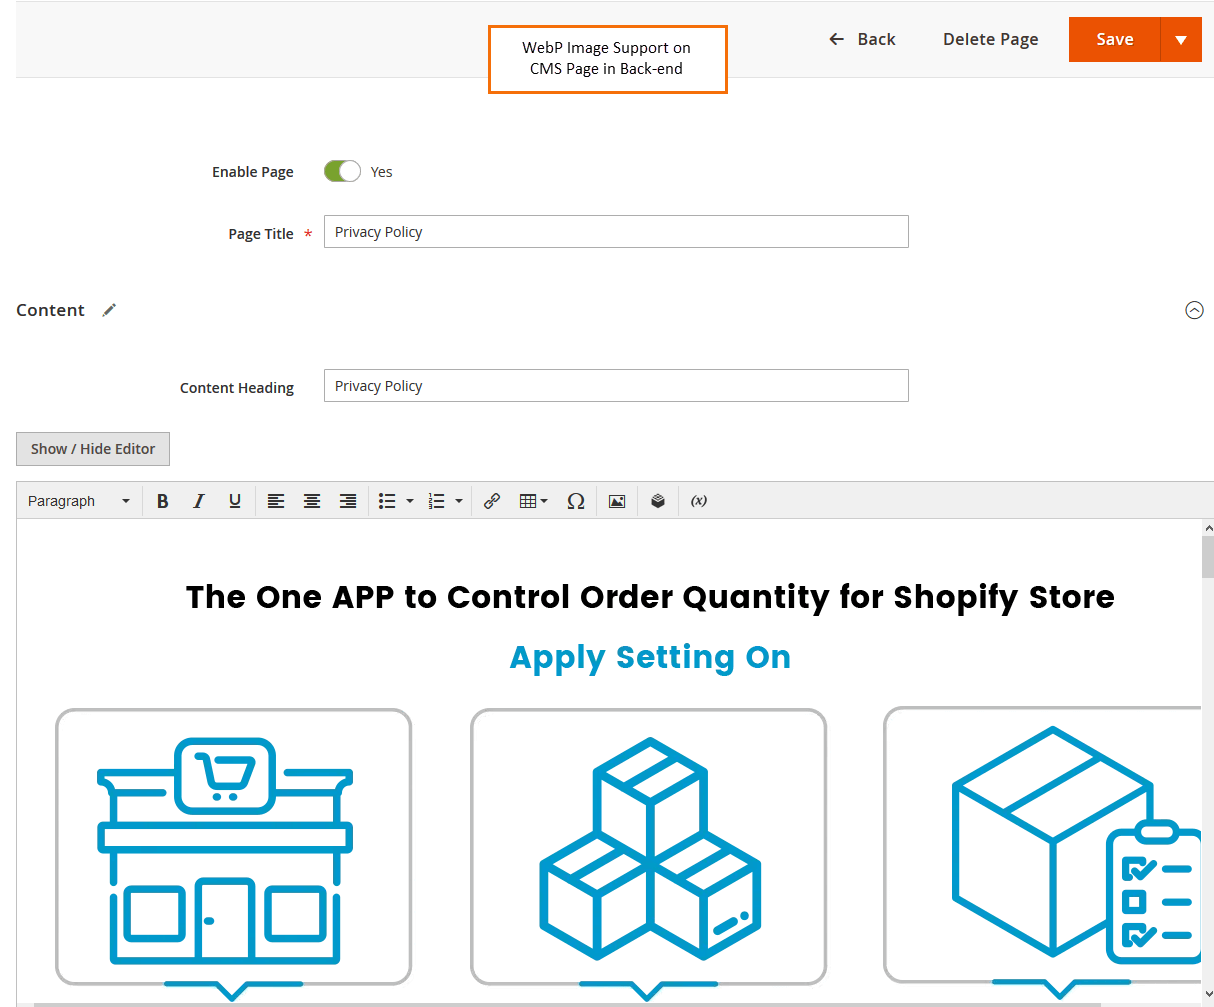
Step 6: Admin can also easily upload WebP image on all CMS pages in your Magento 2 store.
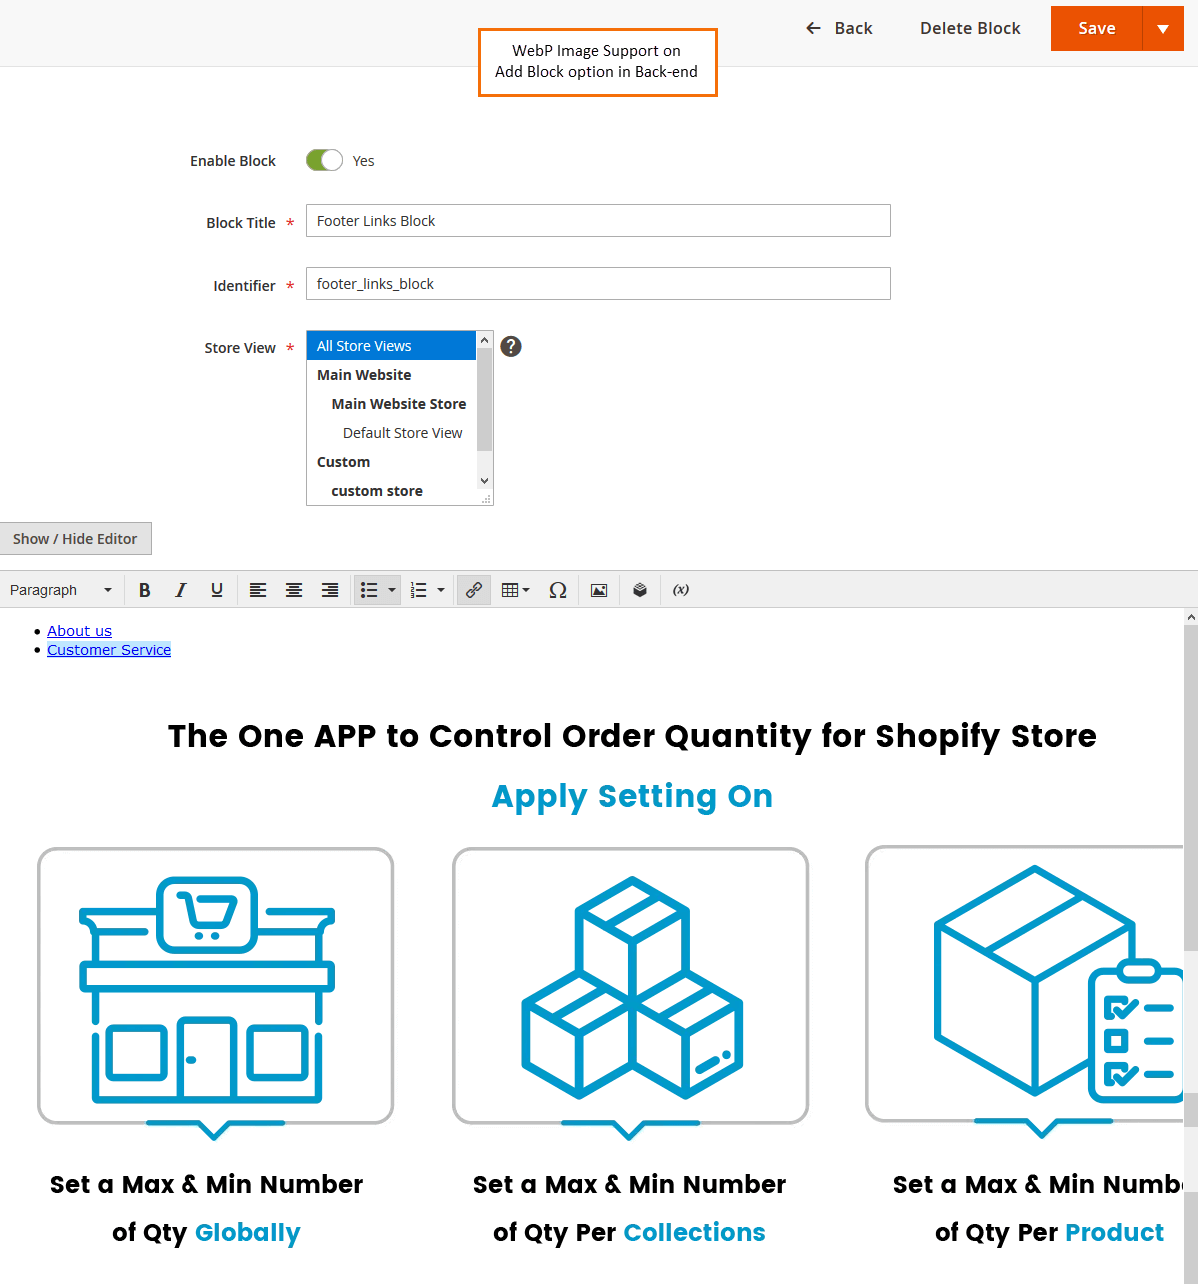
Step 7: Admin can also easily upload WebP image on all upload block in your Magento 2 store
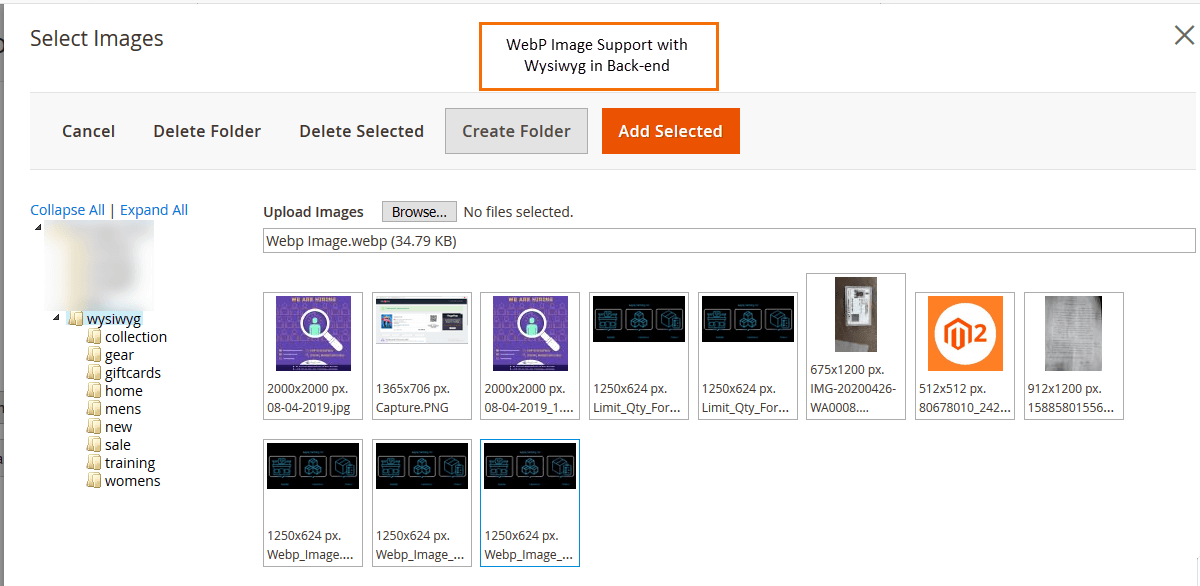
Step 8: Admin can also easily upload WebP image from WYSIWYG editor in your Magento 2 store
Conclusion:
Hopefully, all have downloaded the Magento 2 WebP Image and follow the above-given steps for uploading WebP image in Magento 2. In case any difficulties do contact our Support Team for further guidance. Don’t forget to share the article with your friends and developers. I would love to hear your opinion on this in the comment section below. Stay tuned with us.
Happy Coding?


Unique content and the presentation of your content was too amazing.
Great article. This all information is important for me. Thank for share.
It is really helpful and I successfully uploaded it because of your blog.