Hello Magento Friends,
In this blog, we will learn how to set up Customer Account Options in Magento 2.
The customer’s journey in your Magento 2 store must be optimized from registration to after-sales service. Using customer account configuration, store admin can manage customers easily. Magento 2 provides various customer configuration options for customer management.
Let’s see the steps to Setup Customer Account Options in Magento 2.
Steps to Setup Customer Account Options in Magento 2:
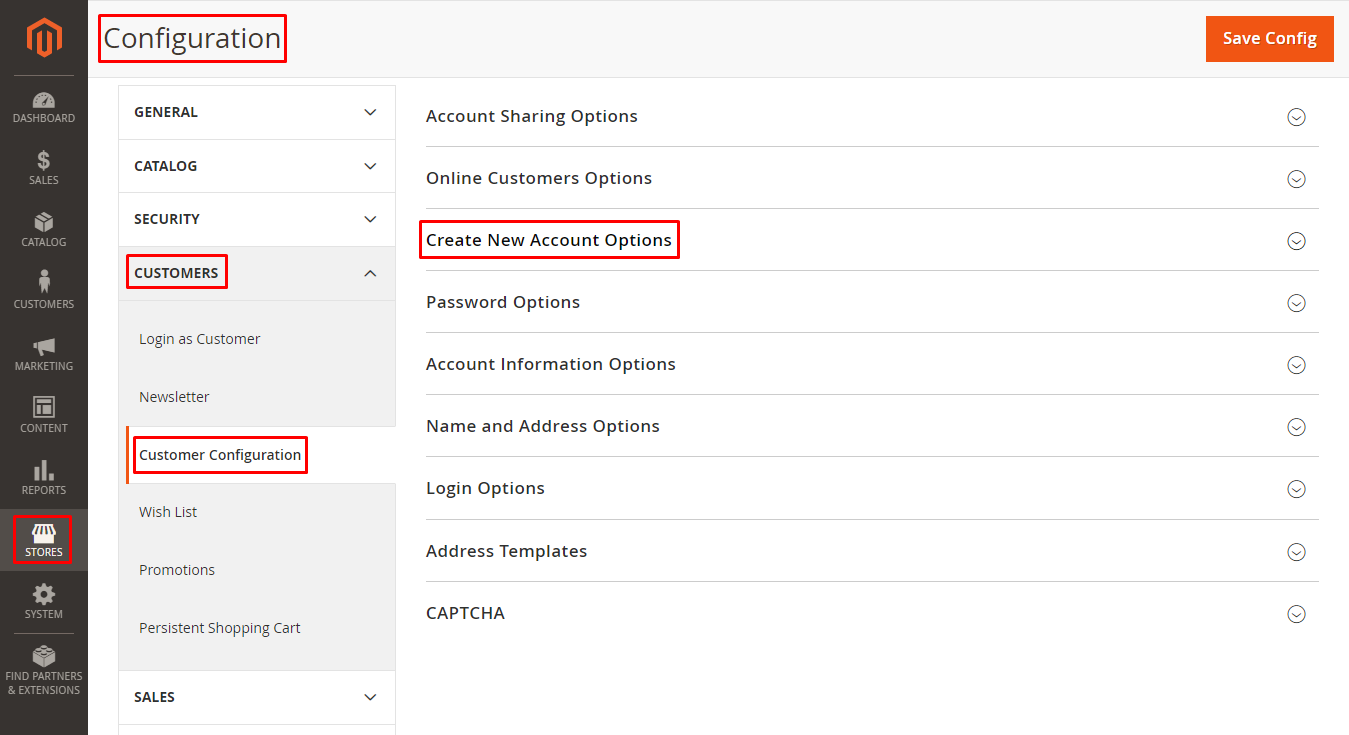
Step 1: From the Admin Dashboard. Go to Stores > Settings > Configuration.
Step 2: Now expand the CUSTOMERS tab from the left panel and select Customer Configuration.
Step 3: Now enlarge the Create New Account Options.
Step 4: Now apply the settings as required.
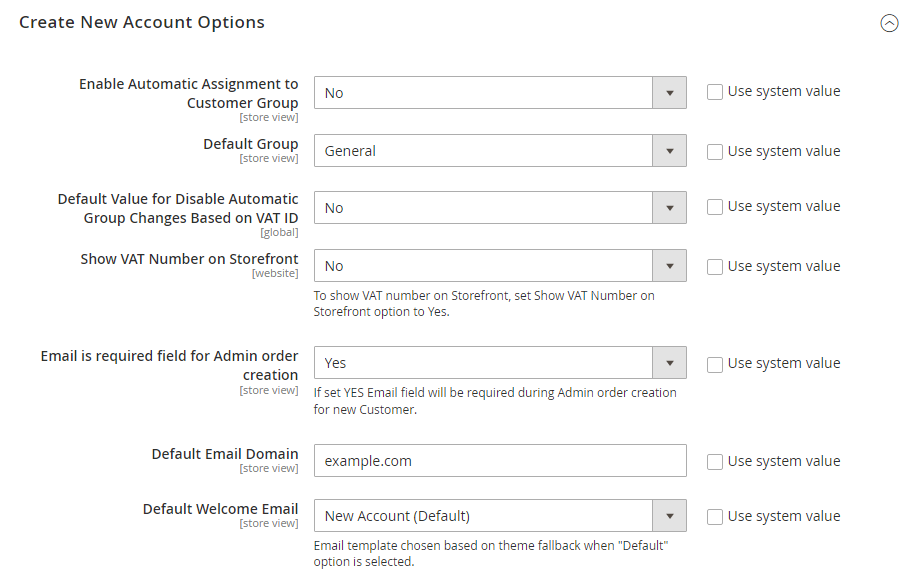
- Enable Automatic Assignment to Customer Group: Determines whether the customer is assigned to the default customer group.
- Default Group: Set the default group of customers. Learn more about How to Set Default Group for New Customer Account in Magento 2.
- Default Value for Disable Automatic Group Changes Based on VAT ID: Choose whether the customer group changes automatically based on VAT ID.
- Show VAT Number on Storefront: Set whether the VAT number is visible to customers in front.
- Email is required field for Admin order creation: Determine whether an email is required at the time of admin order creation for new customers.
- Default Email Domain: Set the default email domain.
- Default Welcome Email: Email template used for default welcome email.
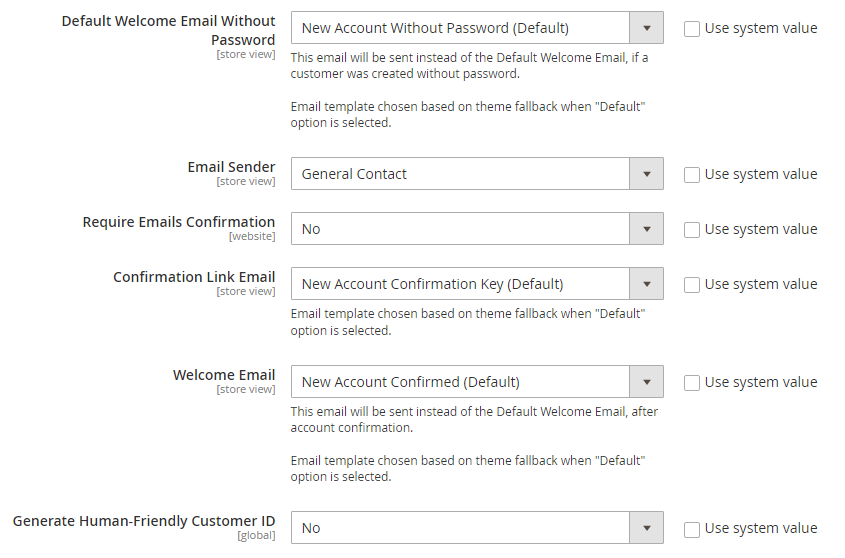
- Default Welcome Email Without Password: Default welcome email template used for customer created without password.
- Email Sender: Select the sender email from here.
- Require Emails Confirmation: Determine whether confirmation is required to create an account.
- Confirmation Link Email: Email template used for the confirmation email.
- Welcome Email: After account confirmation, an email template used for the welcome message.
- Generate Human-Friendly Customer ID: Whether the field used to enter and store VAT ID is visible from the storefront or not.
At last, click Save Config.
Final Words:
Hence, this way, you can Setup Customer Account Options in Magento 2. Share the tutorial with your friends and stay in touch with us.

Happy Reading!