Hello Magento Folks?,
In this tutorial, I will help you to Improve Magento 2 performance by utilizing AWS CloudFront☁️. Let me first illuminate you all about Amazon CloudFront and how it works in improving website performance. Check our previously published article How to Integrate Amazon S3 Cloud Store with Your Magento Store.
Introduction:
Amazon CloudFront is one type of CDN that stands for a content delivery network. Amazon CloudFront’s name itself says that it is provided by Amazon that delivers static as well as dynamic data, provides APIs at high speed and low latency in the whole world, applications and videos. By integrating the Magento 2 with Amazon CloudFront CDN, you will be optimizing the performance of your Magento 2 store. Let’s Get Started?.
Checkout How to Configure Amazon S3 with Magento 2 stepwise solution.
Steps to Configure Magento 2 store with AWS CloudFront☁️:
Firstly, we will request a Magento 2 page from a web browser that has been processed by a server. On average Magento 2 loads 170 scripts per page. Additional loads are experienced for a server CPU and memory when the requests are incoming. This results in a rise in the costing of infrastructure for maintaining an acceptable level of page load time.
The following data is processed when the request is processed on installed Magento 2.4.
| Page | Number of Requests | Size, KB |
| Homepage | 236 | 88 |
| Category Page | 225 | 23.2 |
| Product Page (Configurable) | 338 | 348 |
| CMS Page (Contact Us) | 114 | 880 |
I will illustrate to you all how to configure Magento 2 with AWS CloudFront:
For this, you will need an AWS Account. If you don’t have then create a new one.
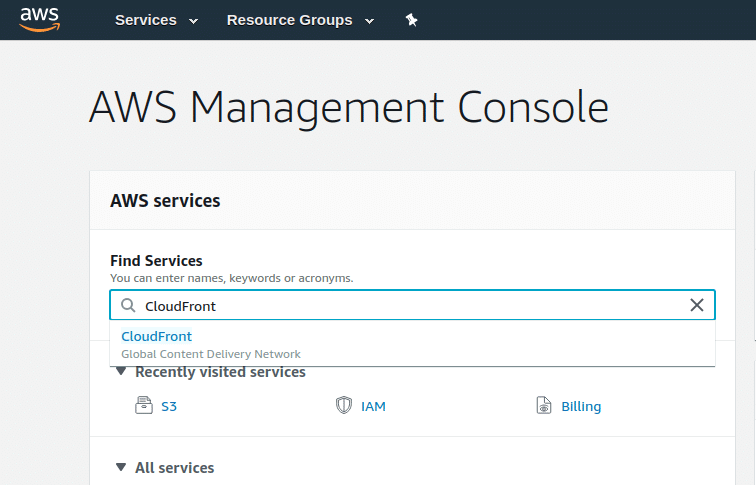
Log In to the AWS account and open the Services tab and write down CloudFront.
From the popup, Choose CloudFront Global Content Delivery Network suggestion
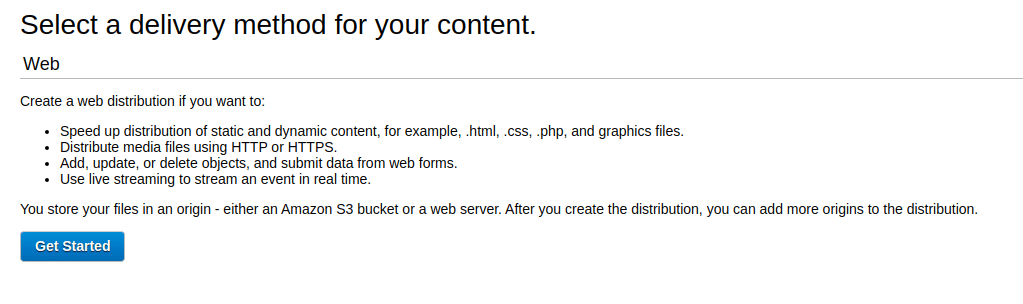
Now, from the AWS CloudFront Distributions page create the location for the Magento static files.
Tap on the Create Distribution button for creating a web distribution
Now here are 2 steps to follow for creating.
Step 1: Provides 2 delivery method options i.e. Web & RTMP
Tap on getting Started below the Web delivery method option.
Static Content Distribution
Now we have to set the static file distribution from the Create Distribution page.
Make sure you don’t change the specific settings for creating a static content distribution.
Take a reference to the below-recommended settings.
| Static Content Distribution | |
| Origin Domain Name | magento24.magecomp.com |
| Origin Path | pub/static |
| Origin ID | static-magento24.magecomp.com |
| Viewer Protocol Policy | Redirect HTTP to HTTPS |
| Allowed HTTP Methods | GET, HEAD, OPTIONS |
| Cached HTTP Methods | GET, HEAD, OPTIONS |
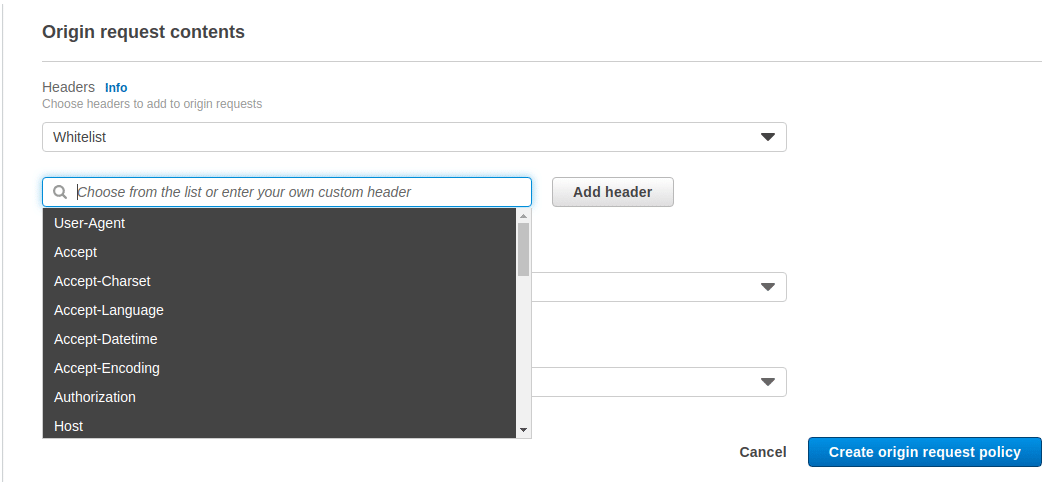
| Cache Based on Selected Request Headers | Whitelist |
| Price Class | Use Only US, Canada, Europe |
| SSL Certificate | Default CloudFront Certificate (*.cloudfront.net) |
| Distributed State | Enabled |
Origin Protocol Policy and Viewer Protocol Policy settings are set to HTTPS if the domain connection is secure, if there is a non-secure connection of your domain then you have to set it to HTTP.
Note: Price Class setting is used only in Europe, Canada, US.
Choose to Accept, Host, and Origin values for Whitelist Headers from Cache Based on Selected Request Headers
After all the settings are given for the static distribution, tap on the Create Distribution option.
Here, the OPTIONS HTTP is utilized for the fonts and the HTML templates files are requested from the JavaScript files.
It takes approximately 15 minutes for the AWS CloudFront for creating the new distribution

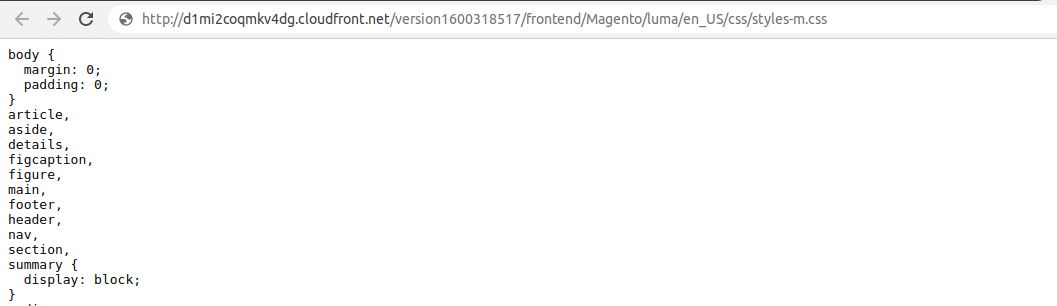
After creating the distribution the Magento 2 static files should be accessible from the new CloudFront distribution.
Media Content Distribution
Similarly, we have to create the distribution for Magento 2 media files.
From the AWS CloudFront Distributions page tap on the Create Distribution option. Tap on Get Started below the Web delivery method option.
| Media Content Distribution | |
| Origin Domain Name | magento24.magecomp.com |
| Origin Path | pub/media |
| Origin ID | media-magento24.magecomp.com |
| Viewer Protocol Policy | HTTPS Only |
| Allowed HTTP Methods | GET, HEAD |
| Cached HTTP Methods | GET, HEAD |
| Cache Based on Selected Request Headers | None |
| Price Class | Use Only US, Canada, Europe |
| SSL Certificate | Default CloudFront Certificate (*.cloudfront.net) |
| Distributed State | Enabled |
After all the settings are given
After all the settings are given for the static distribution, tap on the Create Distribution option.
Now, these 2 distributions will be listed on the AWS CloudFront Distributions page.
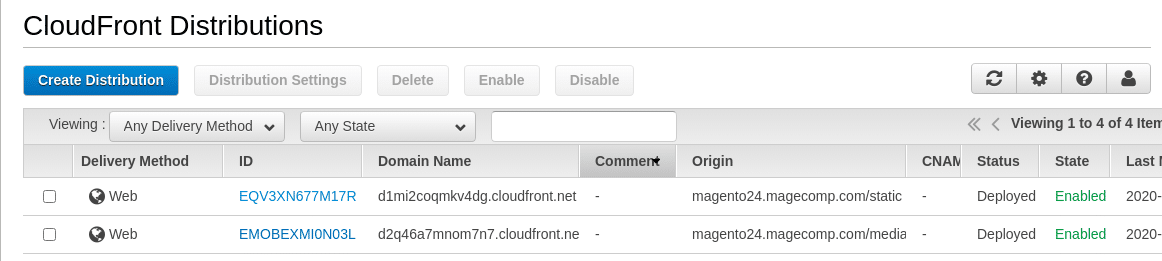
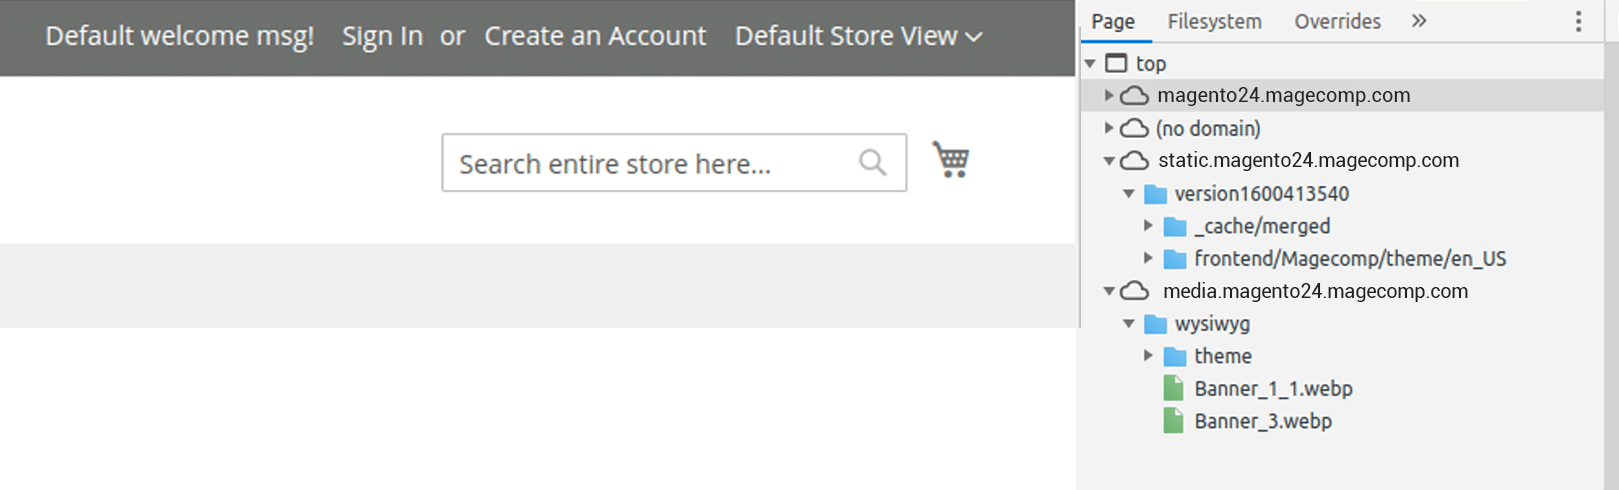
Check out the new CloudFront Distribution you will be able to access the media files

Apache Configuration
Magento 2 should send precise response headers to permit the requests for static as well as media files from the various domains.
Now, we have to provide extra Apache information before using the new AWS CloudFront Distributions.
The Access-Control-Allow-Origin error will be faced for all the static and media files that are requested from the content delivery network or AWS CloudFront if additional header’s responses are absent.
Apache Headers Module
For utilizing the mod_headers module in .htaccess files it is compulsory to enable the Apache headers module.
For this you will have to use the below-given command [Ubuntu]:
$ a2enmod rewrite
For Restarting Apache [Ubuntu]:
$ service apache2 restart
The pub/static Instructions
The pub/static/.htaccess file gives by default headers for the static files. Now, these headers need to be adjusted for permitting requests from other domains.
The pub/static/.htaccess before:
<code class="xml">
<IfModule mod_headers.c>
   <FilesMatch .*\.(ico|jpg|jpeg|png|gif|svg|js|css|swf|eot|ttf|otf|woff|woff2)$>
       Header append Cache-Control public
   </FilesMatch>

   <FilesMatch .*\.(zip|gz|gzip|bz2|csv|xml)$>
       Header append Cache-Control no-store
   </FilesMatch>
</IfModule>
</code>
The pub/static/.htaccess after changes:
<code class="xml">
<IfModule mod_headers.c>
<FilesMatch .*\.(ico|jpg|jpeg|png|gif|svg|js|css|swf|eot|ttf|otf|woff|woff2|html|json)$>
   Header set Cache-Control "max-age=604800, public"
   Header set Access-Control-Allow-Origin "*"
   Header set Access-Control-Allow-Methods "GET, OPTIONS"
   Header set Access-Control-Max-Age "604800"
   Header set Access-Control-Allow-Headers "Host, Content-Type, Origin, Accept"
</FilesMatch>

   <FilesMatch .*\.(zip|gz|gzip|bz2|csv|xml)$>
       Header append Cache-Control no-store
   </FilesMatch>
</IfModule>
</code>
Note: All the file extension lists in the FilesMatch option are modified and 2 extra extensions are included namely JSON and HTML. For the HTML extension, the Catalog Store settings must be visited again because of the used .html URL suffix for the Categories and Products.
The pub/media Instructions
The pub/media/.htaccess file has to include the response headers for the images
The mod_headers.c section from the pub/media/.htaccess before:
<code class="xml">
<IfModule mod_headers.c>
   <FilesMatch .*\.(ico|jpg|jpeg|png|gif|svg|js|css|swf|eot|ttf|otf|woff|woff2)$>
       Header append Cache-Control public
   </FilesMatch>

   <FilesMatch .*\.(zip|gz|gzip|bz2|csv|xml)$>
       Header append Cache-Control no-store
   </FilesMatch>
</IfModule>
</code>
The mod_headers.c section from the pub/media/.htaccess after:
<code class="xml">
<FilesMatch .*\.(ico|jpg|jpeg|png|gif|svg|js|css|swf|eot|ttf|otf|woff|woff2)$>
   Header append Cache-Control max-age=604800
   Header set Access-Control-Allow-Origin "*"
</FilesMatch>
</code>
Magento 2 Configuration
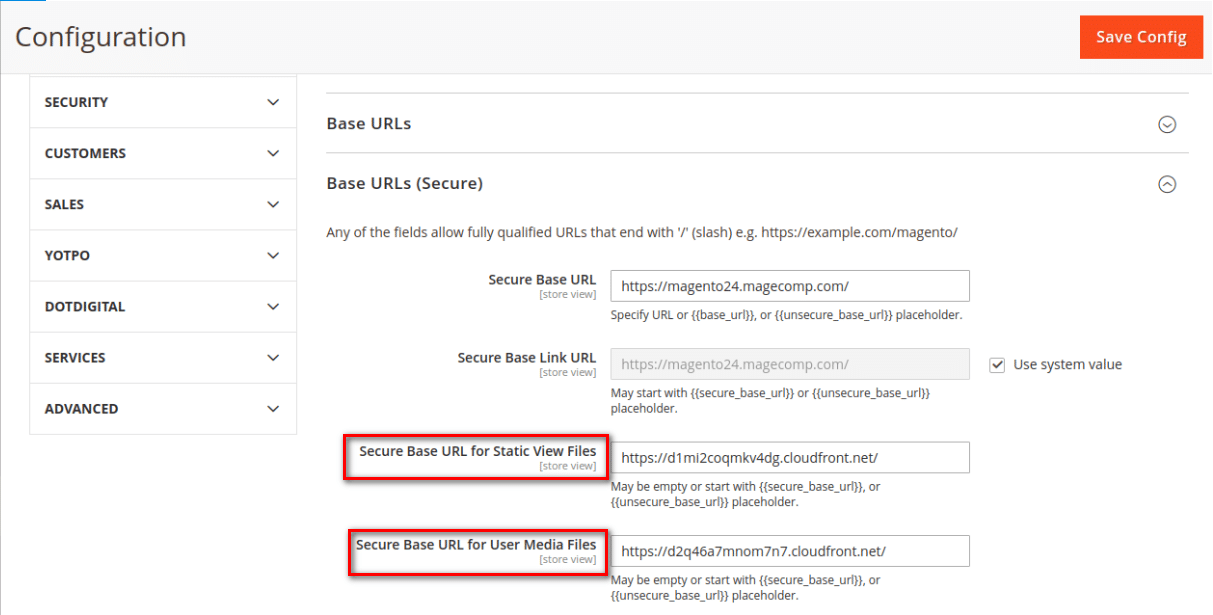
Step 1: Navigate to Stores > Configuration > General > Web > Base URLs (Secure)
Note: If you have multiple stores, then these changes will be reflected in the specific store only.
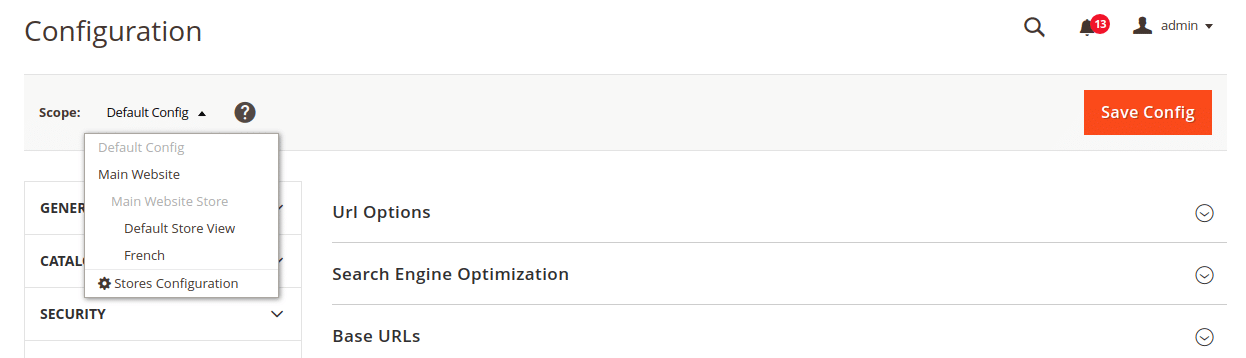
Step 2: Add AWS CloudFront URLs to the Secure Base URL for Static View Files and similarly Secure Base URL for User Media Files.
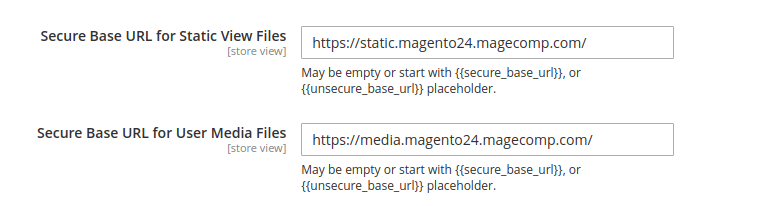
Save the Config and refresh the cache from the Cache Management Section.
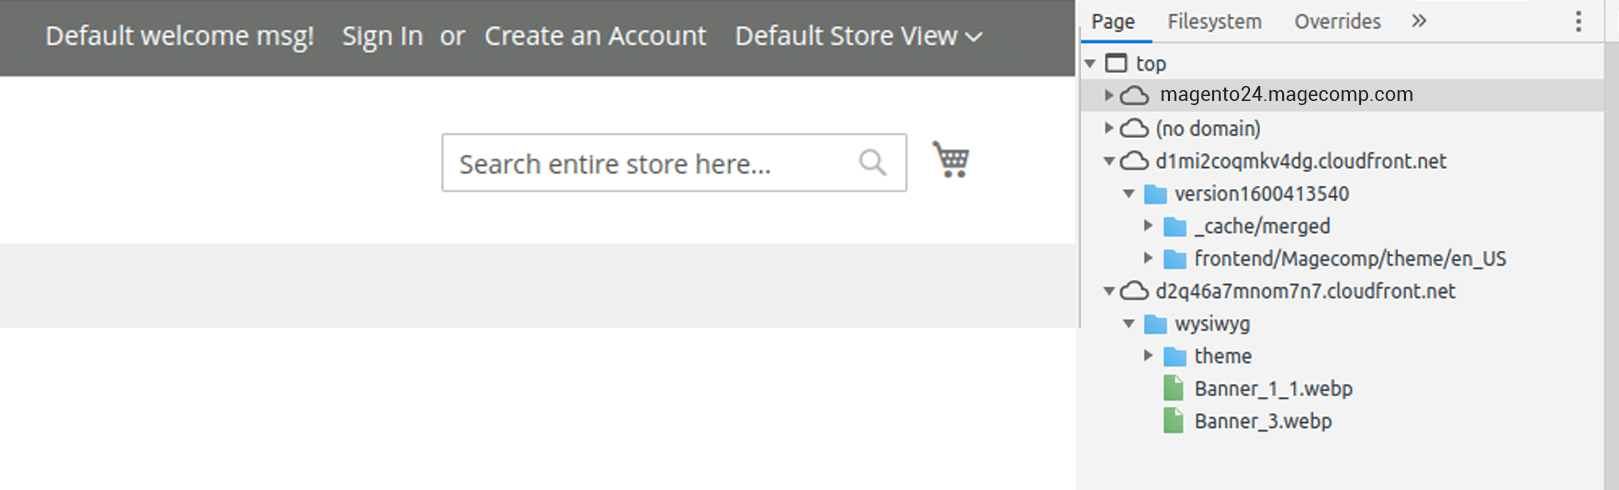
Goto Magento 2 frontend and review domain name changes of the static and media files.
CNAME for CDN
In case you desire to give friendly URLs for the CloudFront distributions then the configuration of CNAME records should be done for AWS CloudFront.
static.magento24.magecomp.com points to d1mi2coqmkv4dg.cloudfront.net
media.magento24.magecomp.com points to d2q46a7mnom7n7.cloudfront.net
Changes in AWS CloudFront
For the AWS CloudFront Distribution, a new CNAME record should be added. Add the Alternative Domain Names (CNAMEs) by clicking on distribution from the AWS CloudFront Distributions list.
Also, choose the Custom SSL Certificate for the SSL Certificate settings.
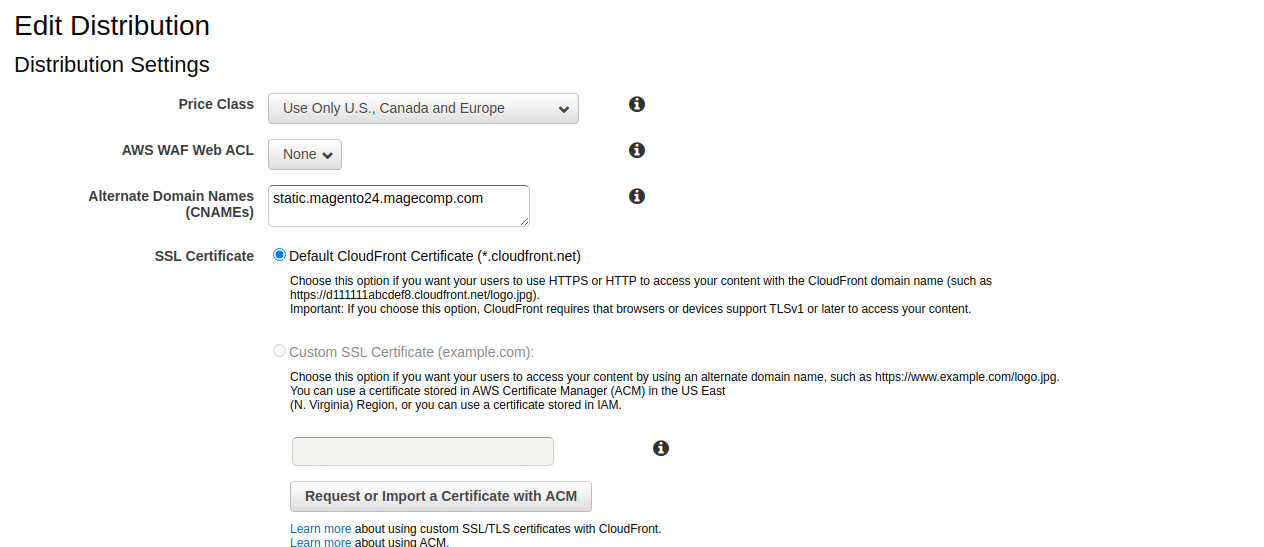
Now for this, you have to again create a new SSL Certificate for the custom domain. The AWS Certificate Manager will permit you to create an SSL Certificate in some minutes. Tap to YES, edit the button to save changes. Approximately it will take up to 15 minutes for alteration to be propagated for the distribution.
Performance Results
Mainly the performance metrics are on the basis of built-in Full Page Cache. Check the results on Pingdom. The page load time involves the rendering of all scripts loaded on a page.
Here during the testing, the minification of the static content is disabled.
| Page | Page Load Time, Without CDN | Page Load Time, With CDN |
| Homepage | 2.191 sec | 1.1 sec |
| Category Page | 3.8 sec | 2.22 sec |
| Product Page (Configurable) | 1.9 sec | 0.8 sec |
| CMS Page (Contact Us) | 1.53 sec | 0.7 sec |
Here you can verify that the number of incoming HTTP GET requests are decreased when the webserver with the CDN is configured. It helps in decreasing the usage of CPU and Memory on the server and can serve more numbers of the incoming requests from the users.
Conclusion:
Content Delivery Network for an E-commerce store is a must-have nowadays. Especially, when the business grows and the number of customers increases year-to-year. The AWS CloudFront is a great service for the reasonable pricing and edge locations coverage.
Hence, improve your Magento 2 website performance by configuring Magento 2 with AWS CloudFront. When the business grows and the customers are increased every year then this is very useful for providing an excellent customer experience.
In case any difficulties in the above steps then let me know in the comment section below I will help you.
Hit 5 ⭐⭐⭐⭐⭐ stars and share↗️ with your Magento business friends.
Stay connected? and Keep Developing??
Happy Reading?.