Hello Magento Folks,
Last time, We learned about How to Change Backend Session Timeout in Magento 2 for Magento 2 stores.
Today, I am here to explain to you What is Magento 2 Cookie Notice and everything about cookies.
Let’s Begin.
Contents
Introduction
Biggest E-Commerce platform, Magento 2 which is very well known for getting data with the use of cookies. In this article we will delve deeply to learn everything about cookies.
Mainly, we can say that cookies are enabled on any website , then it will generate tiny sized files on your system in which it stores some information. And this information is usually used to make your browsing experience more personalized. Cookies are generated when you visit any websites in your browser that uses cookies for tracking users movements on your site. It also helps you to continue where you left.
Generally website stores a reciprocal file same which is set in your browser and with the help of that file they track and save information on your all the movements within the website and all the information which you gave willingly entered while visiting the website for example mobile number or email address.
In some of the countries, visitors are known about cookies which are an essential part of browsing and when they browse the website, they agree on Cookies.
In some of the countries, there may be a pop-up displaying like “Allow to use cookies”. In that case, some operations are not enabled until the user agrees on allowing Cookies.
How to Enable/Configure Cookies in Magento 2?
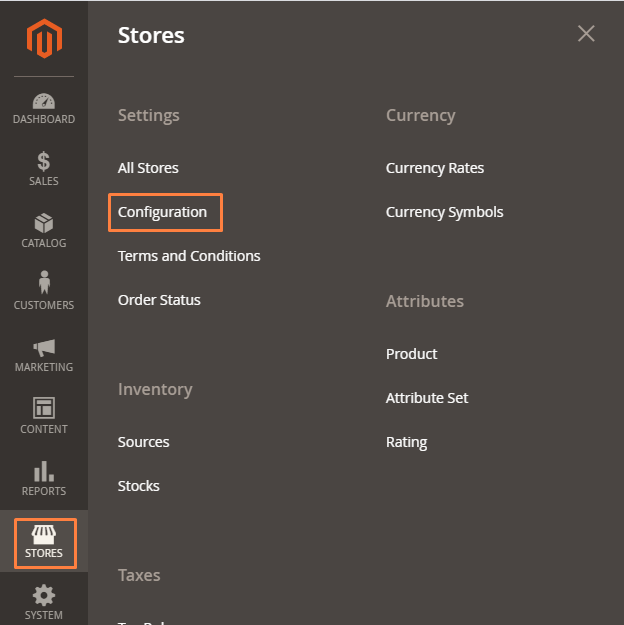
Step 1: On the admin menu click on Stores and tap on Configuration as per guided in the image below:
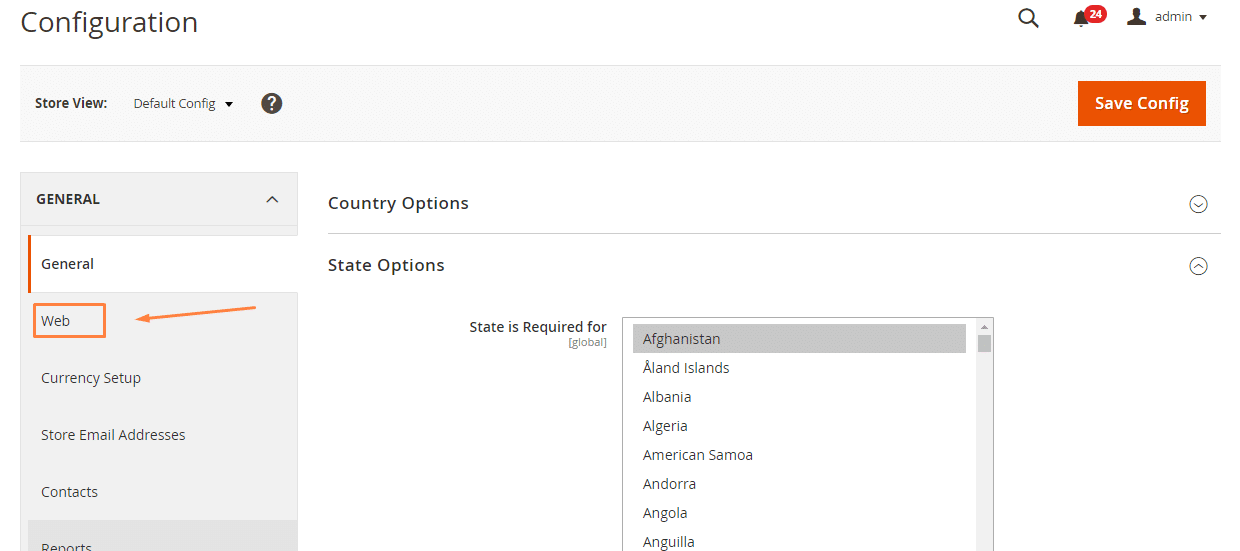
Step 2: Click on Web under general as guided below:
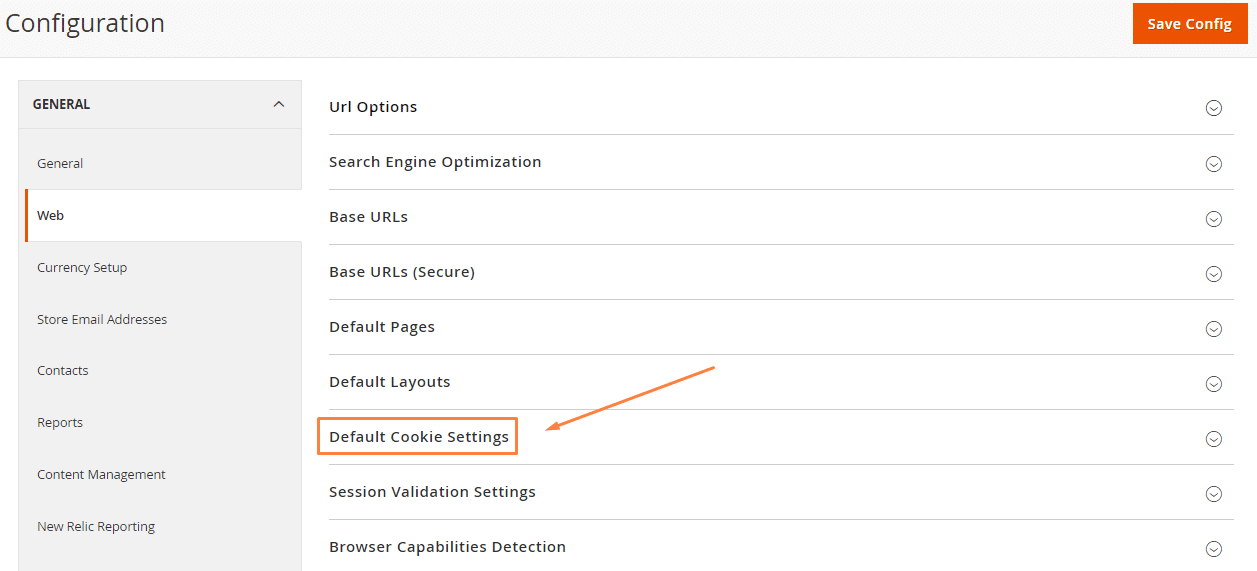
Step 3: Tap on Default Cookie Settings as per guided below:
Step 4: Now you can configure cookies setting by filling the appropriate details according to you.
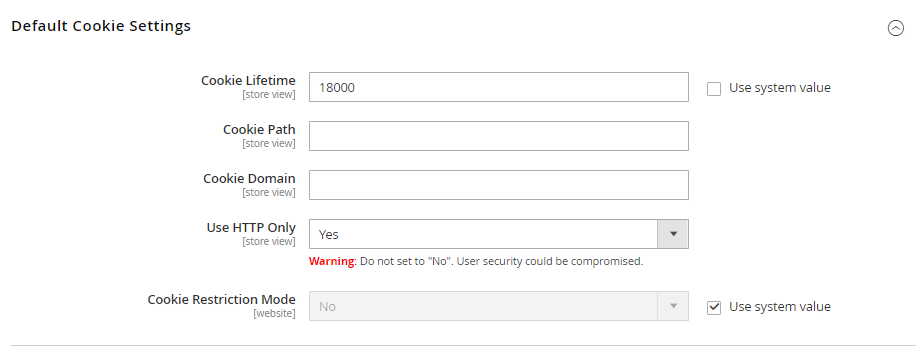
Cookie Lifetime: This is all about how long Cookie files stay on the users browser. Basically, one hour is the by default setting which is equivalent to 3600 seconds.
Cookie Path: You have to enter the cookie path here to make cookies available for some particular folders. You have to enter “/” if you want to make available everywhere on your site.
Cookie Domain: Enter here if you want to enable cookies for some specific subdomain. Enter something like “.domain.com” if you want to enable cookies for all the subdomains. (Verify that should enter “.” before your domain name).
Use HTTP Only: For malware prevention, select “Yes” here. So, it uses the HTTP protocol only and any other protocols are not allowed for example JavaScript.
Cookie Restriction Mode: You have to select “Yes” here.
How to Edit Cookies in Magento 2?
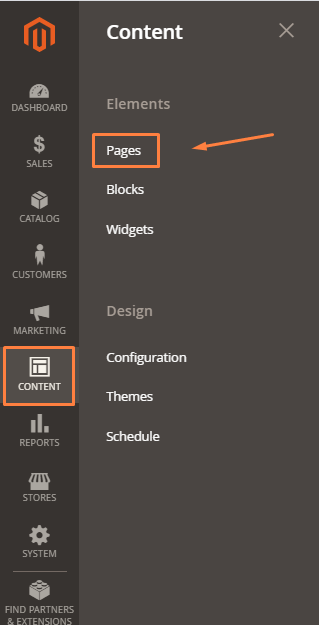
Step 1: On the admin menu click on Content and tap on Pages as per guided in the below image:
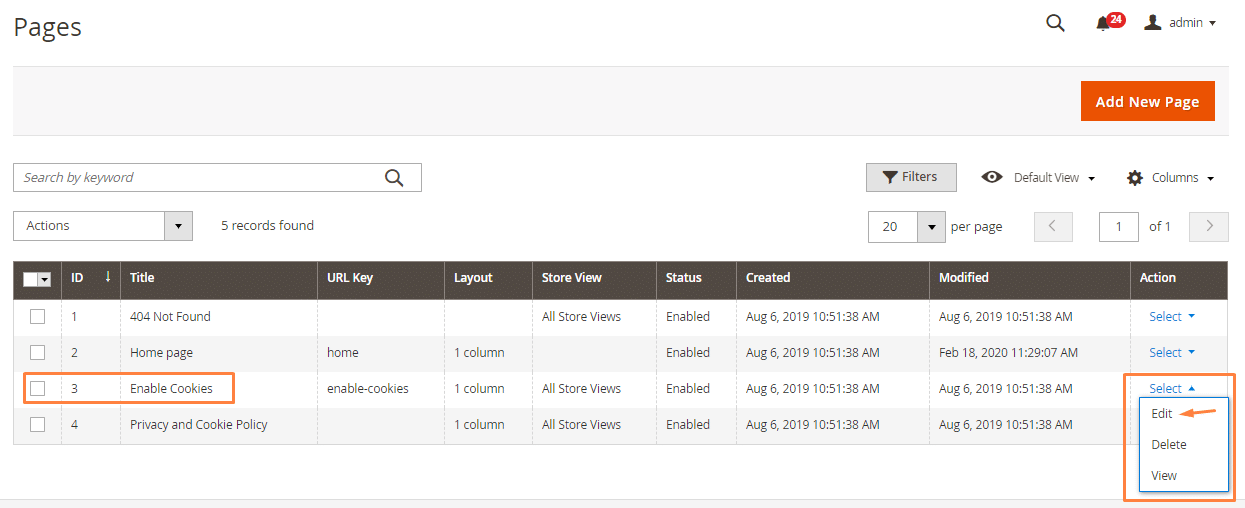
Step 2: Click on Select and tap on Edit for editing cookies.
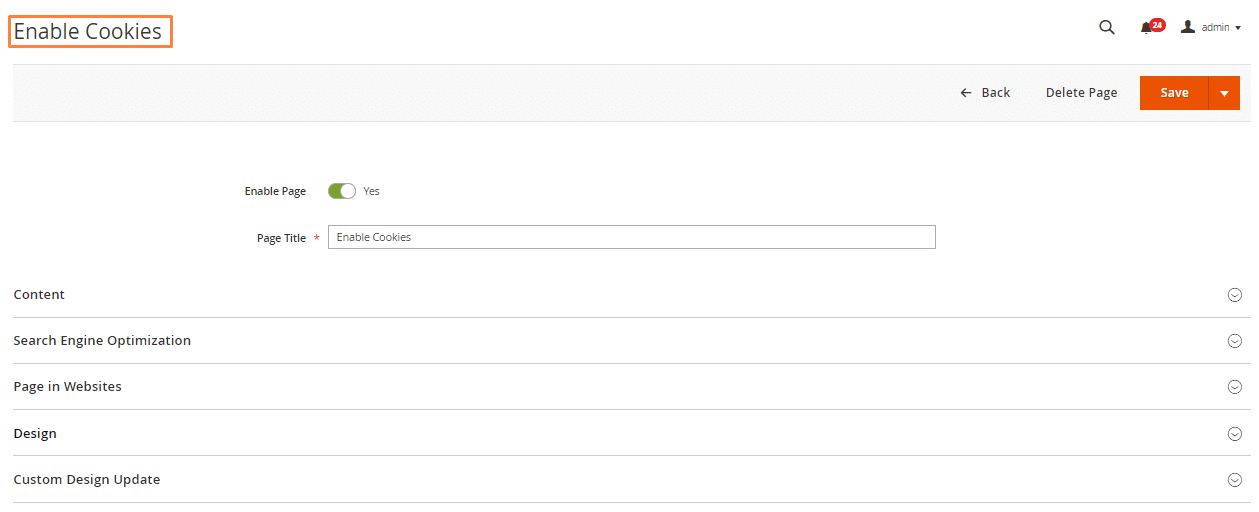
Step 3: Here you can edit your cookie settings if needed.
Conclusion: Therefore, you can now configure and edit cookies in your Magento 2 store by following above mentioned steps. Tutorial explained above is probably the simplest way to configure and edit for Magento 2 Store.
So this is it for today. I hope it helps you. If you face any issues while applying the above steps, then feel free to contact our support team for any help.
Also, Try Magento 2 Cookie Compliance(FREE) by MageComp
The Magento 2 Cookie Compliance extension will help to display a clean, easy informed and simple cookie notification bar on the frontend of your store.

Download FREE Now
Please let us know if you have any specific topics for us to write the blog in the comments section below. It will be highly appreciated. Till then, keep reading our other useful articles in the Magento Tutorial Series.
Happy Reading?

