Hello Magento Friends,
Welcome to Magento Tutorials by MageComp. Today we will learn about How to Enable/Disable Demo Store Notice in Magento 2.
At times it may happen that your Magento store is in demo mode and you do not accept orders from customers temporarily. Reasons for it include, after installation the store is not yet ready to go live, you want to test some functionalities of your store or your store is temporarily under maintenance.
To make visitors aware of the unavailability of your store, Magento provides the facility to display demo store notice at the top of the page. The design and style of demo store notice depend on the theme of your store. Thereafter when your store is ready to accept orders, you can disable the demo store notice.
So let’s discover How to Enable/Disable Demo Store Notice in Magento 2
Steps to Enable/Disable Demo Store Notice in Magento 2:
Step 1: From the Admin Dashboard, go to Content > Configuration > Design.
Step 2: Find the store view to configure and open it in Edit mode.
Step 3: Under the Other Settings option, expand the HTML Head.
Step 4: Find the Display Demo Store Notice field and set it to Yes.
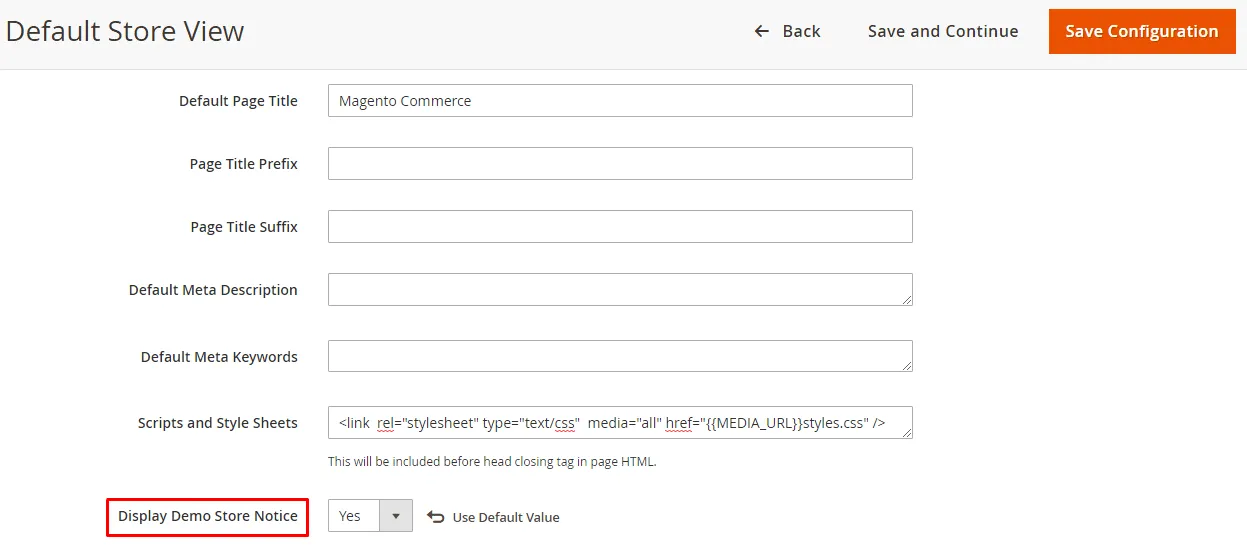
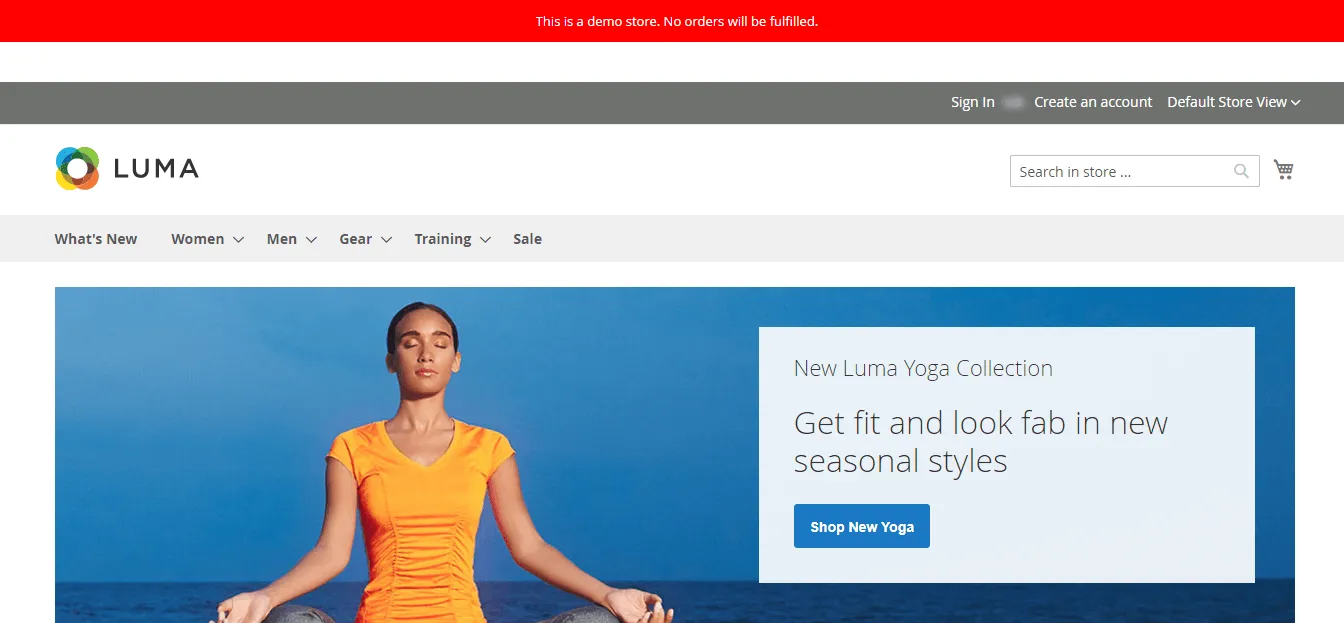
Then click Save Configuration and clear Magento cache. Now, check the store frontend, the demo notice will be displayed as follows:
Next, when your Magento store is ready to go live, set Display Demo Store Notice to No.
Conclusion:
This way you can easily inform customers about your store maintenance mode by the above steps to Enable/Disable Demo Store Notice in Magento 2. Hire a dedicated Magento Developer to fulfill your business needs and develop a fully customized store.

Share the article with other Magento merchants. Stay tuned with us.
Happy Reading!