Hello Magento Friends,
Today I am here with the most useful blog to Configure Braintree Payment Method in Magento 2.
Offering different payment methods to customers helps to improve the user experience of the store. Learn How to Configure a Payment Method in Magento 2. You can also Add Custom Payment Method in Magento 2.
Braintree is one of the popular and secured payment methods. It provides access to PayPal, Venmo (in the US), and credit and debit cards. Braintree payment solution is supported by many countries including the US, Europe, Canada, New Zealand, Hong Kong, Singapore, Australia, and Malaysia.
Here we will learn about Magento 2 Braintree Configuration.
Steps to Configure Braintree Payment Method in Magento 2:
Step 1: Configuration for Braintree Payment Method
- Log in to the Admin Panel of your Magento 2 store.
- Now, move to Stores > Settings > Configuration.
- Then from the left pane expand SALES and select Payment Methods.

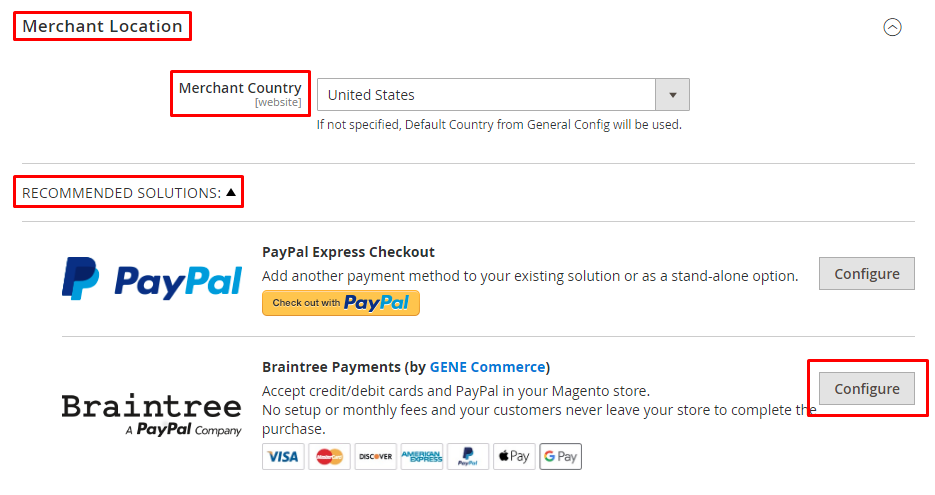
- In the Merchant Location section select the Merchant Country.
- Expand the RECOMMENDED SOLUTIONS tab and click on Configure button for Braintree.
Step 2: Basic Braintree Settings
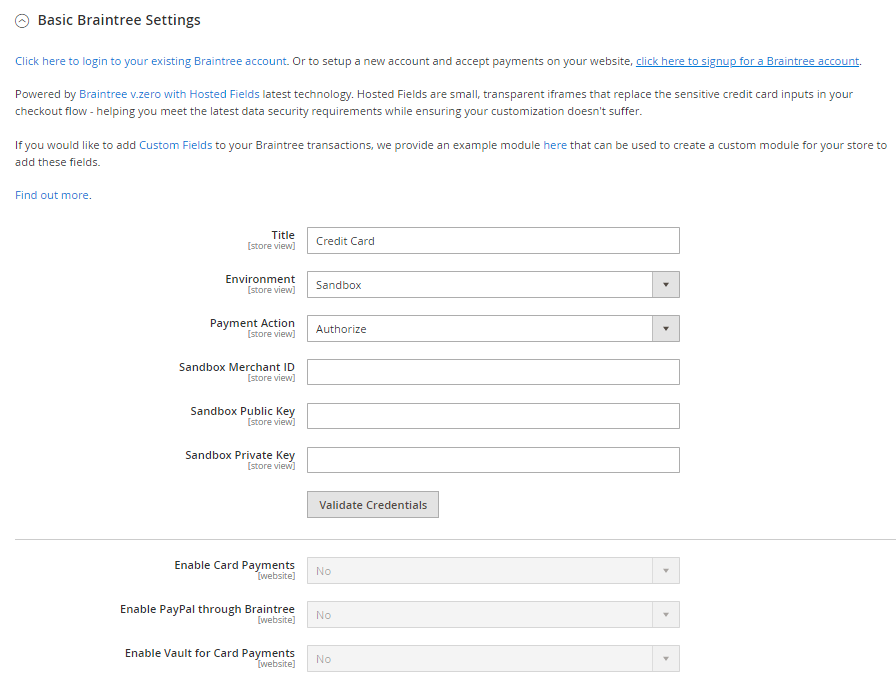
- Title – Set your custom title or use the default one.
- Environment – Set the environment for Braintree settings. Sandbox is for testing and Production is when you are ready to go live.
- Payment Action – Select the Payment Action. Authorize means the approval of the purchase and keeping funds on hold. Intent Sale means withdrawing funds from the customer account straightaway after the purchase.
- Sandbox Merchant ID – Enter the Sandbox Merchant ID from Braintree Account.
- Sandbox Public Key – Enter the Sandbox Public Key from Braintree Account.
- Sandbox Private Key – Enter the Sandbox Private Key from Braintree Account.
- Validate Credentials – Here you can Validate your Braintree Credentials.
- Enable Card Payments – Set Yes if you want to enable Card Payments for Braintree.
- Enable PayPal through Braintree – Set Yes if you want to allow the PayPal payment option for Braintree.
- Enable Vault for Card Payments – Set Yes if you want to store customer credit card information for the future.
Step 3: Advanced Braintree Settings
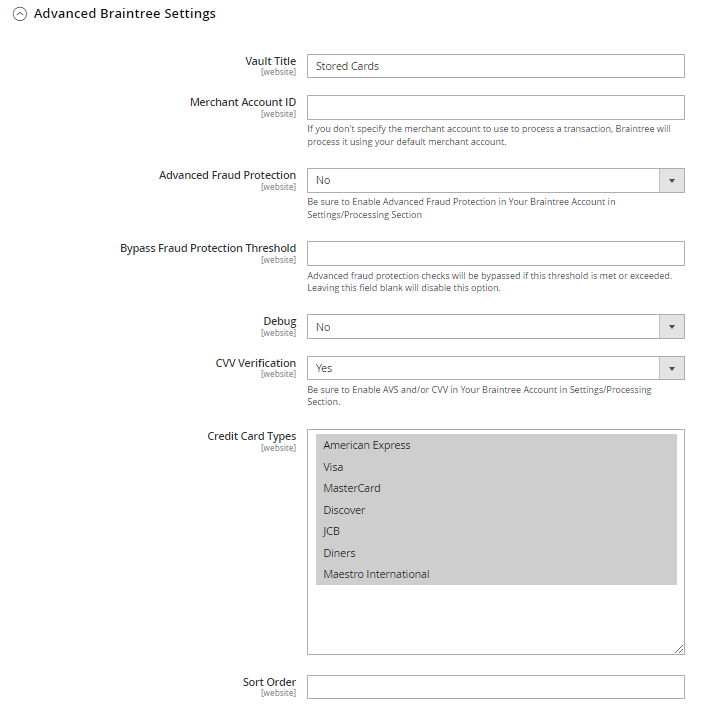
- Vault Title – Set your custom vault title or use the default one.
- Merchant Account ID – Enter your Merchant Account ID from Braintree Account.
- Advanced Fraud Protection – Enable the Advanced Fraud Protection for Braintree from here. Note – Make sure the Advanced Fraud Protection is also enabled from your Braintree Account available in the Settings/Processing section.
- Bypass Fraud Protection Threshold – Advanced Fraud Protection will be avoided if the threshold limit exceeds.
- Debug – Enabling this will save a log file of transactions between your store and Braintree.
- CVV Verification – Set it to Yes to enable customers to enter the 3-digit security code from the back side of the credit card. Note – Make sure the AVS and/or CVV are also enabled from your Braintree Account available in the Settings/Processing section.
- Credit Card Types – Select the types of Credit Cards that can be accepted when a customer uses the Braintree Payment Method.
- Sort Order – Set the order of the Braintree Payment Method to be visible on the storefront with other payment methods.
Step 4: Country Specific Settings
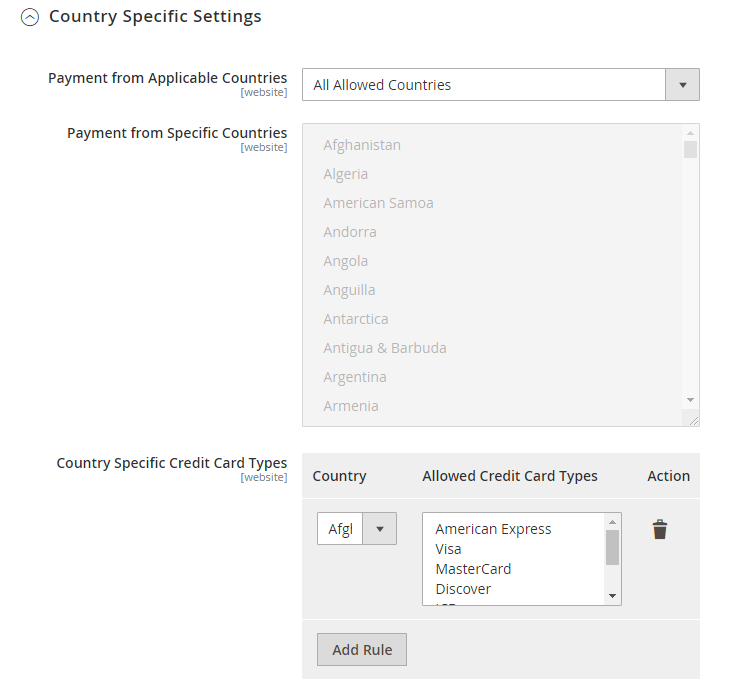
- Payment from Applicable Countries – Select if all or specific countries can use the Braintree payment method.
- Payment from Specific Countries – If you have selected Specific Countries in the above field, here you need to select the countries that are allowed to use the Braintree payment method.
- Country Specific Credit Card Types – Here you need to Add Rule for allowed credit cards based on country.
Step 5: PayPal through Braintree
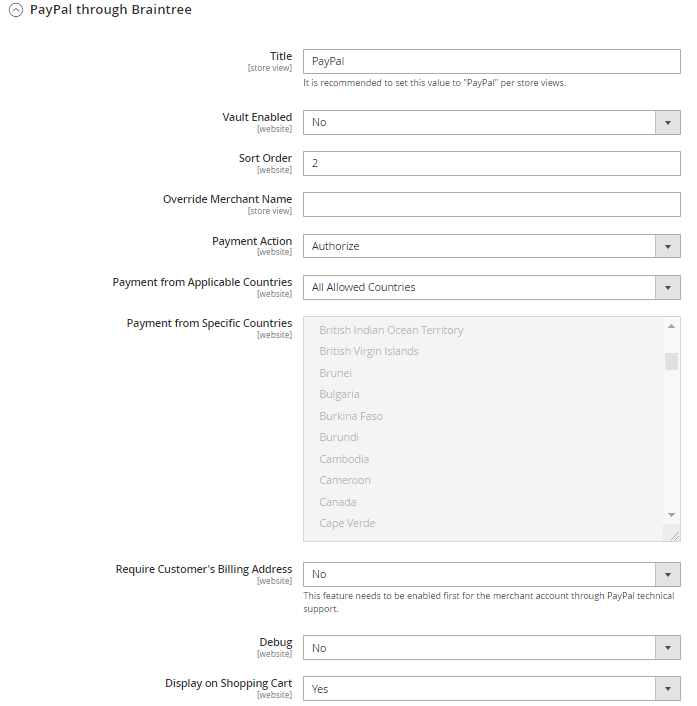
- Title – Set your custom title for Braintree payment through PayPal or use the default one.
- Vault Enabled – Set Yes if you want to store customer credit card information for the future.
- Sort Order – Enter the sort order number for Magento 2 PayPal Braintree payment method.
- Override Merchant Name – Enter the merchant name if you do not want to use it as mentioned in the store configuration.
- Payment Action – Select the Payment Action. Authorize means the approval of the purchase and keeping funds on hold. Intent Sale means withdrawing funds from the customer account straightaway after the purchase.
- Payment from Applicable Countries – Select if all or specific countries can use Magento 2 PayPal Braintree payment method.
- Payment from Specific Countries – If you have selected Specific Countries in the above field, here you need to select the countries that are allowed to use Magento 2 PayPal Braintree payment method.
- Require Customer’s Billing Address – Set Yes to require the customer’s billing address.
- Debug – Enabling this will save a log file of transactions between your store and Braintree.
- Display on Shopping Cart – This will show the PayPal button on the shopping cart as well as the mini cart page.
Step 6: 3D Secure Verification Settings
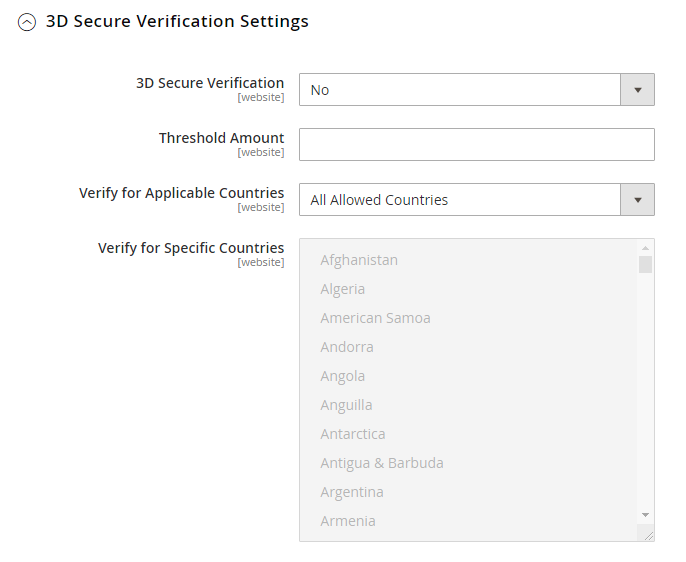
- 3D Secure Verification – Enable verification steps for customers using credit cards that are registered in the verification program.
- Threshold Amount – Set the minimum amount required to activate 3D verification.
- Verify for Applicable Countries – Select if all or specific countries can use the 3D Verification payment method.
- Verify for Specific Countries – If you have selected Specific Countries in the above field, here you need to select the countries that are allowed to use the 3D Verification payment method.
Step 7: Dynamic Descriptors
Dynamic descriptors will appear on the credit card statements sent to customers.
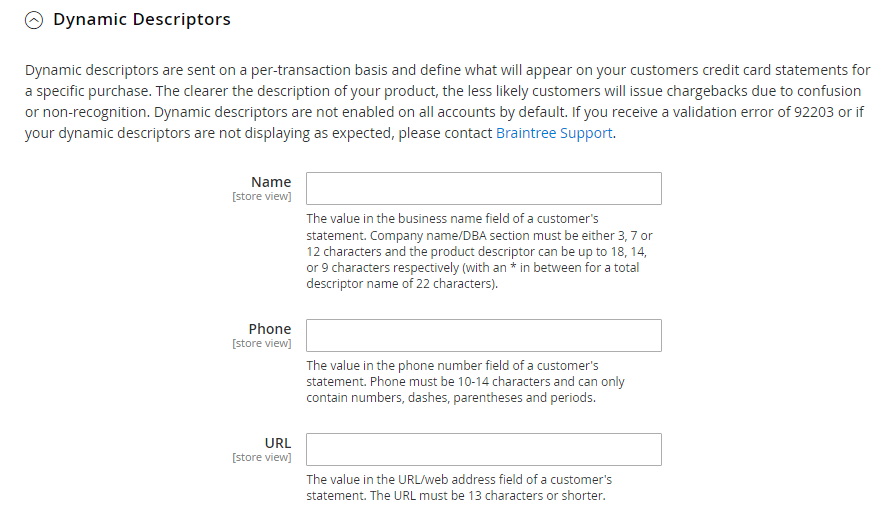
- Name – Set the name of the descriptor. It has 2 parts separated by *. The first part is the name of the company or DBA and the second part is the product.
- Phone – Enter the phone number descriptor for up to 10-14 characters long.
- URL – Enter the URL descriptor which must not exceed 13 characters.
Once you are done with all the settings, click the Save Config button.
Final Words:
This was all about configuring Braintree Magento 2. You can also take advantage of the Payment Gateway Integration Service for Magento 2.4 Braintree payment method configuration.
You can right away connect with me through the comment part if you face a situation like Magento 2 Braintree not working on the front end. Share the Braintree Magento 2 configuration with your friends and stay in touch with us.
Happy Reading!