Hello Shopify Friends,
So you have chosen Shopify to skyrocket your online business. Now it’s time to add products in Shopify.
In this tutorial, you will learn step-by-step instructions to add products to your Shopify store.

How to Add Products to Your Shopify Store?
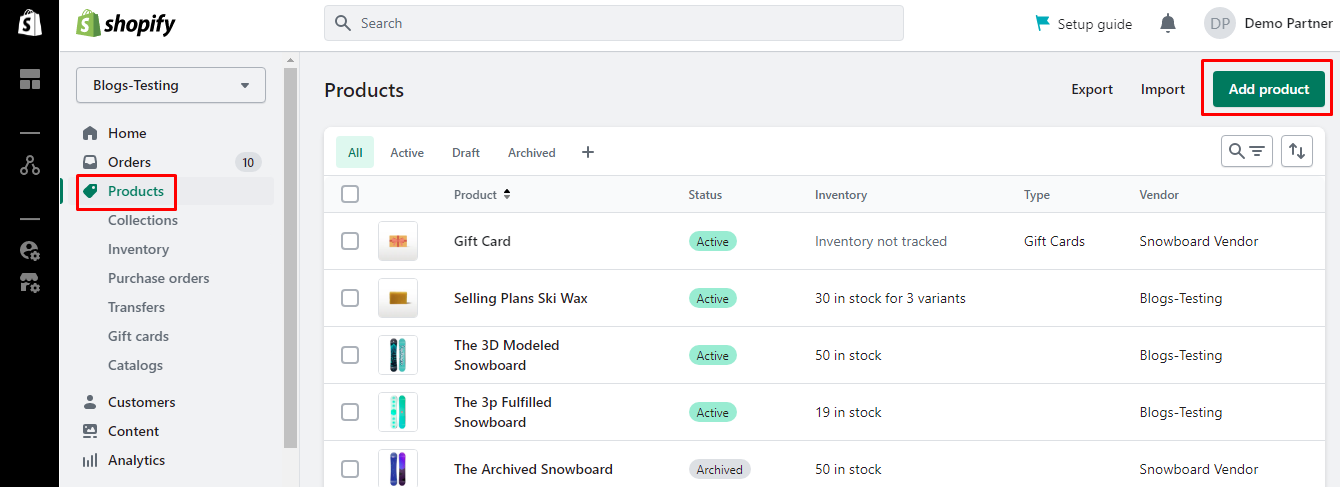
Step 1: Log in to your Shopify Account
From your Shopify Admin Account, select Products from the left menu, and click on Add product button to add products in Shopify.
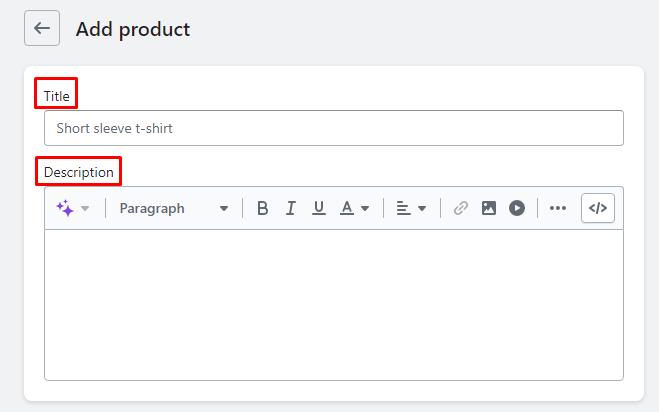
Step 2: Add Product Details
Now you need to enter various product information that will be displayed on your product page.
- Product Title – Add the name of your product in the Title box. The product title must be short and understandable. It must clearly show what the user is looking for to grasp their attention. Be consistent with all the product titles of your store. If you start the product name with color, you should do this for every product. Include SEO keywords in your product titles that users usually search on the web, making it easier to find your product.
- Product Description – The description is the most important part of your product page. Enter detailed information about the product, including its use, features, and other information. Include everything a customer needs to know about the product in the description. It gives you the chance to convince customers to buy your product. Keep a consistent format for the description of all your store’s products. Content is king, so your product description must be rich in content, SEO-friendly, and impressive.
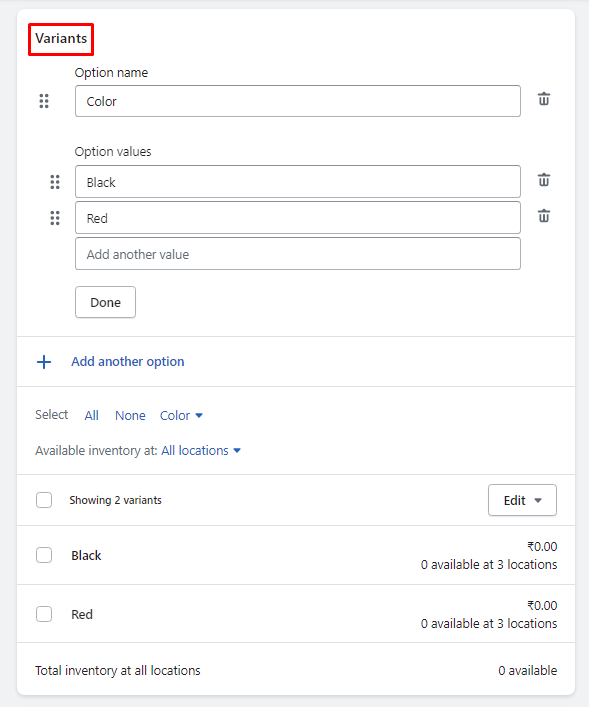
- Variants – Shopify allows adding different variants of the products like size, color, material, and type. You can add the values of the variant. Admin can even edit the variant value’s price, SKU, country of origin, etc., as required.
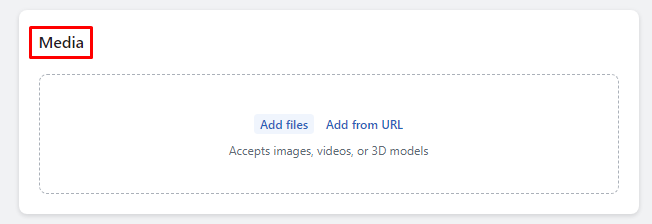
Step 3: Add Media
You can add images, videos, or 3D Model files in this section. You can import them from your computer or make use of URL.
Add high-quality and eye-catchy images of the product. Add multiple images with different angles of each product to let customers know about the product. Product images directly affect the customer’s buying decisions. Ensure you add an alt text of all the product images for SEO ranking.
Also, checkout, How to Add a Product Image on Shopify.
Step 4: Pricing, Inventory, Shipping
- Pricing – Based on brand position, set your product pricing. The prices should be reasonable. If the product is on sale, you can set the discounted price in the Price section and the original price in the Compare-at price section. Cost per item is used to track the product value based on manufacturer cost, shipping, and additional costs. Charge tax on this product option is used if the product is taxable.
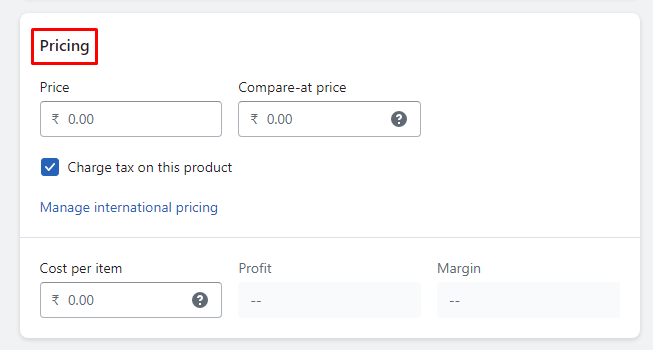
Learn more about Compare at Price For a Product on Shopify.
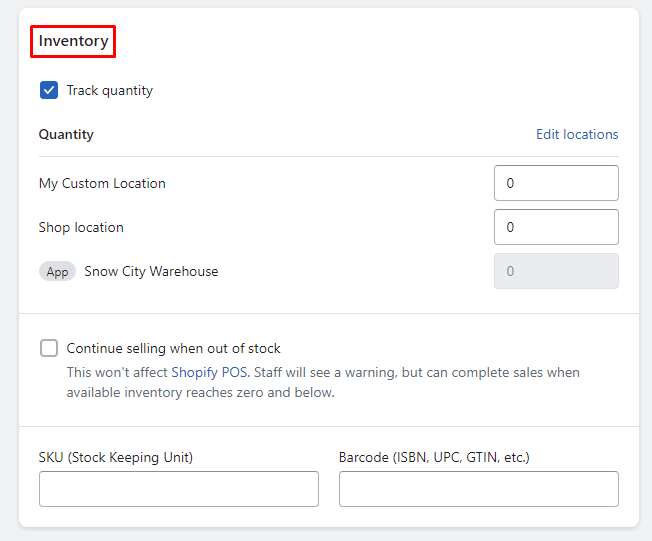
- Inventory – Enter the product’s SKU, which helps organize your stock and fulfill orders smoothly. Every product has a unique SKU (Stock Keeping Unit). Barcode is required if you are reselling an item. To accurately track your inventory, it is necessary to purchase barcodes for each variation, color and size of your items in your listings. Determine whether you want to Track quantity for this product. Select the Continue selling when out of stock option if you can restock the items quickly.
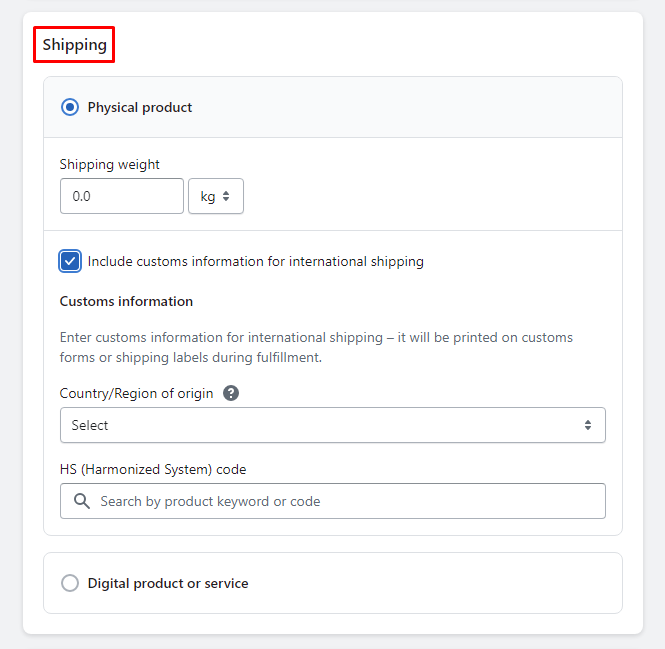
- Shipping – If you are selling a physical product, choose the Physical product option. You can choose the Digital product or service option for service or any other type of product. For physical products, you need to enter the exact Weight of the product with the appropriate measuring unit. The Customs information section is only for products you want to ship globally. Select the Country/Region of origin for the product. Enter HS (Harmonized System) code for custom authorities to apply tariffs.

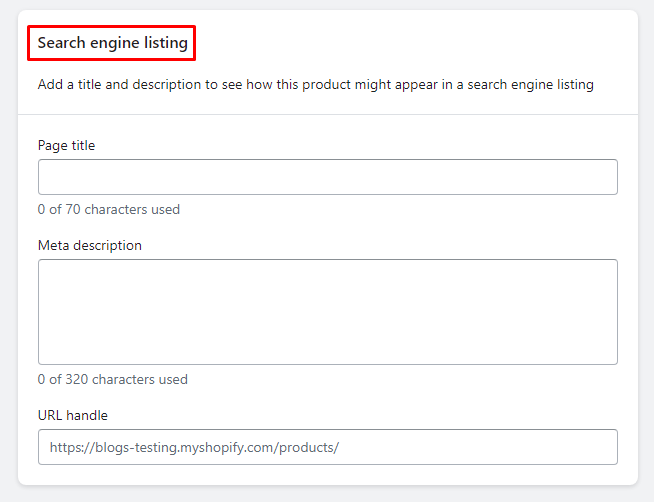
Step 5: Edit Search engine listing
SEO is crucial to attracting traffic to your website. Add SEO-friendly information about your product in this section. This will help to improve search engine rankings and gain traffic. Add Page title and Meta description with relevant keywords to gain search engine advantage. In the URL section, you can edit the website address and add relevant keywords but ensure it has no spaces.
Learn – How to Change Title and Meta Description in Shopify
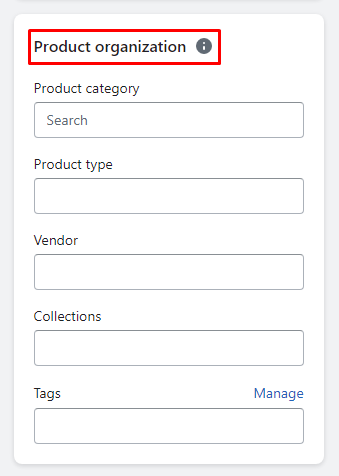
Step 6: Add Product Tags & Collection
You can classify your product from the Product organization section.
- Product category – Select the relevant category of the product.
- Product type – Select the product type based on its nature.
- Vendor – Here, you need to select the manufacturer of the product.
- Collections – Add a product to a collection to make it easy for customers to find it.
- Tags – You can use multiple tags. Tags will help to organize your product and search results.
Set the Status of the product as Active or Draft.
Once you are finally done with the product settings, click Save.

Final Words:
That’s it! Your product should now be added to your Shopify store and ready for customers to view and purchase. Remember to regularly manage and update your products as needed.
You can contact our talented Shopify developers if you need any special assistance.
Share the article with your Shopify friends and stay updated for more tutorials.
Happy Reading!
—————————————————————————————————————————————–
Frequently Asked Questions
(1) What is Shopify?
Answer: Shopify is an e-commerce platform that allows individuals and businesses to create their own online stores and sell products.
(2) How do I add products to Shopify?
Answer: To add products to Shopify, follow these steps:
- Log in to your Shopify account.
- From your Shopify admin dashboard, click on “Products” in the left-hand menu.
- Click on the “Add product” button.
- Enter the product details, such as the title, description, price, and images.
- Set up any additional product information, such as variants, inventory tracking, and shipping details.
- Choose the appropriate product collections or categories.
- Save the product to add it to your store.
(3) What information should I include when adding a product to Shopify?
Answer: When adding a product to Shopify, include the following information:
- Product title: The name of your product.
- Description: A detailed description of the product, including features, specifications, and benefits.
- Images: High-quality images that showcase the product from different angles.
- Price: The cost of the product.
- Variants: If your product has different options like size or color, set up variants to allow customers to choose their preferred option.
- Inventory tracking: Specify if the product is in stock and the quantity available.
- Shipping details: Set up the weight, dimensions, and shipping origin of the product.
(4) Can I add multiple images for a product in Shopify?
Answer: Yes, you can add multiple images for a product in Shopify. When adding or editing a product, you’ll have the option to upload multiple images that can be displayed as a gallery or used for variant images.
(5) How do I manage inventory for products in Shopify?
Answer: To manage inventory for products in Shopify, you can:
- Enable inventory tracking for each product, allowing you to track stock levels.
- Set a specific quantity for each product variant.
- Enable the “Track quantity” option to automatically adjust stock levels when orders are placed.
- Receive notifications when inventory levels are low.
- Use third-party inventory management apps for more advanced inventory control.
(6) Can I import products in bulk to Shopify?
Answer: Yes, you can import products in bulk to Shopify using CSV (comma-separated values) files. Shopify provides a CSV import feature that allows you to upload a spreadsheet containing product information, including titles, descriptions, prices, variants, etc. This can be useful if you have a large number of products to add to your store.