
Hello, Shopify friends.
Welcome to MageComp’s Shopify tutorials.
Today, in this Shopify tutorial, we will learn to add an image to a Shopify blog post.
Let’s begin with the steps.

Steps to Add an Image to Shopify Blog Post
Step 1 –
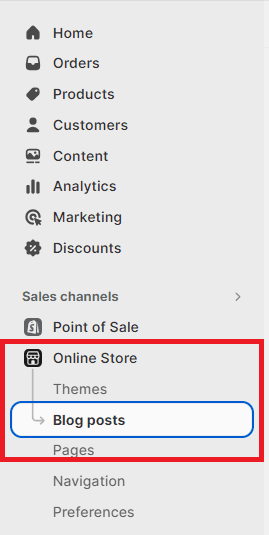
Before beginning with the steps, access your Shopify admin panel by logging into your Shopify account and then go to,
Online Store → Blog posts
Step 2 –
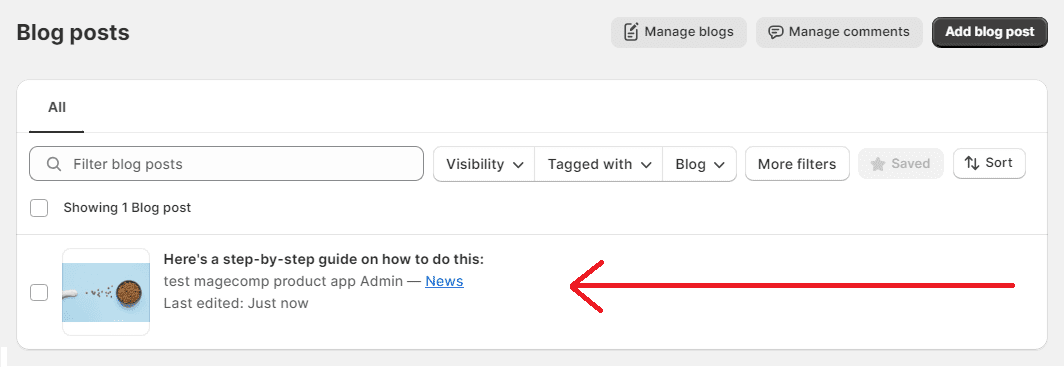
Select the blog to which you want to add an image.
Step 3 –
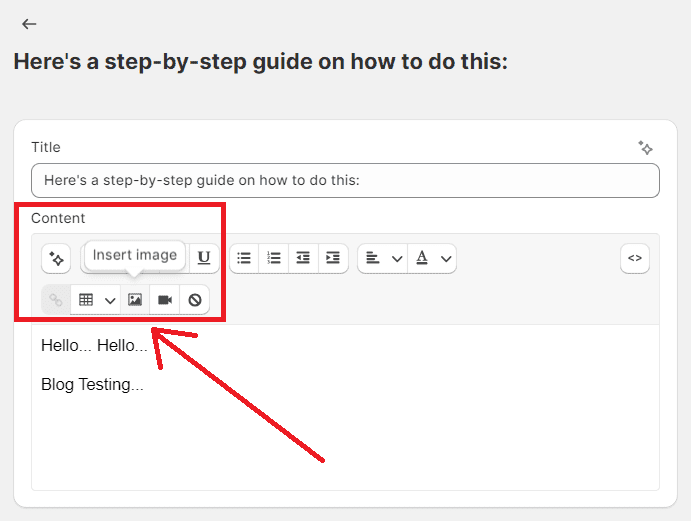
Select the image icon ?
Step 4 –
Select the image that you want to add.

Note – You can choose from your uploaded images, product images, or even paste the URL of the image.

Step 5 –
Once, you have uploaded the image to your blog, Save your changes, and done.
Your blog now has your added image.
Also Read –
How to Add a Blog Post to Your Shopify Store?
How to Schedule Blog Posts in Shopify?
How to Add Blog Author in Shopify?
How To Create a New Blog Template on Shopify?
How To Publish Blog Posts In Bulk On Shopify?
Closing Phrase
This was it, as simple as it can be.
Thanks to Shopify, which has every single that makes a Shopify admin’s work easy, simple, and smooth.
With these steps, you can add any images you want to add to your blog posts and make your blog’s visuals more appealing.

Kindly contact us, if you have any kind of query with the Shopify platform regarding its app or service, or hire our Shopify developers if your Shopify website needs to be upgraded or has to undergo any technical changes.
Happy Shopifying!!!