Hello Magento Folks,
What are you all up to? Today I will explain to you all How to Translate CMS Pages in Magento 2. Also, go through the related topic article
How to Configure Content Delivery Network (CDN) in Magento 2 Let’s Dive In?
Introduction:
CMS page translation is mainly used for creating a translated site that is displayed to the customers on any specific store view respectively. For implementing this firstly you have to Create a new page by using the same URL for assigning it to the store. After that follow the below-given steps.
How to Translate CMS Pages in Magento 2:
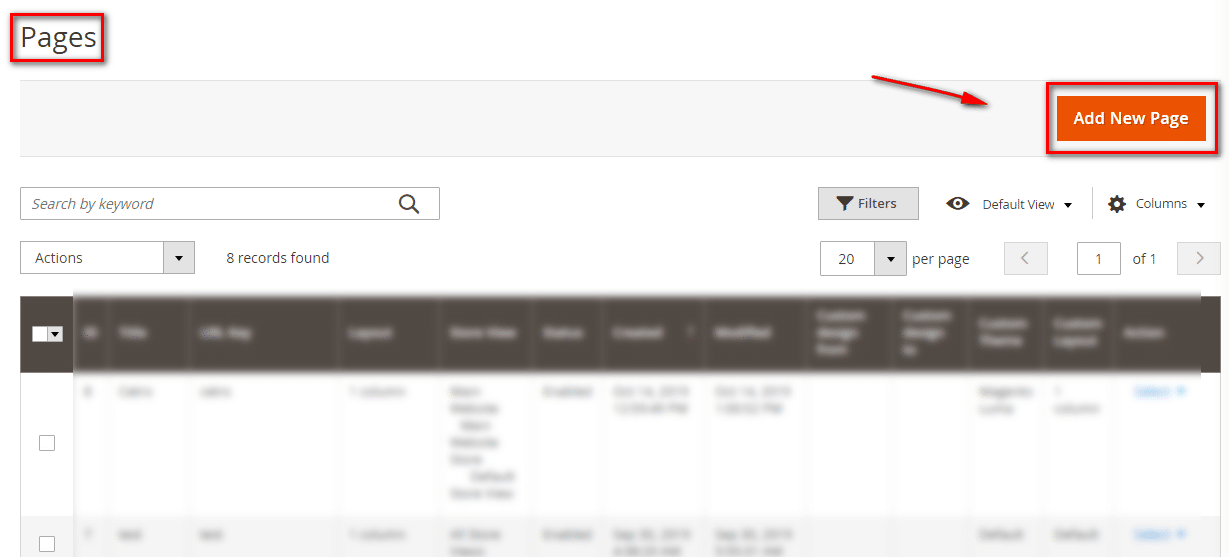
Step 1: Firstly Navigate to Content>Elements>Pages
Choose the page you need to translate and explore it by clicking on the edit mode:
Just Copy the URL Key and go Back button to Pages grid and tp on ADD New Page Button:

Step 2: Fill out the information accordingly.
Enable Page to ‘YES’
Page Title: Add the translated title here.

URL Key: Add the URL that you have copied previously.
Meta Title: Add the title for the translated page
Meta Keywords: Add the keywords for your translated page.
Meta Description: Add the meta description for the translated page.

Store View: Select accordingly for displaying the translation.

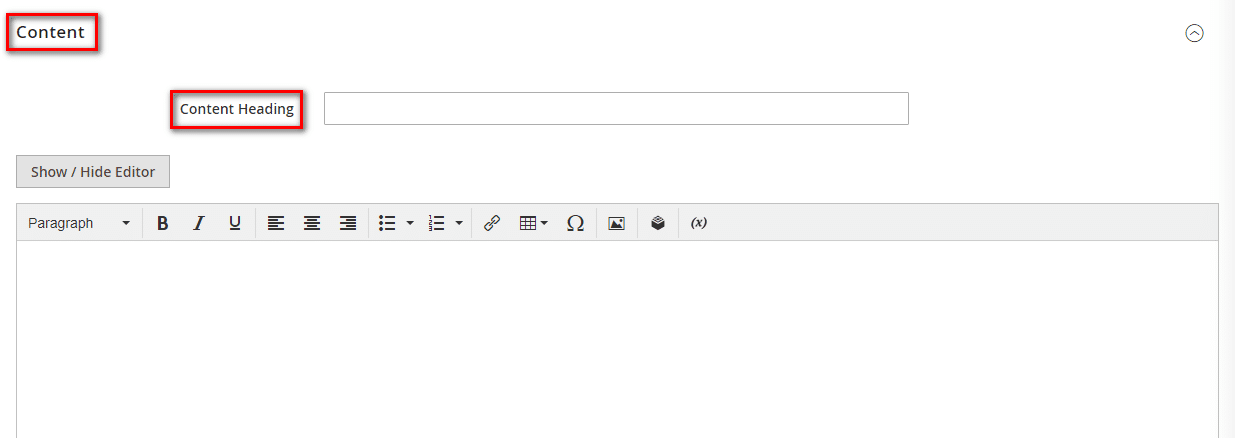
Content: Explore the Content Section and add the translated content.

Design: Create the layout for the translated page.
Step 3: Save the Configuration
Now, for output checkout the frontend and with the help of the Language translator for Magento 2 verify the translation of the store view.
Over to You:
Hopefully, all are able to implement the above-given steps without any queries. In case if you face any queries then feel free to comment down I will solve there or Hire Professional Magento Developer for customization of your Magento store, Make sure to hit the 5 stars if you liked the article for what so ever reason. Share the article with your friends.
Till Then Stay Safe and Stay Connected.
Happy Translating?


