You have worked day and night for creating your dream app. Finally, it’s time to announce your app to the world. But not aware of how to submit your app to the App Store?
Get a readymade Mobile App for your store
Submitting your app to the App Store can be a complex task. But with the aid of this guide, it can be a lot easier. This is a detailed guide for you to swimmingly submit your app to the App Store.
Without further ado, let’s start right away.

How to Submit Your App to the App Store
Create Your Apple ID
The first and foremost thing you need to do in submitting your app to the App Store is to create your Apple ID. This Apple ID will be used to access all the services offered by Apple.

Enroll in Apple Developer Program
The next step towards submitting your app to the App Store is signing up for the Apple Developer Program. You can sign in for the Apple Developer Program utilizing your Apple ID.

Membership of the App Developer Program will have the following benefits:
- Tools and resources required to develop and distribute the app
- Provide access to beta software
- Complete set of services to deliver advanced features
- Testing tools for the App
- Technical support from experts
- Analytics tool for App and advanced capabilities
Sign in to App Store Connect
App Store Connect is a website where you will manage everything you want to do with your app in the App Store. Log in to App Store Connect with the help of your Apple ID.

Make Your App Ready for Submission
Before submitting your app to the App Store, you need to undergo the app certification process. The process involves a review of your app by a person in accordance with the App Store Review Guidelines. Go through this document and make sure it follows the guidelines because the reviewer will judge your app according to this policy.
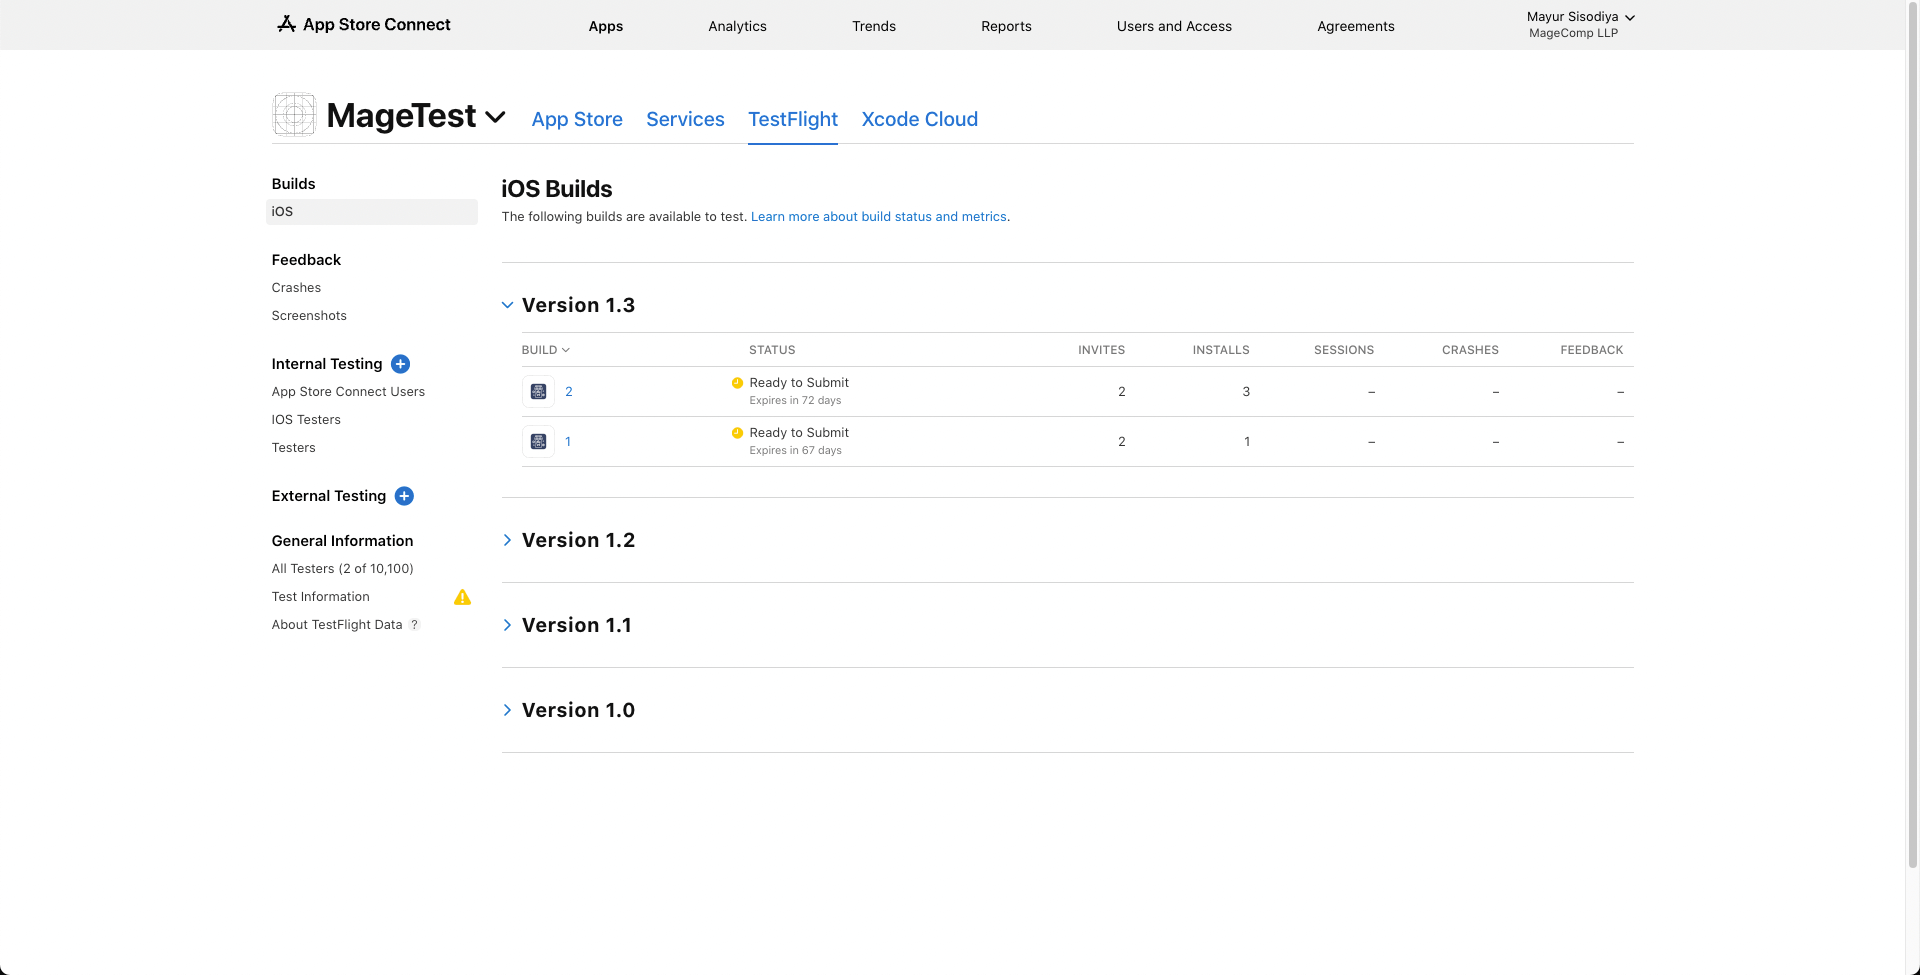
Other than the App Store Guidelines, make sure your app is error-free. If the judge finds errors in your app, he/she is going to reject your app for the App Store. Hence, testing is very necessary. Do not just test your App simply. Perform testing in unusual conditions like low network, low storage, older devices, etc. Take the help of your friends and family in testing your app. TestFlight can help you invite testers and give feedback for your app before it gets released to the App Store. It allows inviting up to 10,000 testers using their email ID.
Create App Store Listing Using App Store Connect
Follow the below steps to create an App Store listing
Step 1: Log in to App Store Connect.
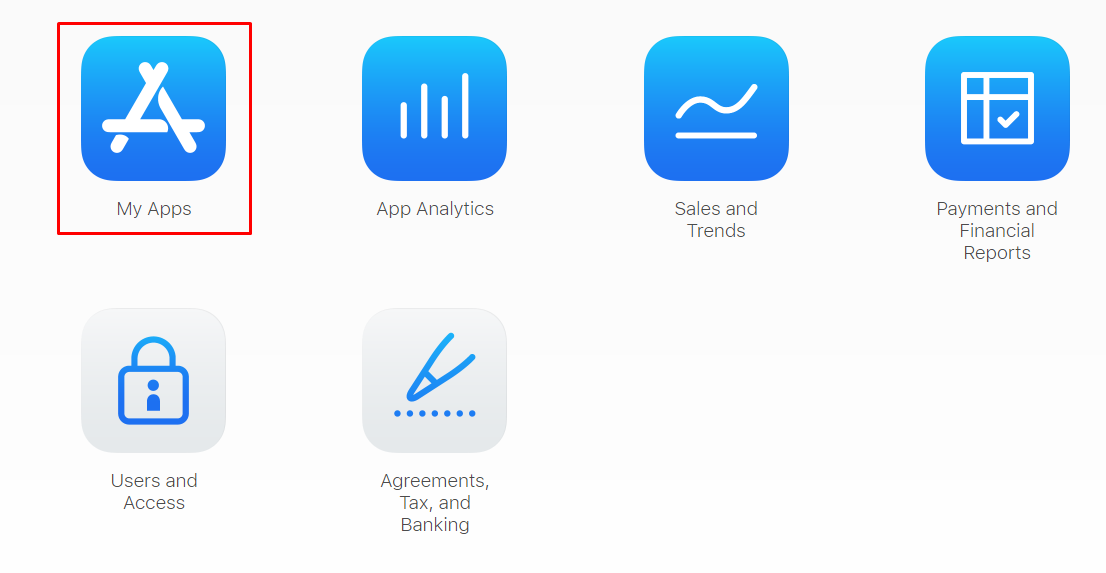
Step 2: From the App Store Connect Dashboard, select My Apps.
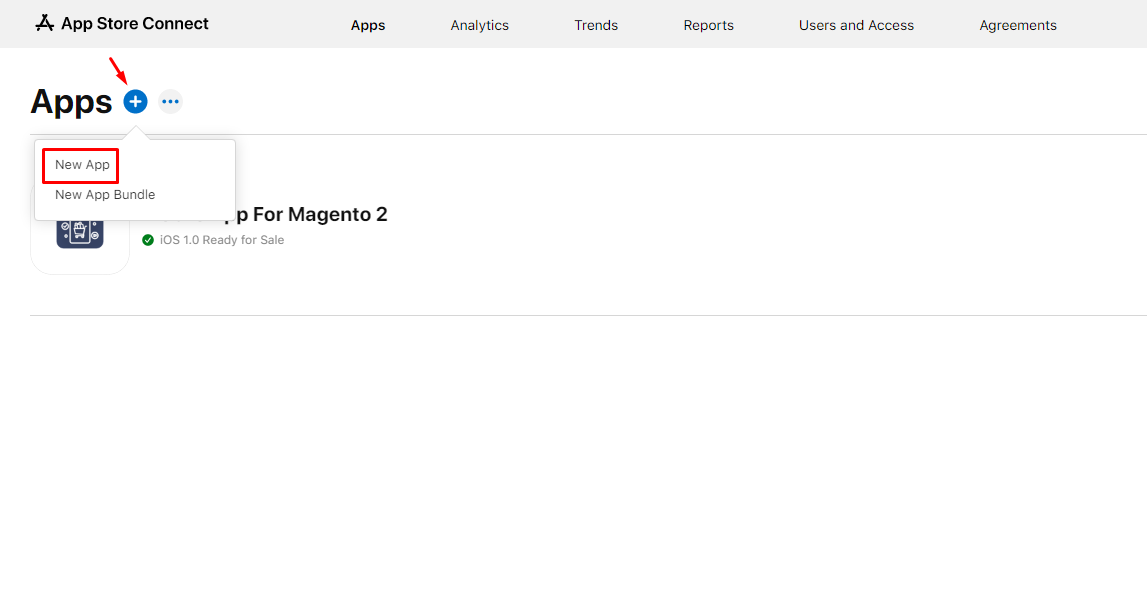
Step 3: Now, click the “+” sign in the upper left corner and select New App.
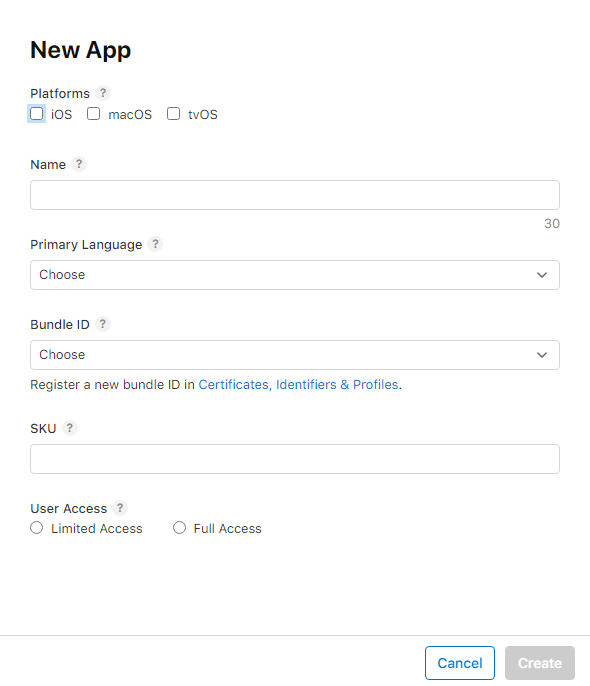
Step 4: Select the platform for which your app will be available. Fill in all the other information asked about your app like name, language, bundle ID, SKU and user access. If you are not sure about input for the field, you can use the “?” sign to know more. After you are done click on Create.
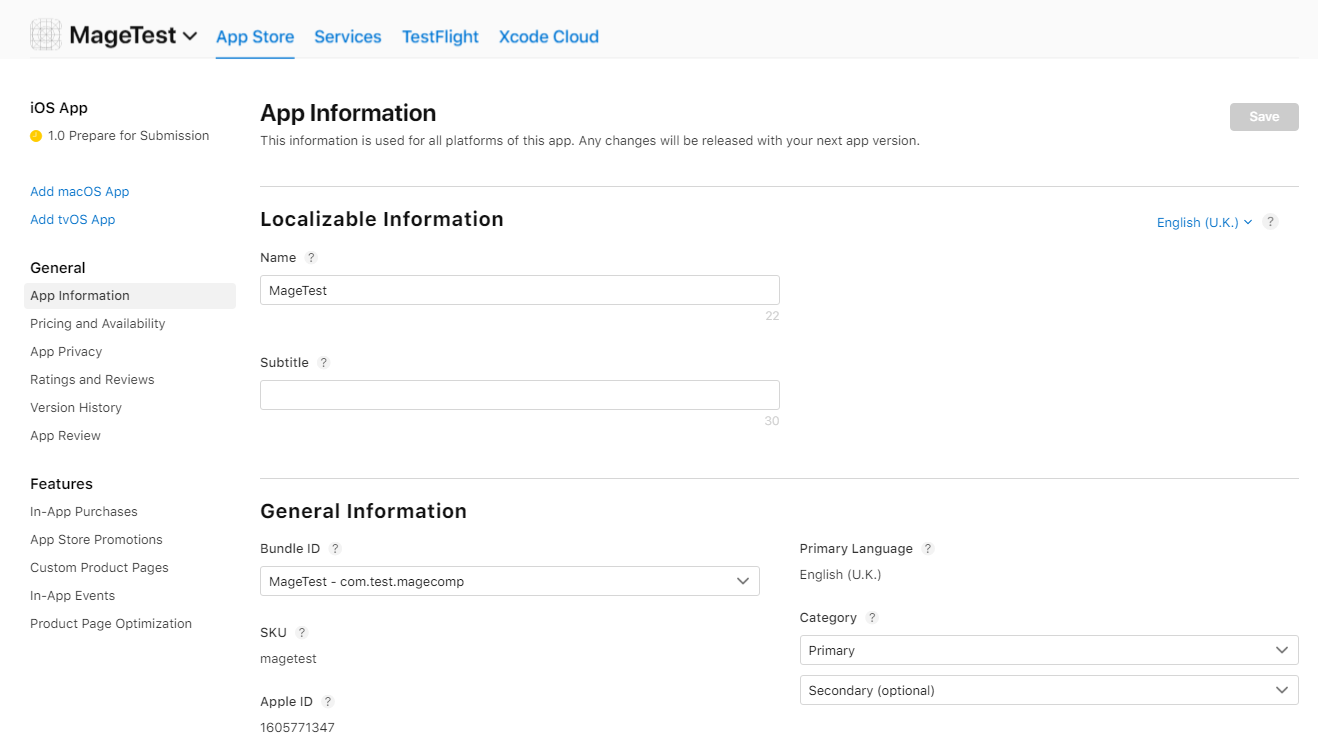
Step 5: Select App Information from the left panel. Now add the localizable and general information for your app including subtitle and category.
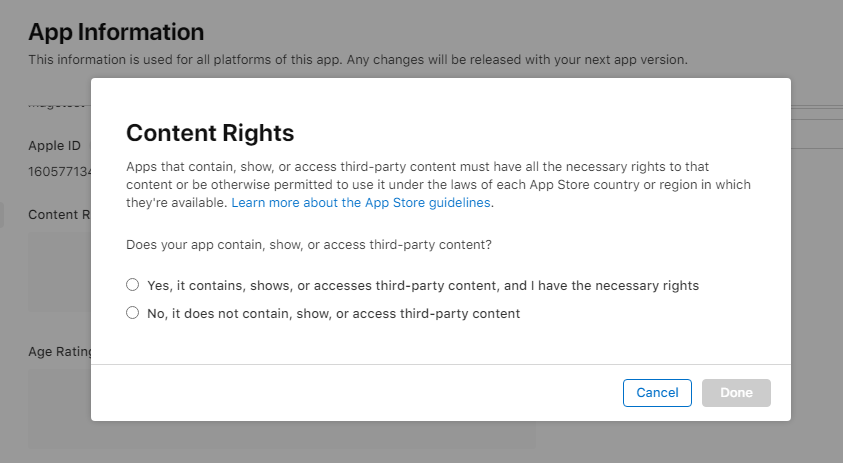
Define content rights for your app.
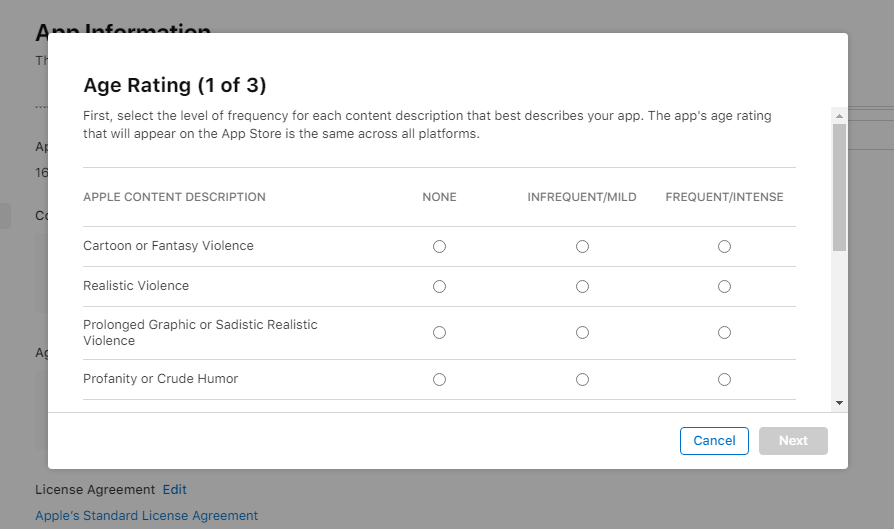
Define Age Rating for your app
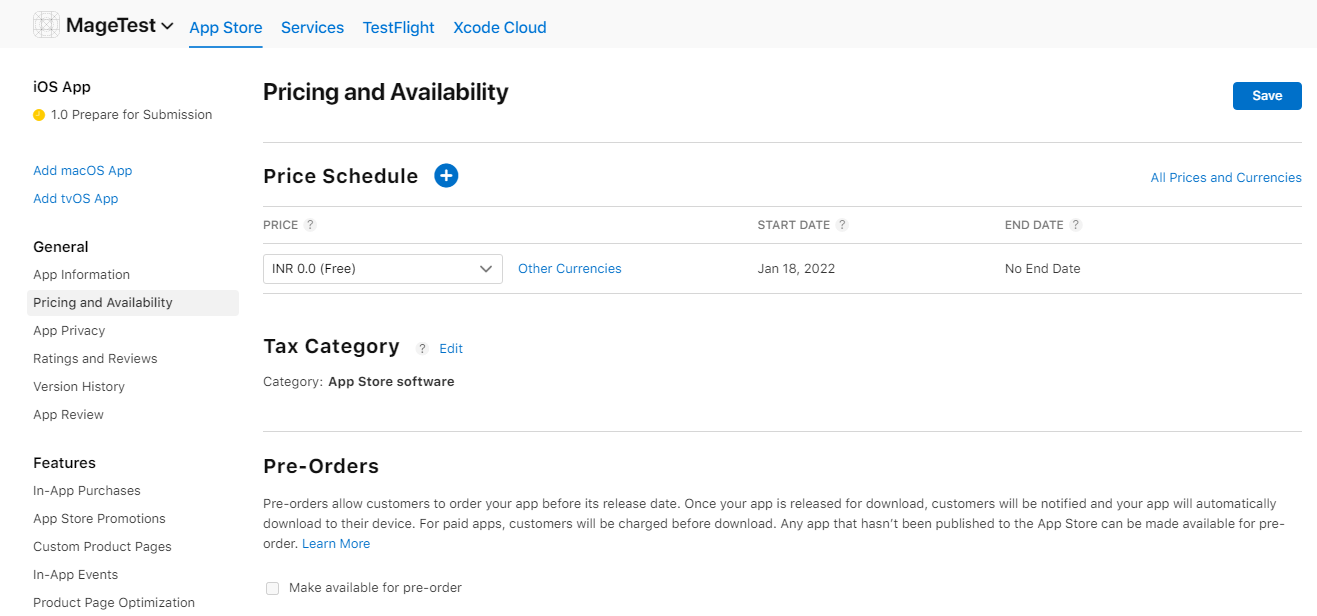
Step 6: Now from the left panel select Pricing and Availability. Define the pricing for your app and other required details.
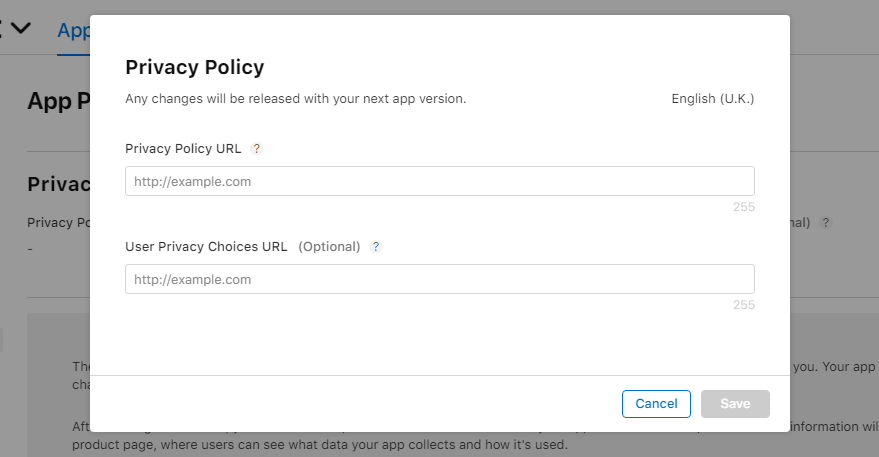
Step 7: Next is App Privacy. Enter the Privacy Policy URL. Use an online privacy policy generator to help you want to enter here.
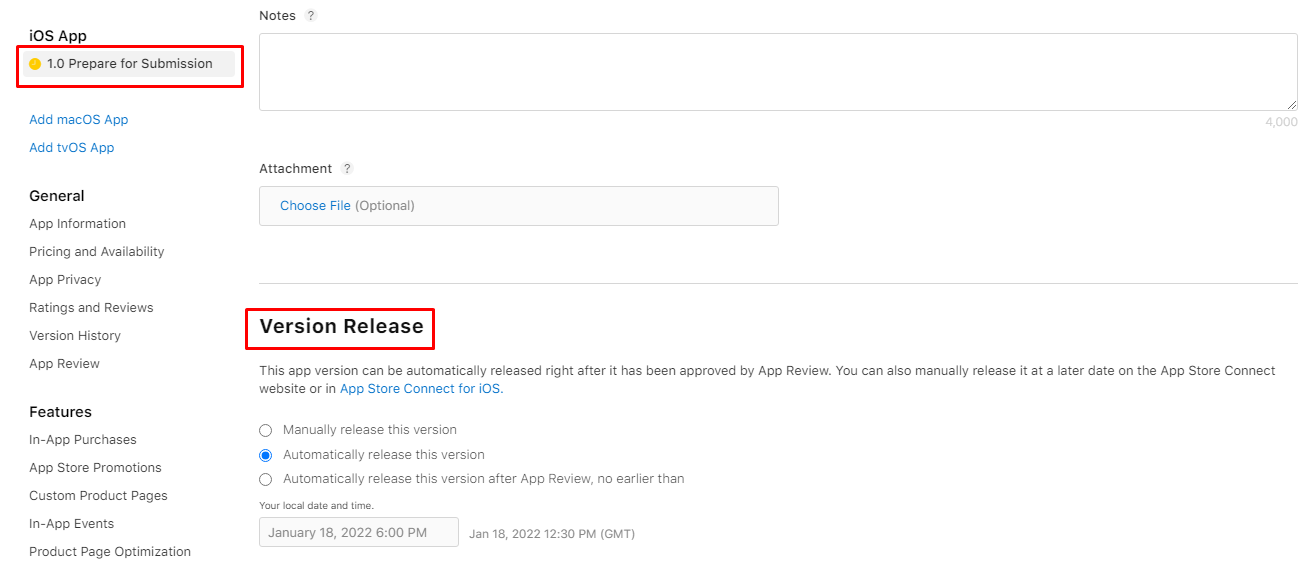
Step 8: Next, from the left pane select 1.0 Prepare for Submission. Scroll down and in the Version Release section, select how the app will be released once it passes the certification process.
- Manually – Go to App Store Connect for releasing the app.
- Automatically – Automatically release the app.
- Specific Date – Schedule the app release date.
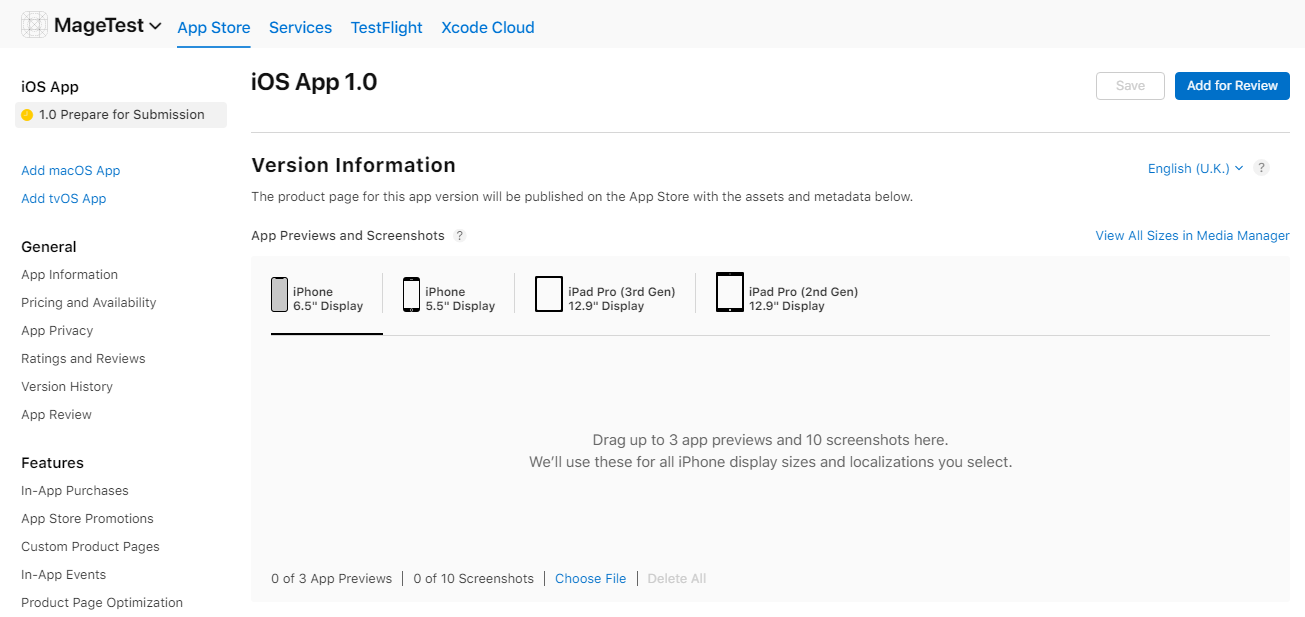
Upload App Store Screenshots and Previews
You must visually connect with users using images and videos. For this App Store permits adding previews and screenshots.
Preview is a short video from your app. Check – App preview specifications
Screenshots are images that illustrate the functionality of your app. Check – Screenshot specifications.
Make sure you abide by the specifications provided by the App Store to reduce the chances of your app being rejected.
The App Store allows adding previews and screenshots separately for 4 different screen sizes. You can add up to 3 App Previews and 10 Screenshots for each display.
Upload Using Xcode
Step 1: Add your developer account to Xcode.
Go to Xcode > Preferences > Accounts.

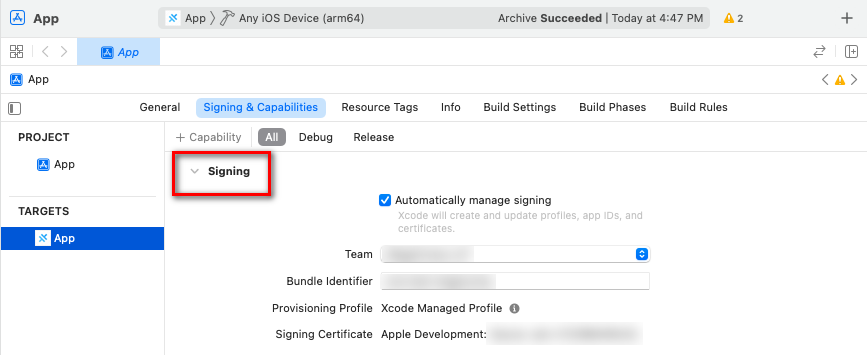
Step 2: Code Signing.
Go to the Signing & Capabilities section. Checkmark the Automatically manage signing checkbox.
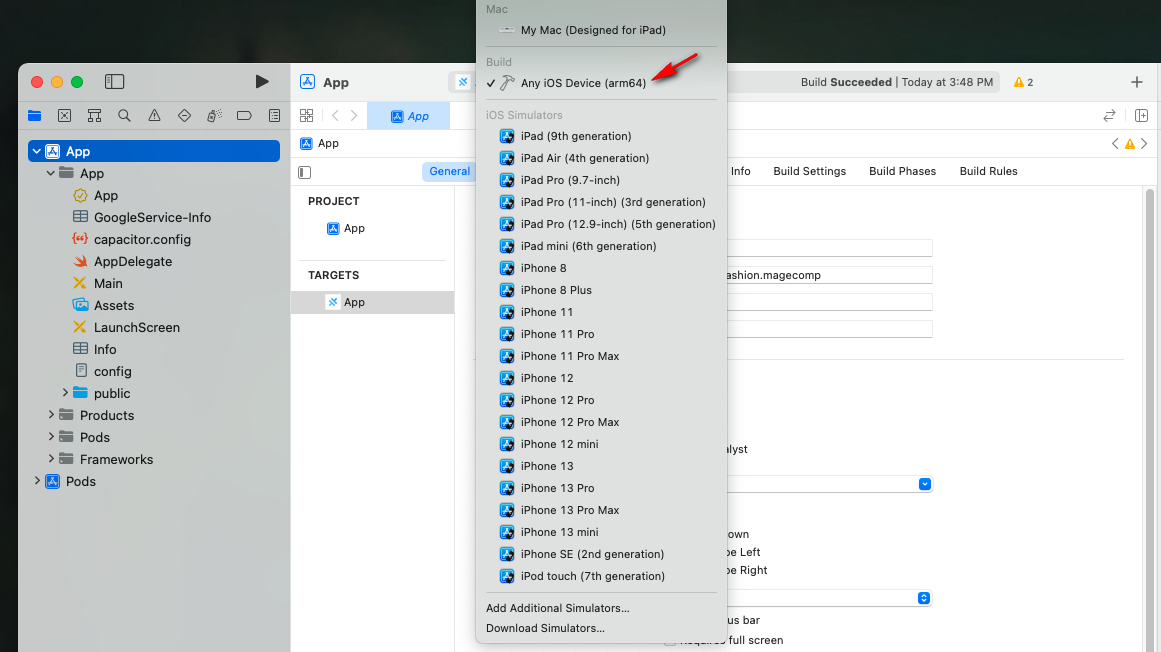
Step 3: Publish your app with Xcode 13.
From the list of simulators select Any iOS Device.
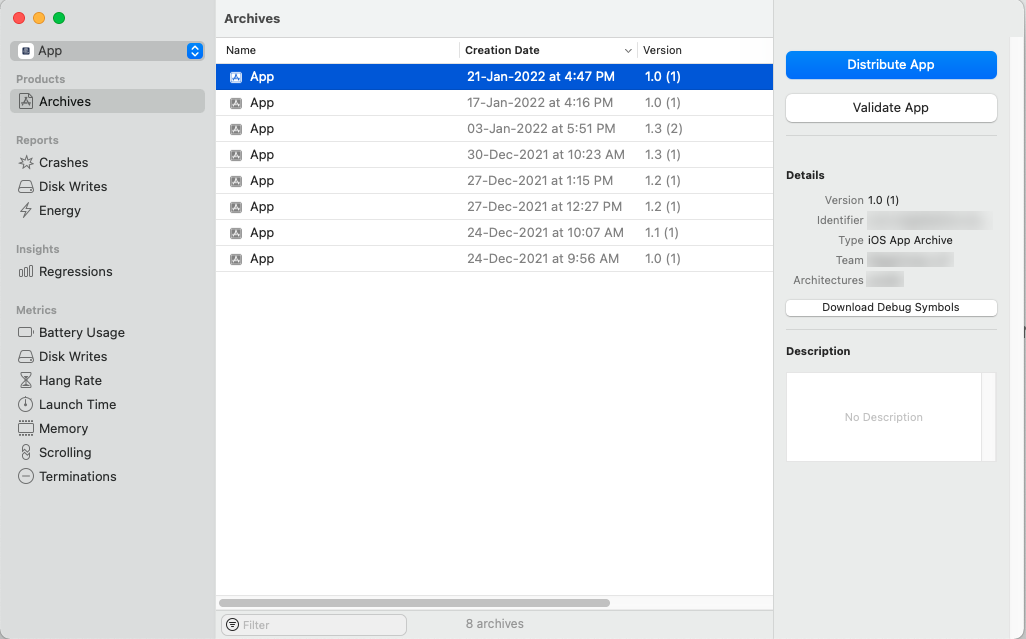
Now go to Product > Archive. This will bundle your app. It will require some time to process based on the size of your app. Here you can manage all the archives generated.
Select the archive and click on Distribute App from the right panel.
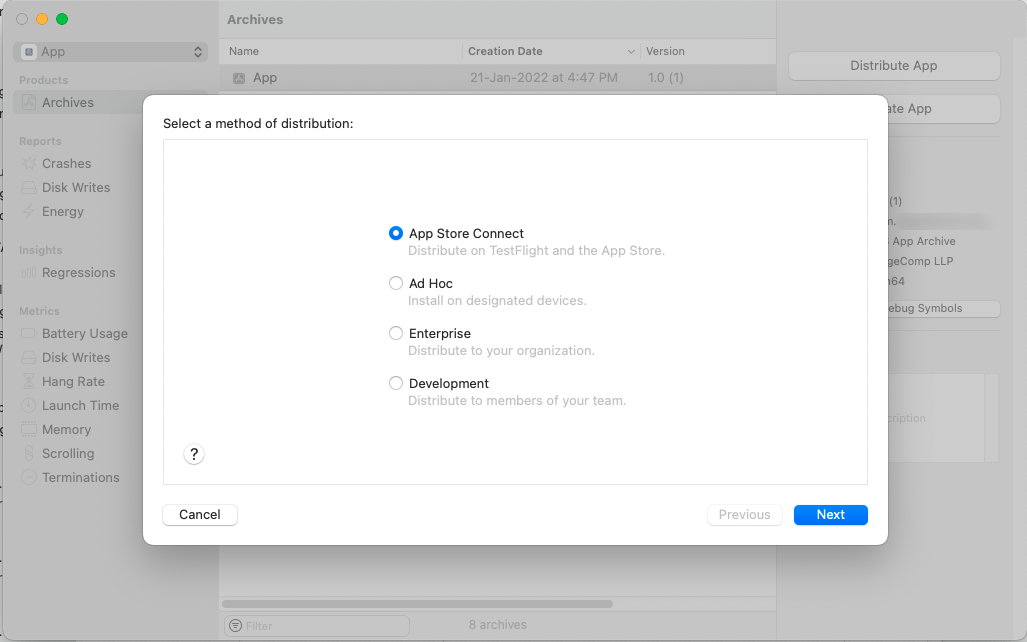
Select the distribution method for your app
Then you will be prompted to select the method of destination for your app.
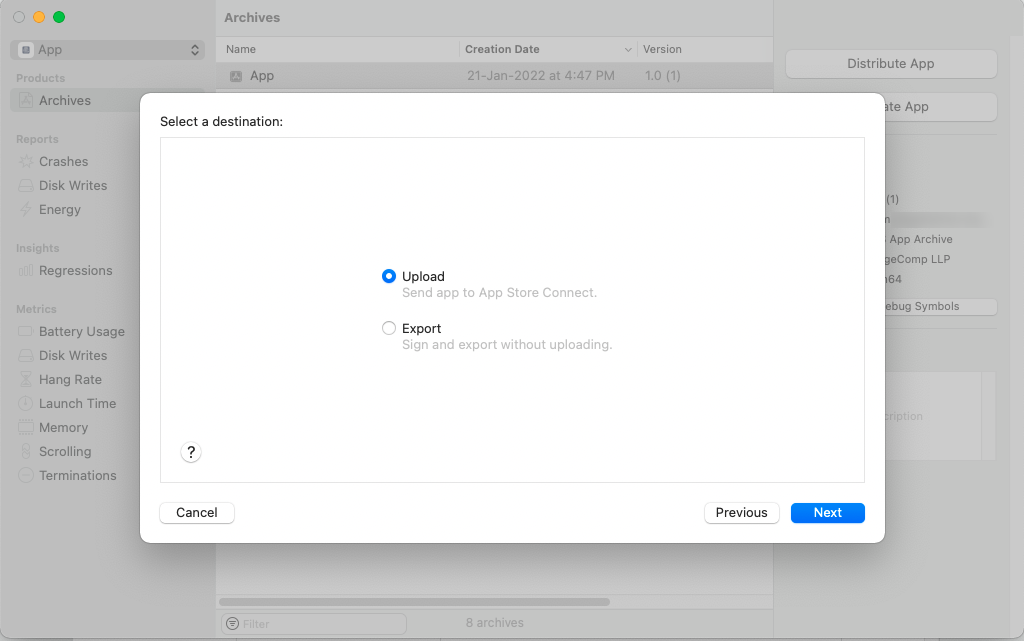
After completing these steps, if Xcode does not find any problems with your app, it will move to the upload process. The upload time will be dependent on the size of the archive and network strength.
Submit App for Review
Now it’s the final step towards publishing your app to the App Store.
The app archived to Xcode will take a little while to process by App Store Connect.
When you hit the Save button, the app gets submitted for review.
Now you have got to wait for the App approval. The review process will take a few hours or days.
Once it gets approved, you will get an email. So all you can do is stay tuned with your inbox.
Yay! Your app is ready to download from the App Store! You can keep a watch on downloads, sales, ratings and more with the help of App Store Connect.
Final Say:
Hence, this was everything about submitting your app to the App Store. If you have submitted any app, please share it in the comment section below. Share the article with your friends and hit 5 stars if you found the tutorial informative.