Hello, Hola, Bonjour, and Namaste, Shopify merchants. ?
Welcome to MageComp Shopify tutorials. ?
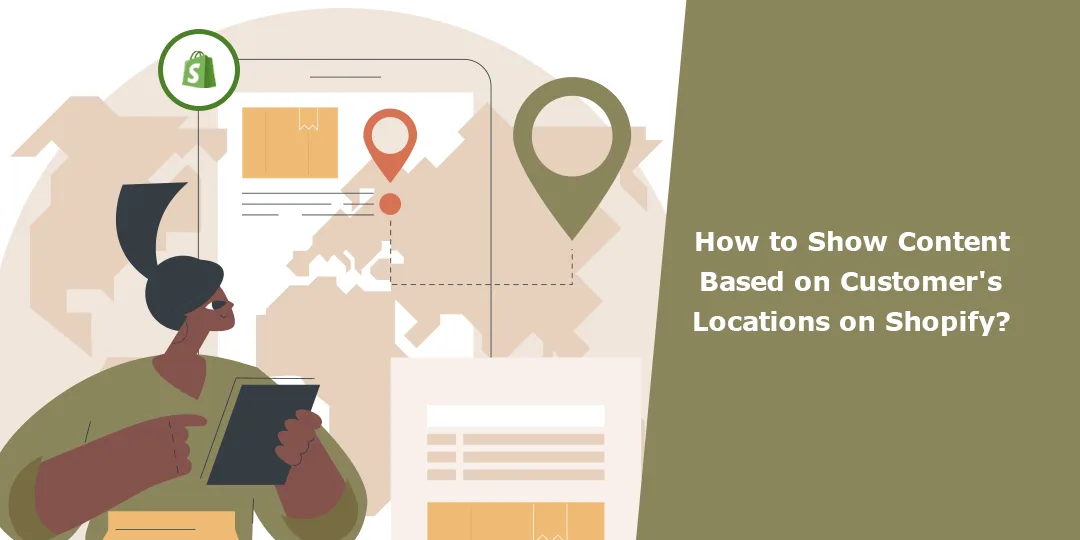
Today, we are here with one of the most awaited and demanded Shopify tutorials: how to show Shopify website content based on the customers’/visitors’ location.

Shopify merchants that have an audience base spread all around the world face one common query – showing their website in the native language of the visitor or the customer. If you also have the same query, by the end of this tutorial, you will have got your answer. Keep Reading!!!
What Does Showing Shopify Website Content Based on Customers’ Locations Mean?
Showing website content based on customers’ location, often referred to as “geotargeting” or “geo-targeted content,” is a technique used by websites and online platforms to customize the content that visitors see based on their geographic location. This customization is done by detecting the user’s IP address, GPS coordinates, or other location data and then delivering content that is relevant to or specific to that particular region or country.
What are the Benefits of Showing Website Content in Customers’ Local Language?
Showing website content based on customers’ location, often referred to as geotargeting, offers several benefits that can enhance the user experience and improve the effectiveness of your website. Here are some of the key advantages:
Personalized shopping experience
Geotargeting allows you to deliver a personalized experience to visitors. When users see content relevant to their location, they are more likely to engage with your website, leading to increased user satisfaction and a higher likelihood of conversion.
Relevancy
Tailoring content to a user’s location makes it more relevant. For example, showing local news, events, or promotions can capture the user’s attention and encourage them to explore further.
Enhanced user experience
Geotargeting helps in providing a seamless and relevant user experience. Visitors don’t have to sift through irrelevant content or struggle to find local information.
Benefits local SEO
If you have a physical presence or operate in specific geographic areas, geotargeting can help with local search engine optimization (SEO). It can improve your website’s visibility in local search results, increasing the likelihood of attracting local customers.
Boosted conversion rate
When users see products, services, or promotions relevant to their location, they are more likely to convert. This can lead to higher sales and engagement rates.

Better advertising opportunity
If you run advertising campaigns on your website, geotargeting can help you display location-specific ads, which can be more effective and lead to a higher click-through rate.
Competitive Benefit
Providing a location-specific experience can set you apart from competitors who do not utilize geotargeting, giving you a competitive advantage.
Show Website Content Based on Customers’ Location
Step 1 –
Log in to your Shopify account and navigate to
Shopify admin panel → Settings → Checkout
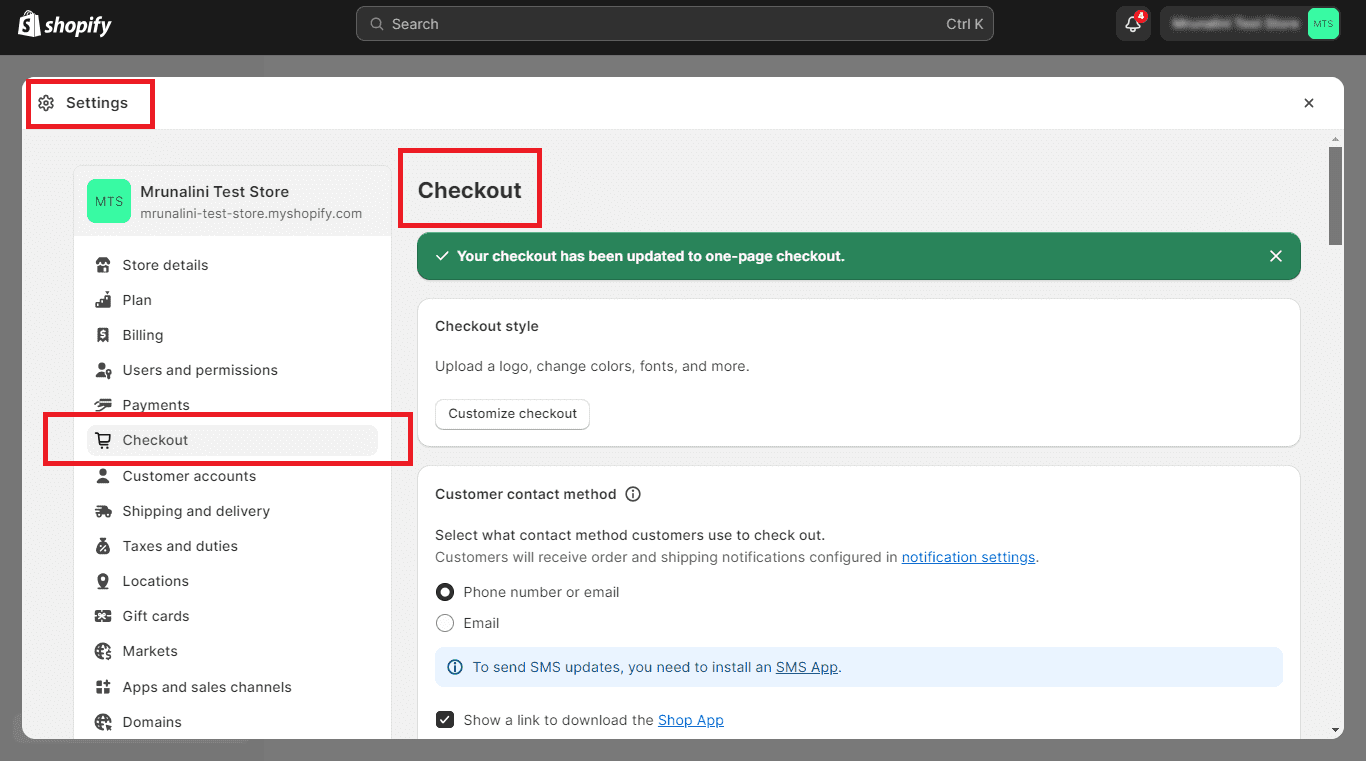
Step 2 –
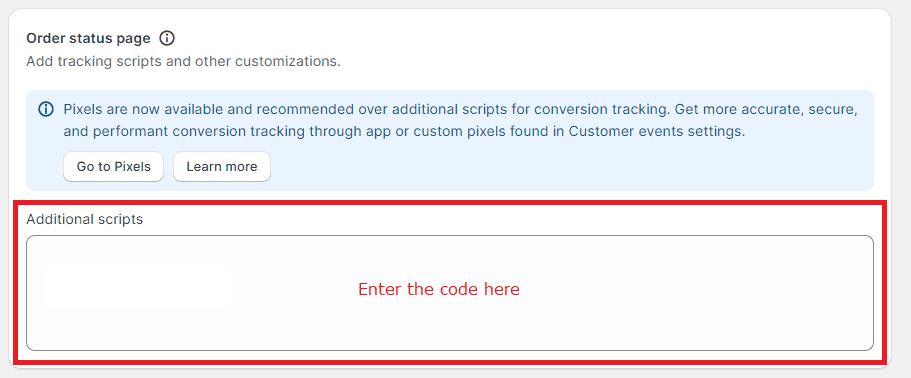
Scroll down to the Checkout tags page until you reach the order status section. Just below the order status page, you will find Additional scripts where you have to enter the code that will help your website show location-based content to your customers.
Step 3 –
Paste the following code into this field. ?
{% if checkout.shipping_address.country_code == 'US' and checkout.shipping_address.province_code == 'NY' %}
<script type="text/javascript">
  var customMessage = document.createElement("div");
  customMessage.innerHTML = '<div class="section" style="padding-top: 3em"><div class="content-box"><div class="content-box__row"><p class="os-step__description">TYPE YOUR CUSTOM MESSAGE HERE.</p></div></div></div>';
  console.log(document.querySelector("[data-order-summary-section=payment-lines]"));
  document.querySelector("[data-order-summary-section=payment-lines]").before(customMessage);
</script>
{% endif %}
In this step, you can edit the code according to your location preference. Just type the specific country or region codes in the Liquid code {% if %}.
In this tutorial code, we have chosen the USA as the country and New York as the state/province name.
For example, if you want to choose Canada as your country, you should put CA in the code like,
checkout.shipping_address.country_code == 'CA'
You can change the country code in this Liquid code according to your requirements.
Similarly, if you want to choose a particular province of a country, e.g., Manitoba, Canada.
For this, you should add the following code with the province code of Manitoba,
checkout.shipping_address.province_code == 'MB'
So, the entire code will be like this ?
{% if checkout.shipping_address.country_code == 'CA' and checkout.shipping_address.province_code == 'MB' %}Step 5 –
Before moving further and making your changes live, place a test order, test the changes made and ensure you have pasted the code correctly.
Once you are done, Save your changes and done.
Over to You
This is it. Yes, it was a bit tricky and had coding in it, but you just need to copy this code and paste it into your Shopify store backend, and you are good to go.
Hope you found this tutorial useful, and if you still have any queries or things did not go as per this tutorial, feel free to contact us and hire Shopify developers to make things right.

Happy Shopifying!!!