

Every business takes a birth as one small store and starts its journey to serve more products and offering to their customers. But over the period of time to reach a wide audience, gain potential customers, improve sales and profitability one should need to expand the business to various geographic locations. It creates a necessity to have multiple stores and need to manage all store separately. Moreover, to deal better with the local audience we need to translate the store into multiple languages and respectively need to change currency too.

Having Magento 2 as rough & tough E-commerce Platform allows us to setup multi-store environment to sever purpose betterly under the hood of single Magento admin panel.
You can leverage some benefits of creating multiple store setup like…
1. Setup different customer group for each store.
2. Set different display prices as per need.
3. Category settings can be different but you can use same root category for all store views.
4. Setup a different theme for each store.
5. Set different language, currency, payment, and shipping options and apply tax classes to each store.
Simply follow these instructions and you are done!
1. Creating New Website
First Logged in to your Magento 2 admin backend. Now navigate to Stores->All Stores.

To create a new store, click on “Create Website” available on the top right corner.

Now it will require some fields like…
Name – Enter the store name
Code – Enter the code to identify store easily
Sort Order – Enter list order sequence
Set as Default – Checked to make it default store
Click “Save Web Site” after filling all the required fields.
2. Creating Store
Second step is to create the Store. From the same stores grid page click on “Create Store” button and fill the required fields.

Now it will require some fields like…
Website – Select you Magento 2 Store
Name – Enter Store frontend name
Root Category – If you want to separate catalog and products for each store, create a new category. Otherwise, select “Default Category”.
Click “Save Store” after filling all the required fields.
3. Creating Store View
Last Step is to create the Store View. On the stores grid now click on Create Store View and fill in the required fields.

Now it will require some fields like…
Store – Select your Magento 2 store
Name – Enter Store front name
Code – Enter the code to identify store easily
Status – Select option of enabled
Sort Order – Enter list order sequence
Click on “Save Store View” after filling all the required fields.
Now, let’s check that store is created successfully or not? Go to stores->Configuration and open drop down menu from default config and see store is liste or not! Now select the store we have just created minutes ago from the list.


4. Store base Url Setup
Now we need have to assign base URL to our newly created second store. For that go to Stores->Configuration->General tab-> Web.

Now we can set URLs using any of these two methods.
- For using main store URL, check Use Default box.
- For specific store URL, go to base URL field and type URL trailed with “/” at the end.
Repeat the same steps for the Base URL (Secure) section and Save Config at last.
Once you’re done with creating a store, you need to configure the server to load it properly on the frontend. There are two popular methods for it, use any of them.
Method 1: Separate directories for each store using secondary domains
- Check if your desired domain name points to the server. Create a secondary domain for your new store.
- Either use FTP or SSH and copy the .htaccess and index.php files from your Magento to the document root of your new domain.
- Open copied index.php file and edit the last lines of the file as follows:
Replace following code:
$bootstrap = \Magento\Framework\App\Bootstrap::create(BP, $_SERVER);

/** @var \Magento\Framework\App\Http $app */
$app = bootstrap->createApplication('Magento\Framework\App\Http');

$bootstrap->run($app);
With the below code:
require __DIR__ . '/app/bootstrap.php';
$params[\Magento\Store\Model\StoreManager::PARAM_RUN_CODE] = ' [WebsiteCode]';
$params[\Magento\Store\Model\StoreManager::PARAM_RUN_TYPE] = 'website';
$bootstrap = \Magento\Framework\App\Bootstrap::create(BP, $params);
/** @var \Magento\Framework\App\Http $app */
$app = $bootstrap->createApplication('Magento\Framework\App\Http');
$bootstrap->run($app);
- Create symbolic links in the document root of your new domain using SSH, and replace the path given below with the full path:
ln -s /home/[user_name]/demo.com/html/app/ app
ln -s /home/[user_name]/demo.com/html/lib/ lib
ln -s /home/[user_name]/demo.com/html/pub/ pub
ln -s /home/[user_name]/demo.com/html/var/ var
Once you have successfully configured your secondary domain to work with Magento, The new domain will load in browser and you can begin developing new store.
Method 2: Shared directory for all stores using pointer domains
- Verify your desired domain name is pointing to the server.
- Create a server alias pointer domain for your new store. The pointer domain will be pointing at the primary domain of your Magento installation.
- Edit .htaccess file in the document root of your Magento installation and enter the following code just above the line RewriteEngine On:
- Replace .*newstore.* with the domain of your new created store, keep the dots and asterisks as it is.
- Make sure that MAGE_RUN_CODE matches with the code you wrote down when you created the new website with above steps. Here, newstore specifies the domain name and websitecode specifies the store code created in Magento.
SetEnvIf Host .*[StoreCode].* MAGE_RUN_CODE=[StoreCode]
SetEnvIf Host .*[StoreCode].* MAGE_RUN_TYPE=website or store
- Once you have successfully configured your pointer domain to work with Magento, you’re ready to develop new store.
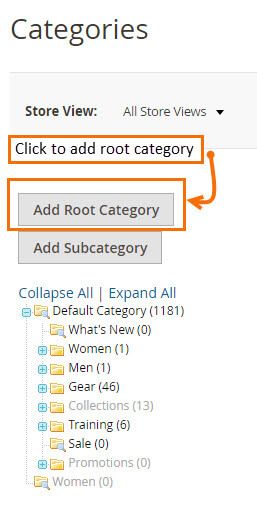
If you want separate catalog and products for each store
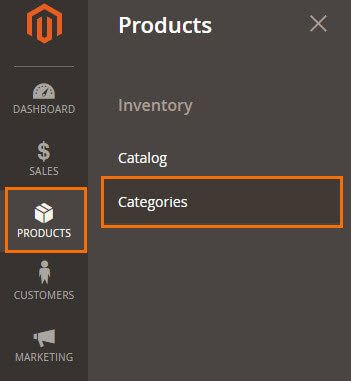
From sidebar menu, navigate to Products->Categories.

Now click on “Add Root Category”.
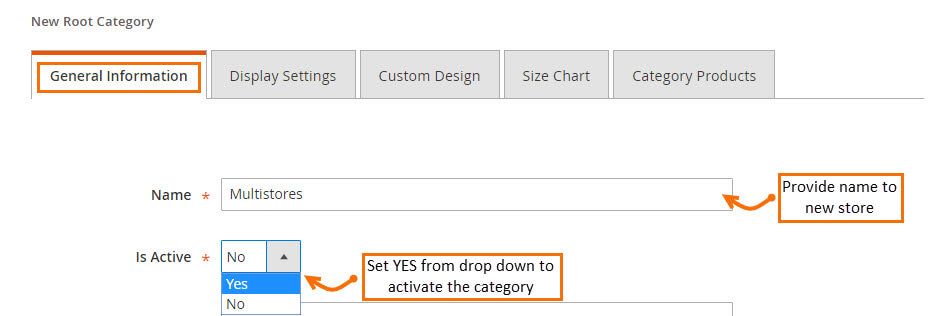
Provide a name to category and activate it by selecting “Yes” from dropdown.
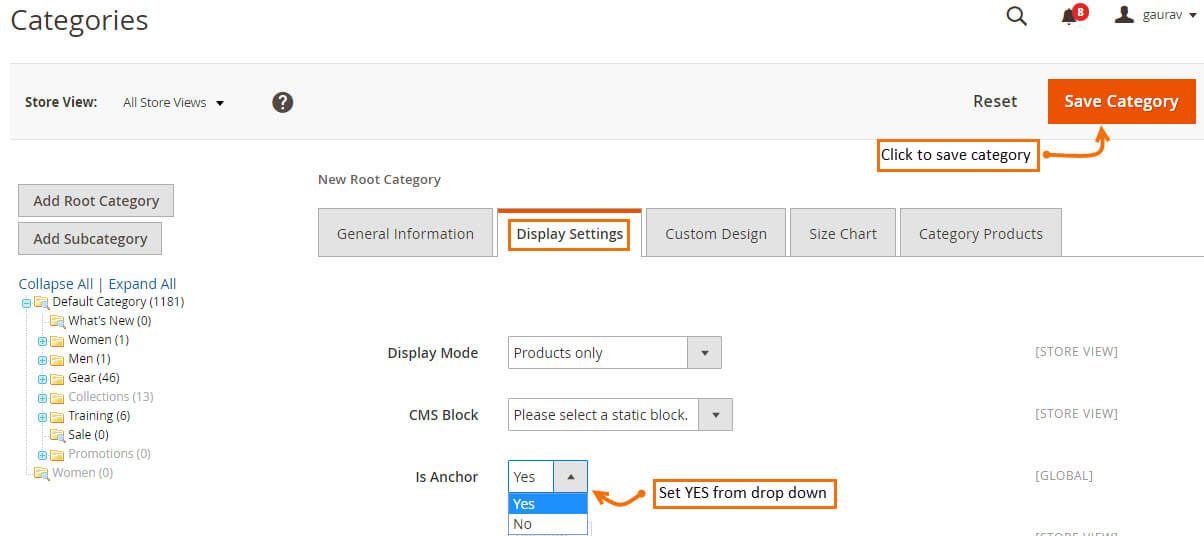
Now move to “Display Settings” and set “yes” to the option “Is Anchor”.
Becuase now you have learned to create a store, you can create one or more store according to your need of setting up different languages and currencies. Comment down below if you are facing an issue while creating store.
Feel free to ask questions regarding this code.
Happy Setting Up!


Hello thank you for this tutorial. I did everything to the end but it does not work. I have a problem with the last part. I do not know if I understood well.
My subdomain english.bigstore.com points to the magento directory just as bigstore.com
Make sure the store code you have set is correct.
You need .htaccess and index.php in the sub domain folder, make sure those are there with necessary changes.
Can we create multi store admin – to manage their admin panel separately ?
Do you want separate admin for every website? The best option in that case separate Magento installation because Magento don’t provide store or website access by admin user.
Thank you for sharing a great post.
You are most welcome 🙂 Keep visiting for more awesome post.
What settings would parked domains have in the index.php and htaccess files ?
You will need to add same code in index.php file as mentioned in the blog.
That should work.
That just gets me a page not found
re :’ [StoreCode]’ i added as such
‘ [mycode]’
should it be
‘ mycode ‘ or ‘ [mycode]’
Please contact us at support@magecomp.com, we will try to help you out with it.
Let me know about second domain -> There i need to upload complete magento files OR just need to add 2 file index.php/.htaccess ???
Both domain on same hosting
Yes, you just need to upload index.php/.htaccess on second domain. and they both should be on same hosting as you said.
To all readers, you can skip method 1 and method 2, as per Magento 2 Wiki there is no need to modify any file index.php or .htaccess anymore. I spend countless hours trying to figure this out and this is the key.
Store > Settings > Configuration > General > Web > Add Store Code to Urls: Yes
Store > Settings > Configuration > Store View: Pick your new store and Add the new domain.
clear cache and try your new store domain follow by the code for example.com/code
Thank you for your suggestion 🙂
One last tip, in order to use the secondary domain http://www.example2.com properly without http://www.example2.com/code [code] at the end the new website will get redirect to the primary or main website http://www.example.com, to fix this you need to edit the root index.php with the following codes on this tutorial
require __DIR__ . ‘/app/bootstrap.php’;
$params = $_SERVER;
$params[\Magento\Store\Model\StoreManager::PARAM_RUN_CODE] = ‘code goes here’;
$params[\Magento\Store\Model\StoreManager::PARAM_RUN_TYPE] = ‘website or store’;
$bootstrap = \Magento\Framework\App\Bootstrap::create(BP, $params);
/** @var \Magento\Framework\App\Http $app */
$app = $bootstrap->createApplication(‘Magento\Framework\App\Http’);
$bootstrap->run($app);
Can different storefronts have different payment and shipping rules?
Yes, It’s all depends on the Payment gateway and shipping methods you are using.
Thank you
Is there any way to install multiple themes in one magento 2? Since I have multi store and need multiple themes as well.
Thanks in advance.
Yes, you can have multiple themes for multi website set up,
You will just need to upload the theme package and select and enable the theme per website from Content/Design/Configuration
Hi,
Can i use a subdomain for a store. Like http://www.123.nl is the main domain without a webshop ?
store 1 is on abc.123.nl
store 2 is on def.123.nl
You should be able to.
I am using Magento Version 2.1.7 and follow all the step up to Method 1 (Exclude the Method 1 and Method 2).
Please confirm the symbolic links, and run the upgrade and deploy commands.
May i know how can i run multistore in local host..
Hi Thank you for sharing a great post. I have successfully create multi store but second store into cart and checkout page is not working. why?
What is the issue you are facing, please explain in details.
I am having trouble with my multistore on 2.2. Can someone give me the files contents for index.php and .htaccess which should be in the main directory and what these should be changed to in the second website directory? I followed the instructions (I thought) but my second website is resolving to the first …