Hello Shopify Friends,
In today’s blog, we will discuss How to Setup Inventory Levels on Shopify.
Managing inventory levels is crucial for any e-commerce business. Shopify provides a user-friendly interface that allows you to track and control your inventory efficiently. This guide will walk you through the step-by-step process of setting up inventory levels on Shopify, ensuring that you maintain accurate stock counts and avoid overselling. Let’s get started.

Steps to Setup Inventory Levels on Shopify:
Step 1: Log in to your Shopify Admin Panel.
Step 2: Select Products > Inventory.

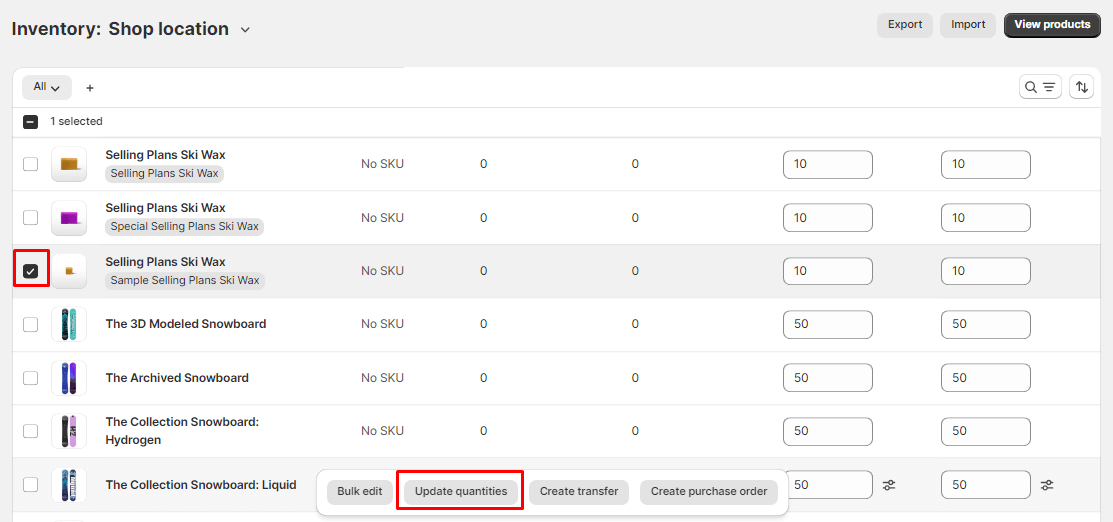
Step 3: Select your desired product, or you can even select multiple products to update the quantity in bulk. Then click on Update quantities.
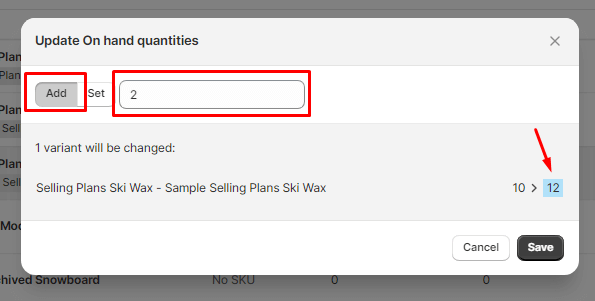
Step 4: Click on the Add button and enter the quantity. This will add the entered quantity to the original quantity. If a product has 10 number of quantity and you enter 2, the total quantity will be 12.

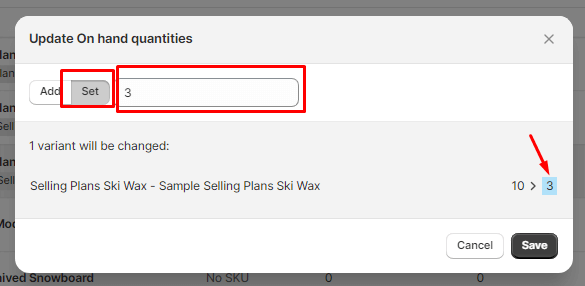
Step 5: Click on the Set button and enter the quantity. This will update the original quantity with the entered quantity. If a product has 10 number of quantity and you enter 3, the quantity will be updated with 3.
Step 6: After you have finished setting inventory levels for your Shopify store products, click on Save.
Concluding Words:
Effectively managing inventory levels on Shopify is essential for maintaining a smooth and reliable e-commerce operation. By following the steps outlined in this guide, you can streamline your inventory management process and ensure a positive customer experience. Keep monitoring your inventory regularly and adjust your strategies based on the insights provided by Shopify’s reporting tools.

Happy Reading!