Hello Magento Folks,
How are you all doing? In this Magento 2 tutorial, I will help you to manage customers and customers group in Magento 2. Also, go through our latest tutorial blog where I have elaborated How to Configure Product Listings in Magento 2. Let’s dig into today’s tutorial blog topic.
Quick Intro:
When it comes to online stores customers are one of the most mandatory people for the store merchant. Customers are the source where the online store’s success is dependent and for all the store owners customer satisfaction is one of the most priority.
Hence the customer’s management is an important task for the store owners who must separate all their customers into various groups on the basis of their requirements. Automate the customer management of your Magento 2 store by integrating the Magento 2 Auto Customer Group Switching extension. Moreover, the benefit to the store owner is it helps in improving the customer’s experience. In this tutorial blog, I will help you to manage customers and customers in Magento 2.
Steps to Manage Customers and Customers Group in Magento 2:
Step 1: Firstly we will learn how to Add New Customers.
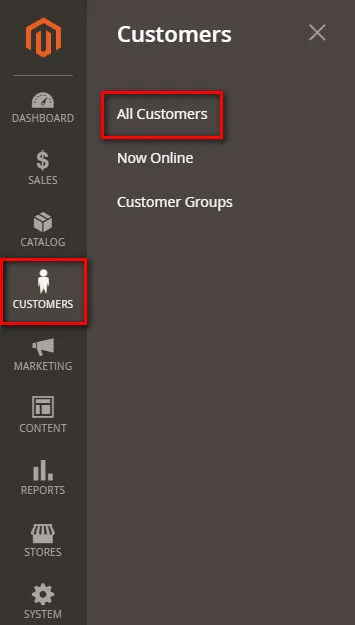
Goto Customers > All Customers from the backend of your Magento 2 store.
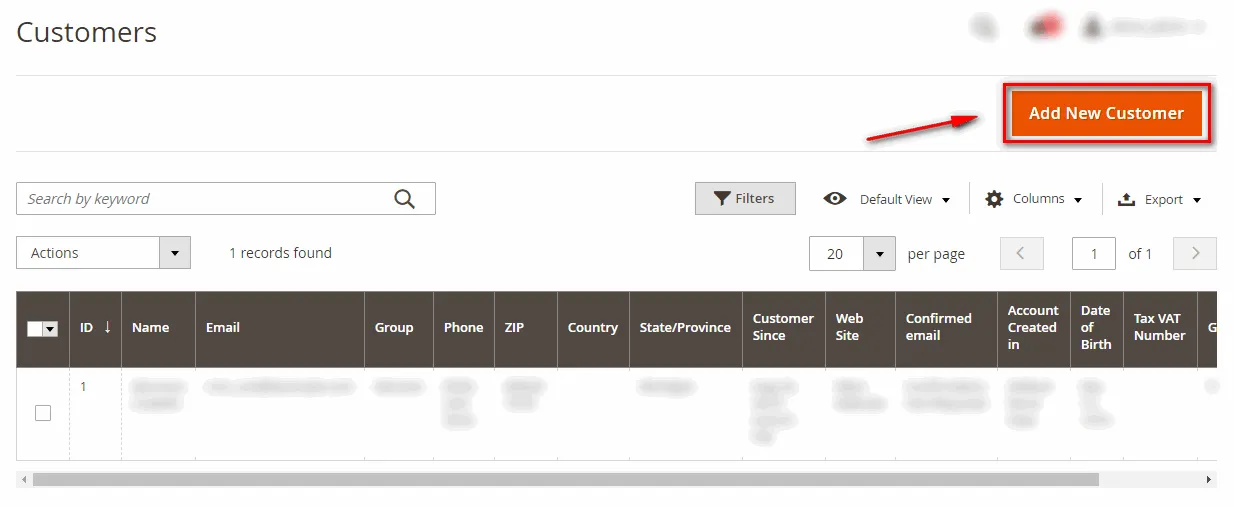
Step 2: Tap to Add New Customer as per the below screenshot
Step 3: Add all the appropriate details of customers in the Account Information field
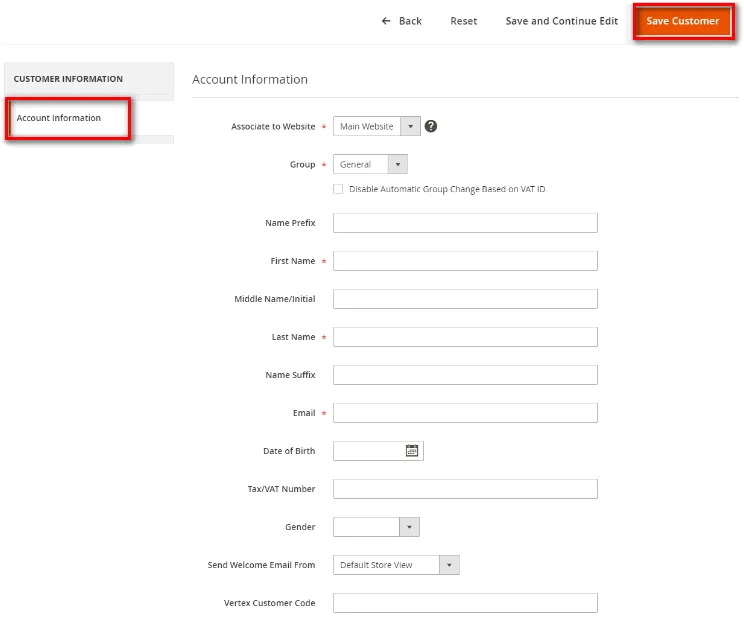
Click to Save Customer option as displayed in the screenshot.
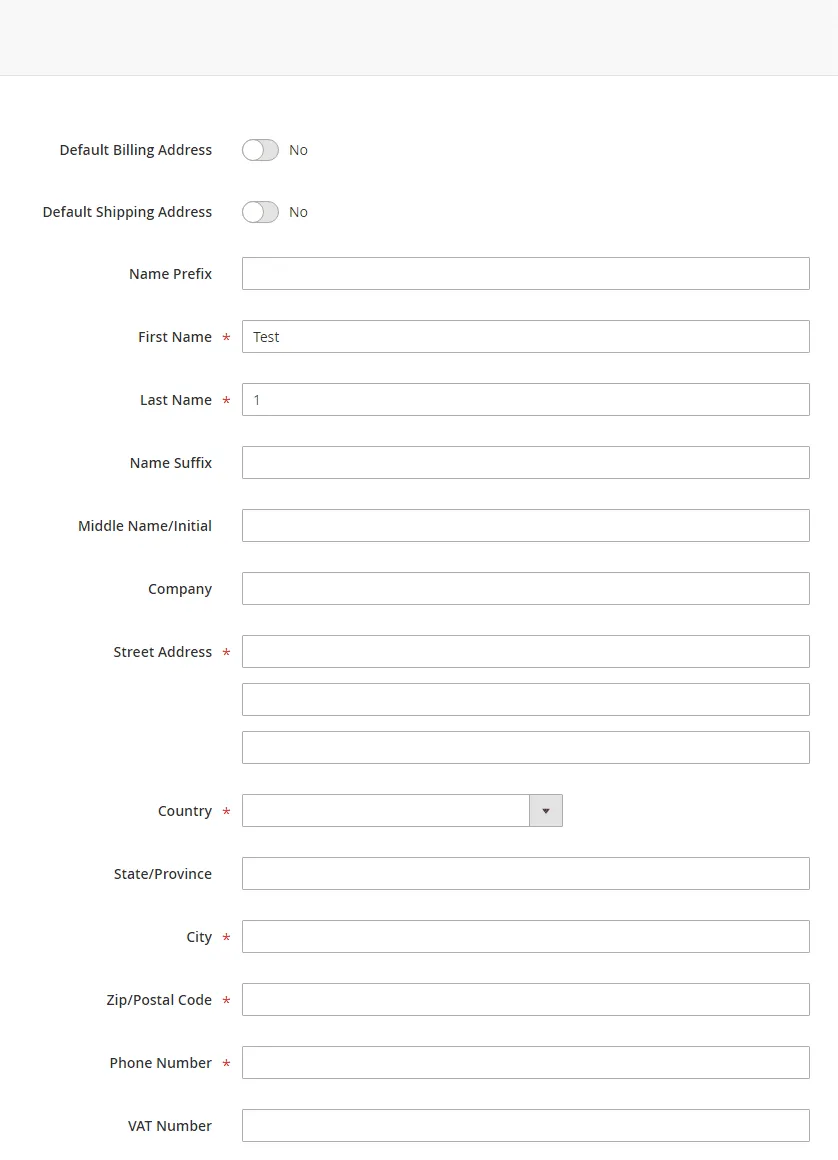
Step 4: Tap to the address tab and then on the Add Address button.
Add all the appropriate details of customers address in this field
Now we will learn how to add a new customer group.
Step 5: Add New Customer Group
Goto Customers > Customer Groups
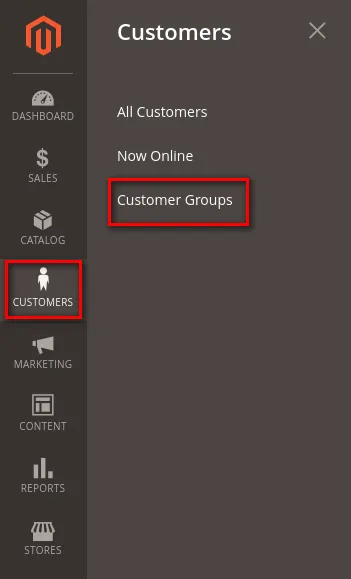
Step 6: Tap on Add New Customer Group
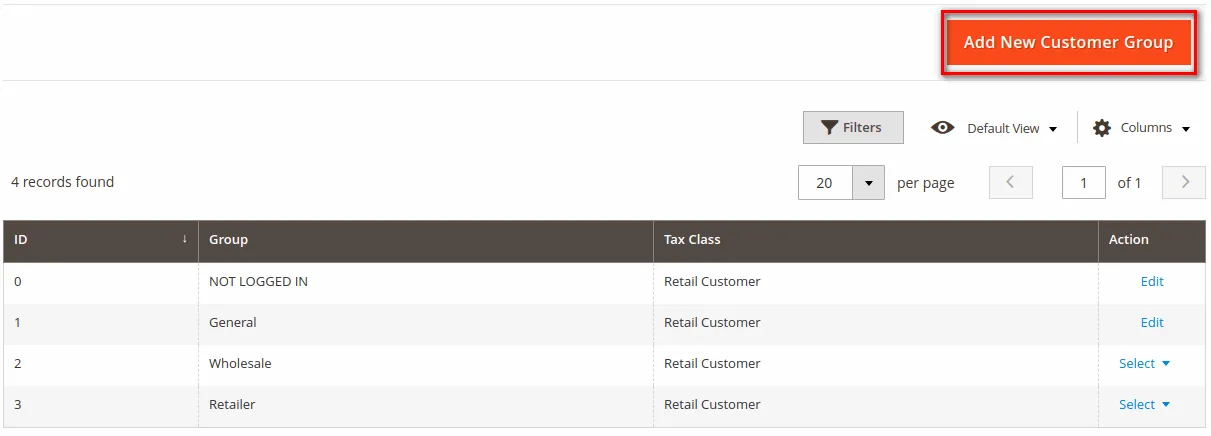
Step 7: In the Group Information field add group name and tax class according to your requirement and

At last, Save Customer Group
That’s It.
Wrap Up:
Hopefully, all are able to manage customers and customers group in Magento 2 with the help of the above-illustrated blog. In case of any issues in the above solution then let me know in the comment sections.
Share the blog with your friends
Happy reading.


