Hello Magento Friends,
In this article, we will learn How to Configure DHL Carrier in your Magento 2 Store.
Best shipping service is the first priority for all e-commerce stores to provide their customers. Therefore when you integrate DHL service into your Magento 2 store you can help your store customers to place orders for anything such as products, goods, letters, etc. We can say that DHL is a flawless resolution for complex shipping requirements.
Are you willing to integrate DHL Carrier in your Magento 2 store? Check out the stuff you will require for connecting your Magento 2 store to the DHL server in the below-given illustration. Instead of configuring the DHL Carrier in your Magento 2 Store integrate the Magento 2 Order Tracking extension and automate your shipping configuration.
Create a DHL merchant account from here.
Steps to Configure DHL Carrier in Magento 2 Store:
Step 1: Apply DHL
Navigate to Stores > Settings > Configuration and explore the sales option and select delivery methods.
Explore the DHL option.
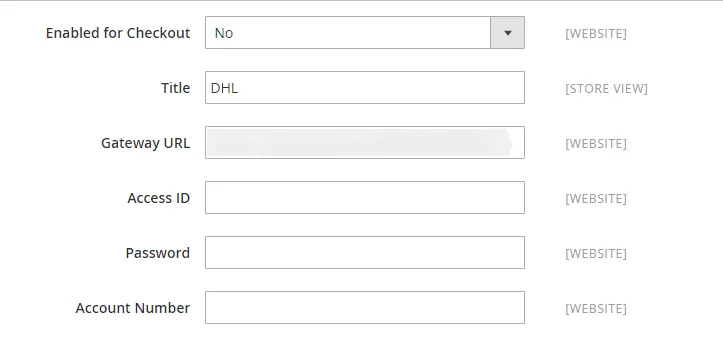
Enabled for Checkout: Set to YES
Title: Add the title for the shipping method to display on the frontend of your Magento 2 store.
Gateway URL: Add the gateway URL for calculating the shipping rate of DHL.
Add the credentials given by DHL in the below-given fields:
- Access ID
- Password
- Account Number
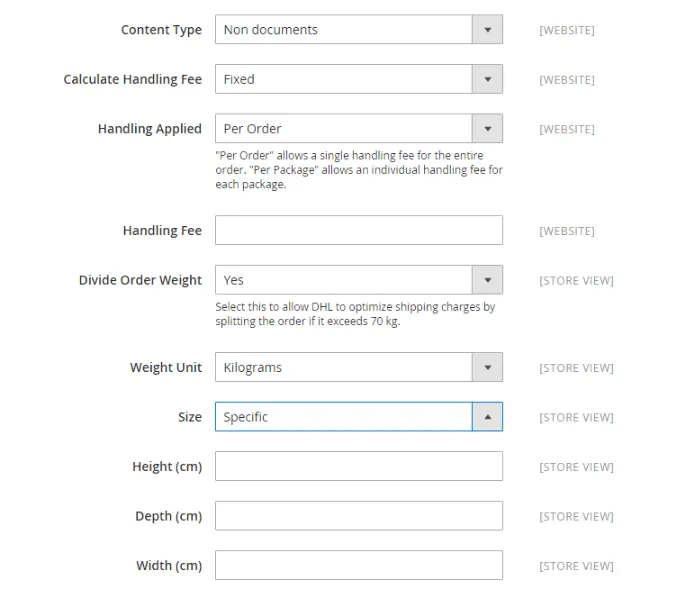
Step 2: Now we will set up the package description and handling fees
Content type: Select anyone for the type of package you ship such as Documents or Non-documents
Calculate Handling Fee: Choose the Handling Fee method as per your convenience from:
- Fixed
- Percentage
Handling Applied: Choose the Handling Applied method as per your convenience from:
- Per Order
- Per Package
Handling Fee: Add the price to charge your customers on the basis of the Method you have selected to calculate the price.
Divide Order Weight: Set the Divide Order Weight to yes for allowing the total order weight to be broken up to check the precise calculation.
Weight Unit: Select the weight unit as per your requirement from:
- Pounds
- Kilograms
Size: Select the size as per your requirement from:
- Regular
- Specific
After the selection of the size, you will require to add the Height, Depth, and Width of the package in centimeters.
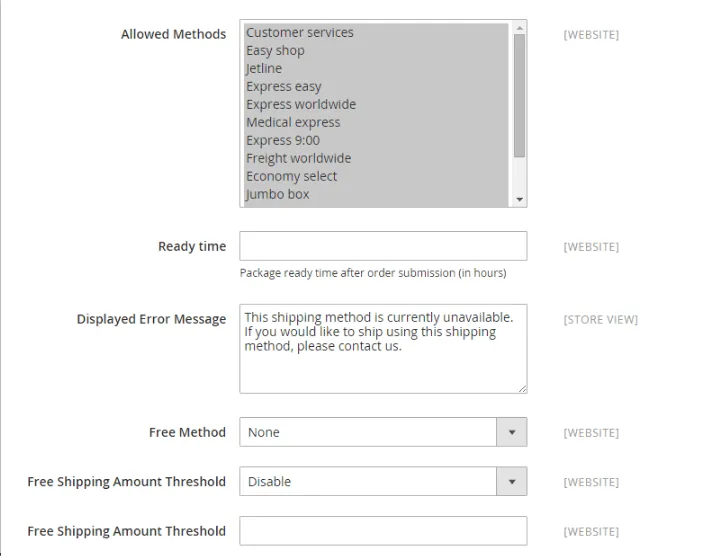
Step 3: Specify allowed delivery methods
Allowed Methods: Select the methods as per your desire to provide your customers. You can also multi-select using the CTRL-key.
Ready Time: Add the number of hours after the order is placed and the package is ready to ship.
Display Error Message: Add the Displayed Error Message as per your requirement. This error message will be displayed when the selected method is unavailable.
Free Method: Choose the DHL service you need to apply for free shipping
Free Shipping Amount Threshold: Choose the Enable option and add the minimum amount of order to qualify for free shipping.
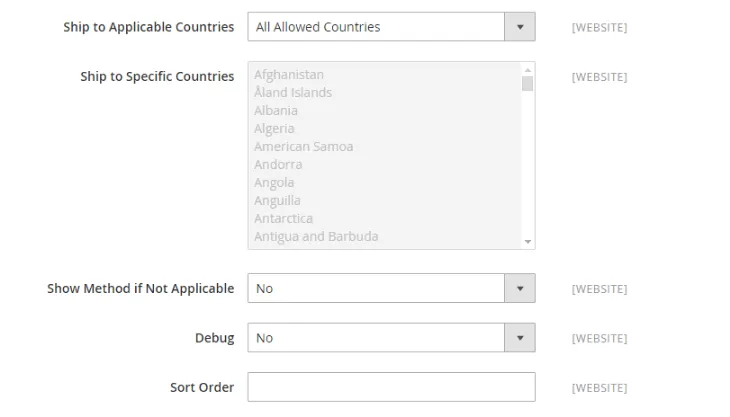
Step 4: Specify the applicable countries
Ship to Applicable Countries: Select from the below options:
All Allowed Countries: DHL is supported for every country.
Specific Countries: DHL will be supported as per the selection of the countries.
Show Method if Not Applicable: Set to YES for displaying DHL shipping method.
Debug: Set to YES if you need to generate a log file with the details of DHL shipments.
Save the Configuration.
That’s It
Wrap Up:
Hopefully, all are able to Configure DHL Carrier in your Magento 2 stores. In case of any errors you face during configuration ask in the comment section below
Share the solution with your Magento 2 Merchant Friends.