
Hello Magento Folks,
I will help you to learn How to Add Orders and Returns Widget in Magento 2. Also, learn How to Configure the Default Page in Magento 2 in my recently published blog. Let’s start with today’s blog article.
Quick Intro:
Basically, with the help of the Orders and Returns widget the consumers can check and review the status of their orders, invoices and track shipments. When you add the Orders and Returns Widget in your Magento 2 store then it will be displayed to your consumers and shoppers who are not logged in to their accounts. The customers will need to fillout the information in the fields of an Order ID, Billing Last Name, the Email address or ZIP Code for searching their orders effortlessly.
Step to add the orders and returns widget in Magento 2:
Step 1: Navigate to Content>Elements>Widgets
Tap to Widget button
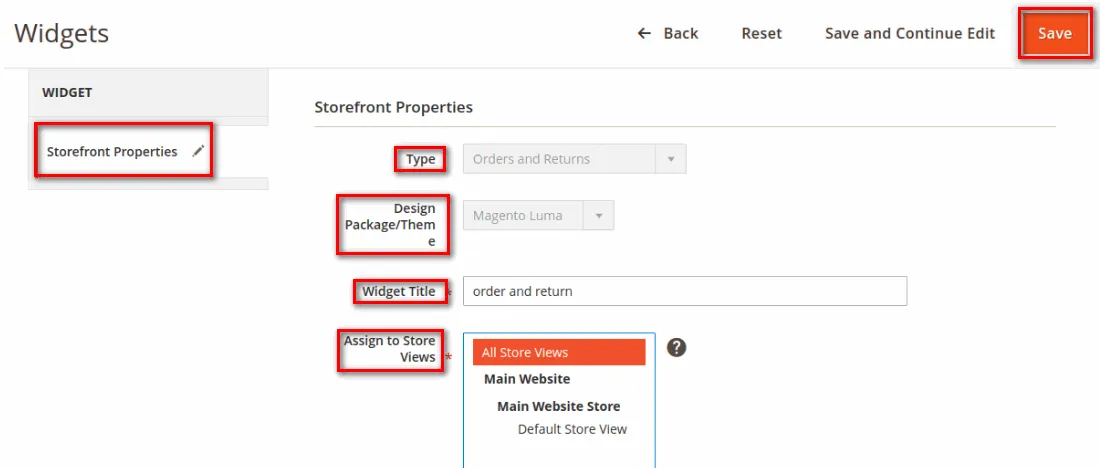
Step 2: Now, in Storefront properties configure as per below.
Type: Admin has to select the Orders and Returns option.
Design Package/Theme: Choose the theme that is utilized within the store.
Widget Title: For the description of your widget and this is visible for admin only.
Assign to Store Views: Select your store view accordingly.
Step 3: Now, tap to Layout Updates and configure accordingly.
Display On: Select the type of page where you require to display the widget.

Complete further details in the layout update to display the widget on the page.
Step 4: Save The Config
For using the orders and returns widget in Magento 2 you will have to add the details in the fields of an Order ID, Billing Last Name, the Email address or ZIP Code and tap on the search button to search your order.
Wrap Up:
Hopefully, all have successfully implemented Orders and Returns Widget in Magento 2 for providing the best experience to your customers. In case of any queries, you can comment down.
Share the article via Social Media
Happy Reading