Error 404 ?
Sorry Shopify Folks, we aren’t available today! ?
Just joking! ?
Hello Shopify Folks, ?
Welcome back to our new Shopify tutorial.
Today in this tutorial, we will teach you how to enable maintenance mode for your Shopify website.
If you’re creating a new website but want to hide it from the public temporarily, you can put it under construction. However, you can still allow visitors to view your product page.

Putting your precious website under construction mode is quite a stressful scenario for every Shopify business admin. The stress of losing valuable customers is equal to having a horrifying nightmare.
But what if we tell you that you can relieve stress by following these steps and informing your valuable customers that you are still in the business?
How to enable maintenance mode on your Shopify website?
Step 1 –
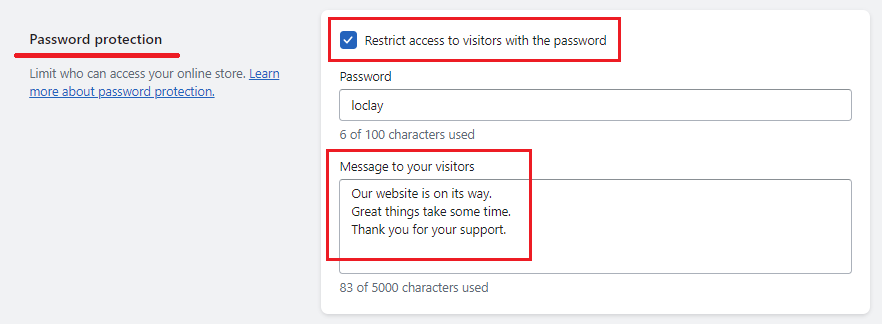
Enable the password protection feature for your product pages from the Online Store> Preferences.
This is one of the easiest ways to avoiding your customers from accessing the pages under construction mode.
Step 2 –
Set a customized message that you want to display to your customers.
Step 3 –
Save your changes, and your Shopify maintenance page/Shopify under construction page is ready.
⇒ Note:
You can enable maintenance mode for Shopify and disable it by following the same steps and selecting the checkbox according to your preference.
How to Customize Your Password Page?
Shopify knows how important and personal your business and business website is for you. That is why Shopify allows you to customize every field possible so that you can create a highly-personalized website for your customers.
Customization of the Shopify under construction page is one of them. You can customize the Shopify maintenance page very easily by following a few simple steps.
Step 1 –
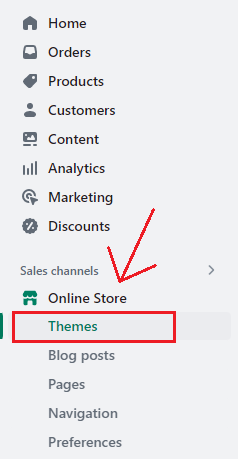
Go to Shopify Admin > Online Store > Themes.
Step 2 –
A page with your website theme will appear on your screen.
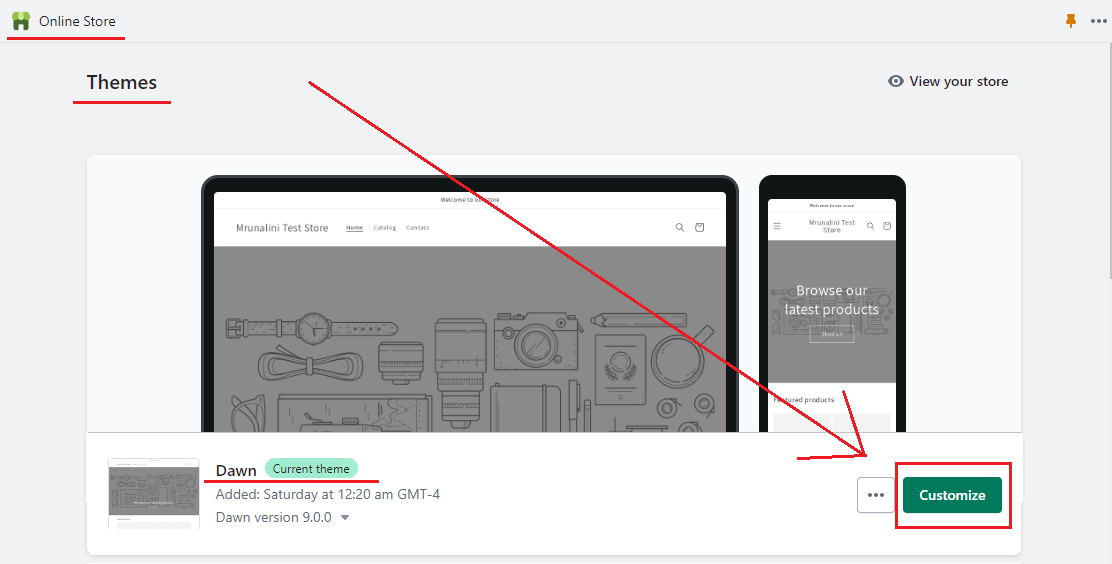
Choose the Customize option.
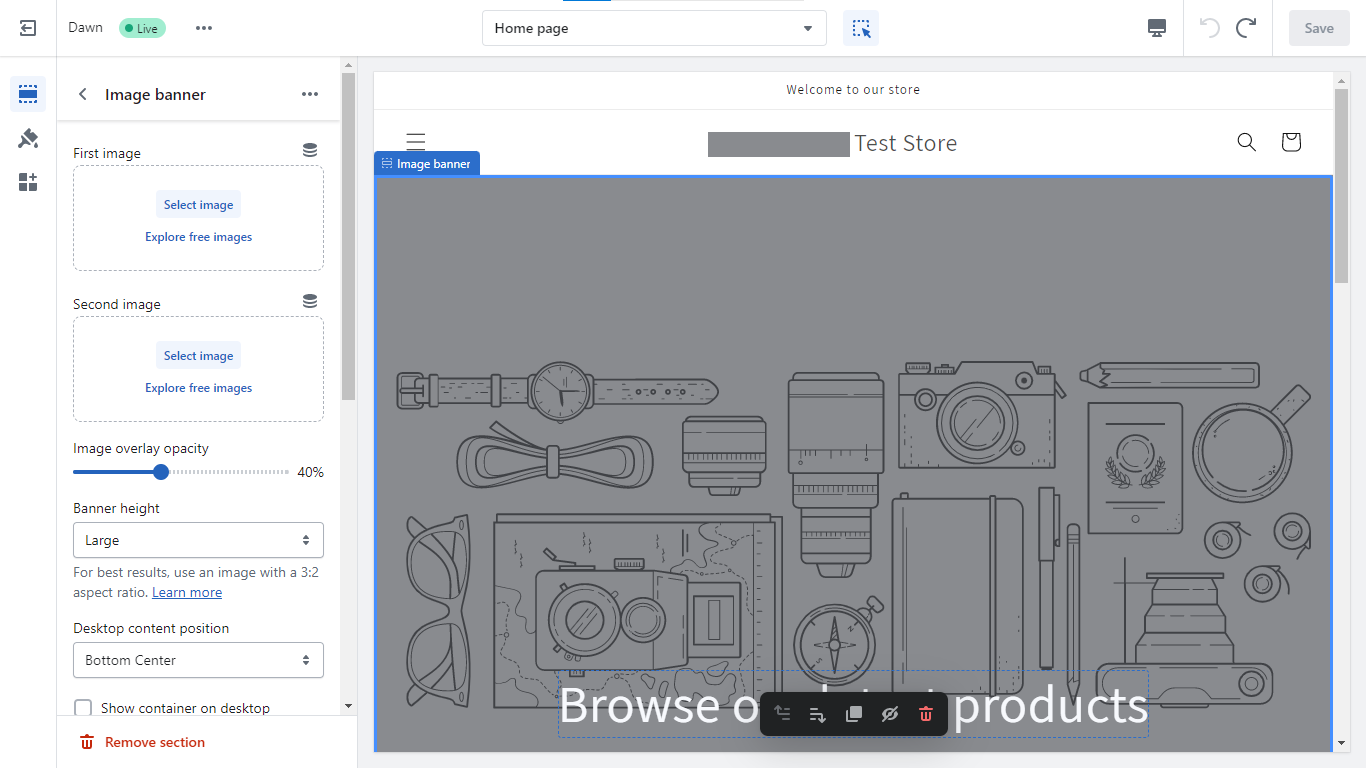
Step 3 –
After choosing the Customize option, you will be redirected to a page allowing you to customize your website pages.
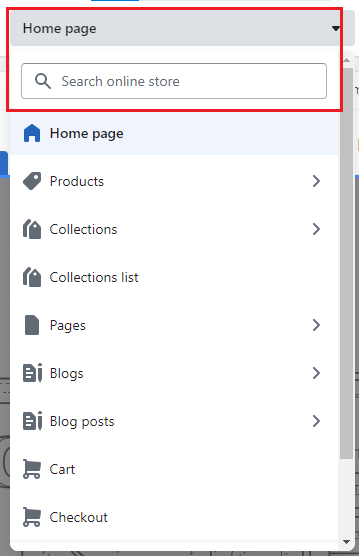
Step 4 –
Click on the selection bar on this page to access a dropdown list of different Shopify store pages.

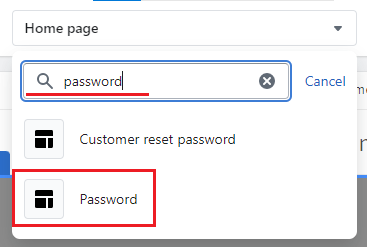
Step 5 –
Search for Password in the search box; you will get two options: Customer reset password or password.
We need to choose the Password option.
By doing this, your created password page will be opened.
You customize it by adding a logo and extra content. You can also insert custom CSS codes and customize your page as you want.
Step 6 –
Once you are done customizing your page, Save your changes and proceed.
And that’s it! Your Shopify under construction page is ready. ?
Ending Note
That was pretty easy! ?
When it comes to working on your Shopify website, testing plugins, or taking a well-deserved break, putting your site in maintenance mode can be a helpful tool to keep your business running smoothly.
You can easily achieve this without any hassle with the information provided in this tutorial. But still, if you are facing any difficulties in accomplishing this task, take the required guidance from our Shopify experts and enable your Shopify maintenance mode easily.
Happy Shopifying! ?
—————————————————————————————————————————————–
Frequently Asked Questions
(1) What is Maintenance Mode in Shopify?
Answer: Maintenance Mode is a feature that allows you to temporarily take your Shopify website offline or display a custom maintenance page. It is useful when you need to perform updates, make design changes, or fix issues on your website without interrupting the user experience.
(2) How can I enable Maintenance Mode on my Shopify website?
Answer: To enable Maintenance Mode on your Shopify website, you can follow these steps:
- Log in to your Shopify admin panel.
- Go to “Online Store” and click on “Preferences.”
- Scroll down to the “Password protection” section.
- Check the box that says “Enable password.”
- Enter a password of your choice.
- Optionally, you can customize the maintenance page by clicking on “Customize theme” and editing the HTML and CSS code.
- Save the changes.
(3) Can I customize the Maintenance Mode page on Shopify?
Answer: Yes, you can customize the Maintenance Mode page to match your brand’s style. By clicking on “Customize theme” in the Password protection section, you can modify the HTML and CSS code of the maintenance page to add your logo, message, or any other desired elements.
(4) Will visitors be able to access my Shopify website during Maintenance Mode?
Answer: No, when Maintenance Mode is enabled, visitors will be required to enter the password you set to access the website. They will see the custom maintenance page you created instead of the regular storefront.
(5) How can I preview the Maintenance Mode page before enabling it?
Answer: Shopify does not provide a built-in preview option for the Maintenance Mode page. However, you can test it by enabling Maintenance Mode, opening your website in a new browser or incognito window, and entering the password to see how the maintenance page appears.
(6) Can I still access my Shopify admin panel during Maintenance Mode?
Answer: Yes, enabling Maintenance Mode only affects the front-end of your website. You can still access your Shopify admin panel using the regular login credentials to make changes, manage products, or perform any necessary tasks.

(7) How do I disable Maintenance Mode once I’m done?
Answer: To disable Maintenance Mode and make your Shopify website accessible to all visitors again, you can follow these steps:
- Log in to your Shopify admin panel.
- Go to “Online Store” and click on “Preferences.”
- Scroll down to the “Password protection” section.
- Uncheck the box that says “Enable password.”
- Save the changes.