Hello, Magento Folks, ?
Last time we learned How to enable the reCaptcha in default Magento 2. Today, I am going to explain how order state and order status is different in Magento 2. But before we go deep into that, please read our February Month Digest?
When you have chosen to build your website with Magento, you would have come across the two different columns in the sales_flat_order table, which is order state and order status. You might be wondering what those are and why they are two different things? Both seem to be the same thing.
Well, they are not the same. The order state is for Magento to understand and process the order in a defined workflow. Whereas, the order status is for store owners to understand and process the order in a workflow. You can create any number of order statuses to understand the exact order flow. One order state can have multiple order statues, but vice versa cannot be done.
Following list of order states are predefined by the Magento to understand and process orders in a defined flow,
- New
- Processing
- Complete
- Pending Payment
- Canceled
- Closed
- Payment Review
- On hold
Magento does have some of the order statuses out-of-the-box, but if you need to create more statuses, then you can definitely do so from your admin panel. Remember that you can create any number of order statuses but not the order states.
Contents
Let’s look at how to create order status from Magento backend,
1. First, log in to your Magento admin panel, then from the sidebar, go to Stores>Settings>Order Status.
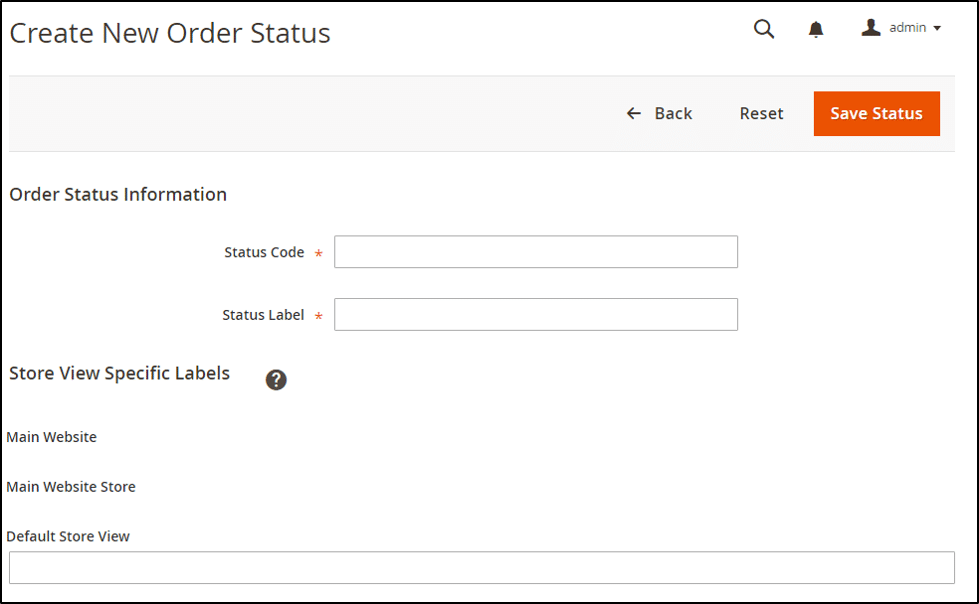
2. On the top-right corner, click on the button “Create New Order Status.”
3. On the next page, fill all the necessary details like Statues Code and Status Label.
- The Status Code should be entered in an alphanumeric format, and the Status Label should be entered that will appear to you and your customers in the frontend.

4. If you are running more than one storefronts, then each store view can have a different Label name.
5. Double-check all the details, then click on Save Status. Assign it to one appropriate order state.
For example, if you need to create multiple order statues for pending payment order state, then it may contain the following order statuses,
- Payment pending_COD
- Payment pending_paypal
- Payment Pending_card
- And many more
Now let’s look at how to assign and unassign an order status to an ordered state.
1. From the sidebar of the admin login panel, go to Stores>Settings>Order Status.
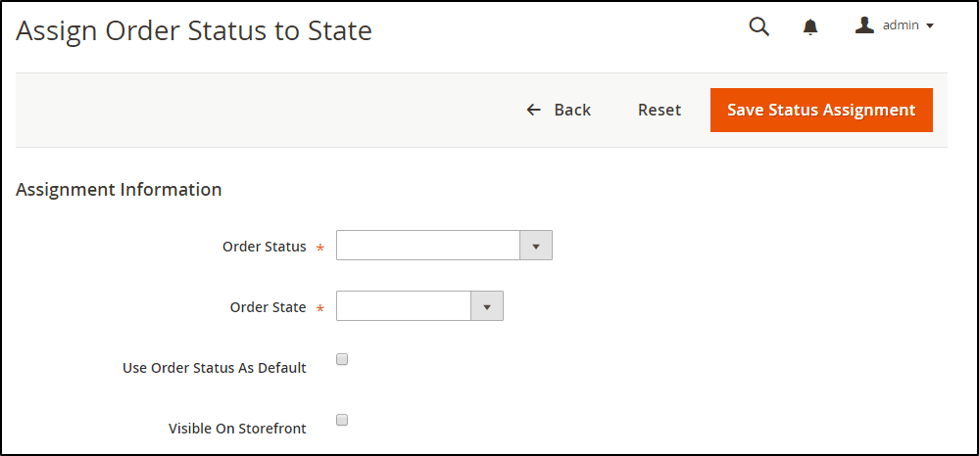
2. Next, to Create New Order Status, you will find Assign Status to State. Click on that button.

3. Select the Order Status you want to assign from the dropdown list.
4. Select the Order State from the dropdown list where order status belongs to the workflow.
5. Mark the checkboxes as per your needs and click on Save Status Assignment.

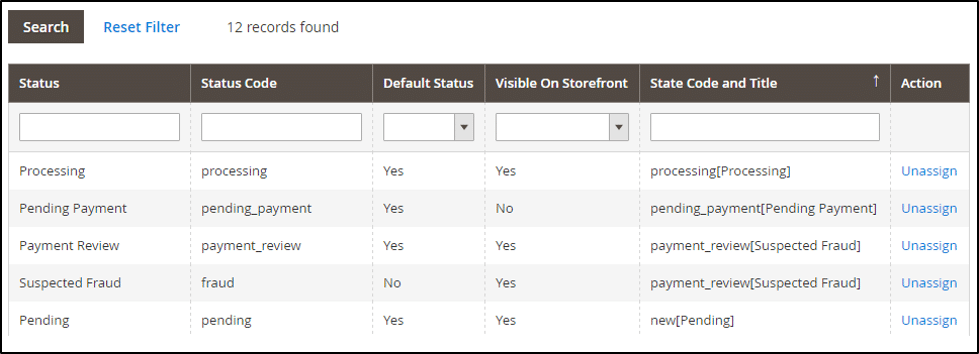
To unassign any order status from an order state, go to Stores>Settings>Order Status. In the Actions tab, click on unassign to unassign any of the order status you want.
So, this is it. By creating multiple order statuses and assigning them to one order state can make the whole task easy and simple to understand for the store owners. ?
Integrate Magento 2 Order Status extension and create endless order statuses and inform your customers for change in status.
It will encourage us to write more useful articles if you give it a thumbs up and share it with your Magento partners.
Happy Reading!?


