Hello Shopify Friends,
In this blog, I will explain How to Customize Email Templates in Shopify.
One important aspect of running an e-commerce business is maintaining effective communication with your customers. Shopify provides a range of pre-designed email templates for various communication purposes, such as order confirmations, shipping notifications, and marketing campaigns.

However, to truly stand out and create a unique brand identity, it’s essential to customize your email templates. Learn – How to Add a Logo to Your Email Templates on Shopify?
In this blog post, we’ll guide you through the process of customizing your Shopify email templates to match your brand’s style and messaging.
Steps to Customize Shopify Email Templates:
Step 1: Log in to your Shopify admin panel.
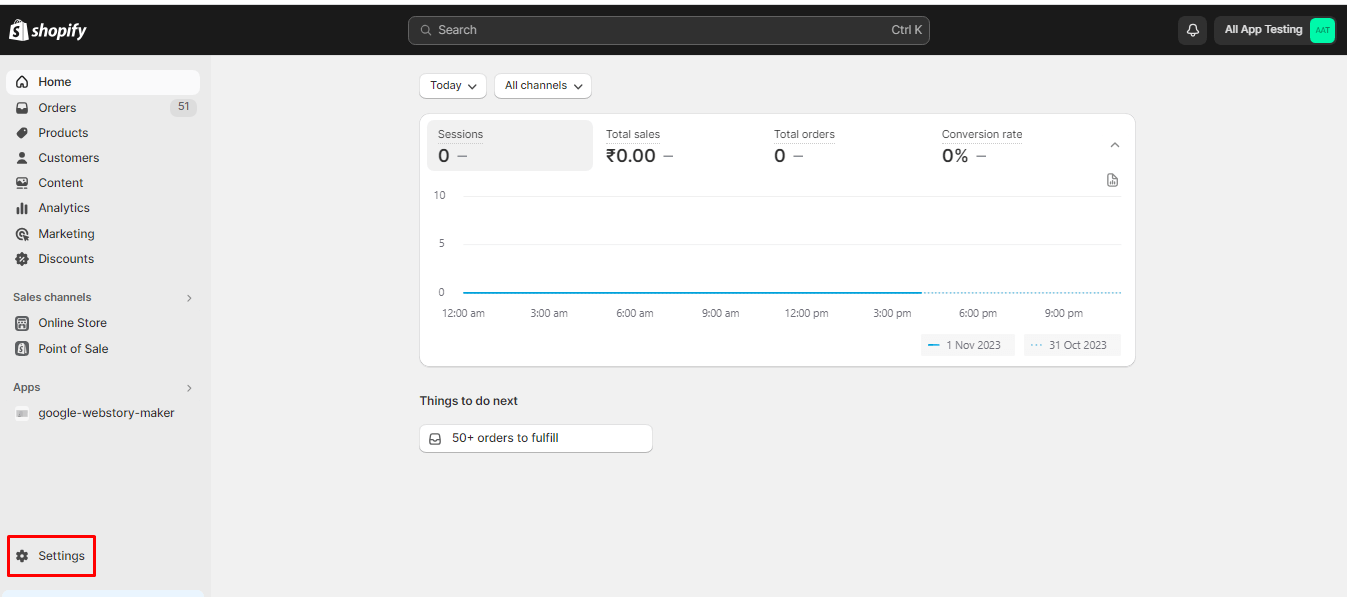
Step 2: Click on Settings from the left menubar.
Step 3: Then select Notifications.
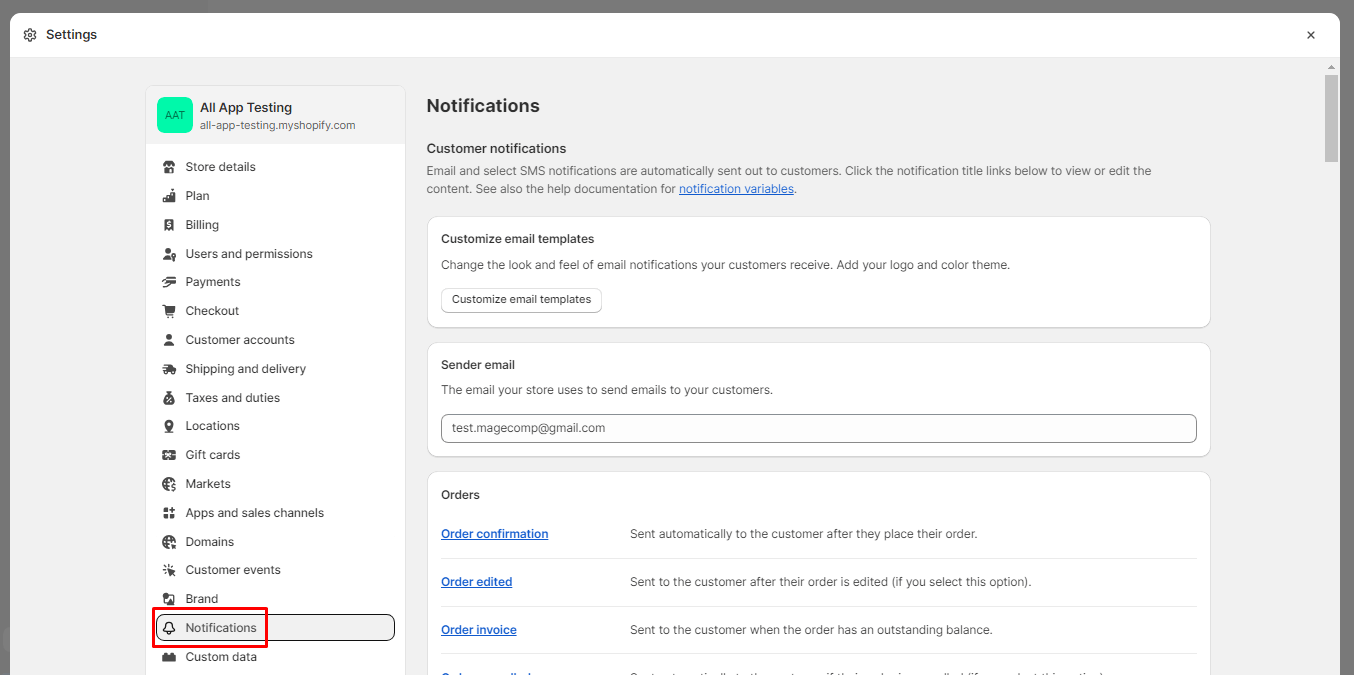
Step 4: In the Notifications settings, you’ll see a list of email templates. Click on the template you want to customize.

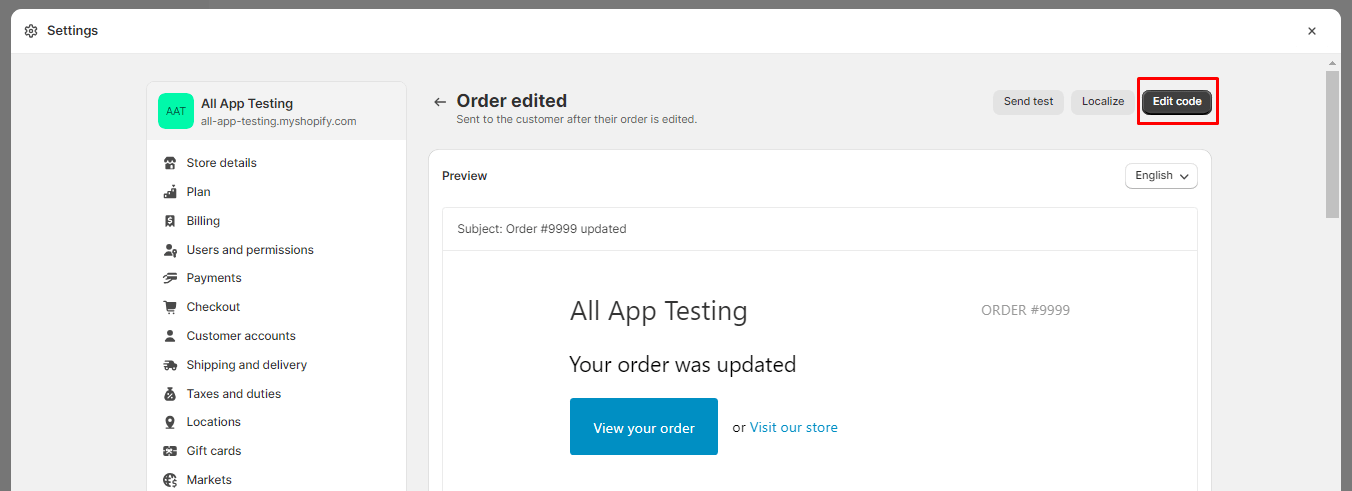
Step 5: Click on the Edit code button for the chosen template.
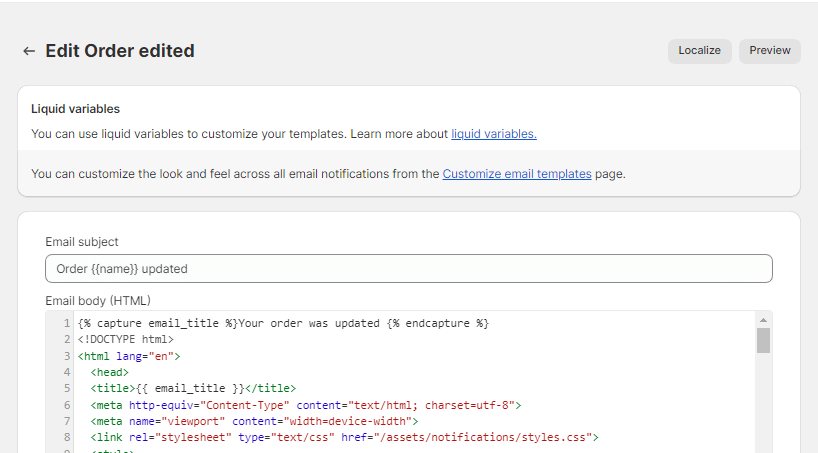
Step 6: Here, you can change the Email subject and Email body.
Step 7: Once you’re satisfied with your email template customizations, save your changes.
Wrapping Up:
Though there are a plethora of free Shopify templates available for your business, but customizing your Shopify email templates is a fundamental step in building a strong brand identity and maintaining effective communication with your customers. By following these steps, you can create email templates that align with your brand’s style and messaging, ultimately enhancing the customer experience and driving sales on your online store. Don’t forget to regularly review and update your email templates to stay in sync with your evolving brand and customer needs.

Happy Reading!