Hello Shopify Friends,
Today we will learn about How to Create a Collection in Shopify, both manual and automatic.

What are Collections in Shopify?
In Shopify, a collection refers to organizing and grouping products based on specific criteria. Collections are used to make it easier for customers to navigate your Shopify online store and find products that are relevant to their interests or needs. Collections can be displayed on the storefront using navigation menus, links, or on dedicated collection pages. They help improve the browsing experience for customers by providing logical groupings of products, allowing them to discover related items easily.
Types of Collection on Shopify:
Shopify provides several options for creating and managing collections. Here are the types of collections on Shopify:
- Manual Collections: With manual collections, you can manually select and add specific products to a collection. This type of collection is useful when you want to curate a specific set of products that share a theme or are part of a particular promotion.
- Automated Collections: Automated collections are based on predefined rules and conditions. You can set up conditions such as product tags, product types, or vendor names to automatically include products in the collection. New products are automatically added or removed from the collection as they meet the criteria.
So now you have learned about collections in Shopify, let’s find out How to Add Collection to Shopify.
Steps to Create a Collection on Shopify:
Create a Manual Collection in Shopify
Step 1: Log in to your Shopify Admin Account.
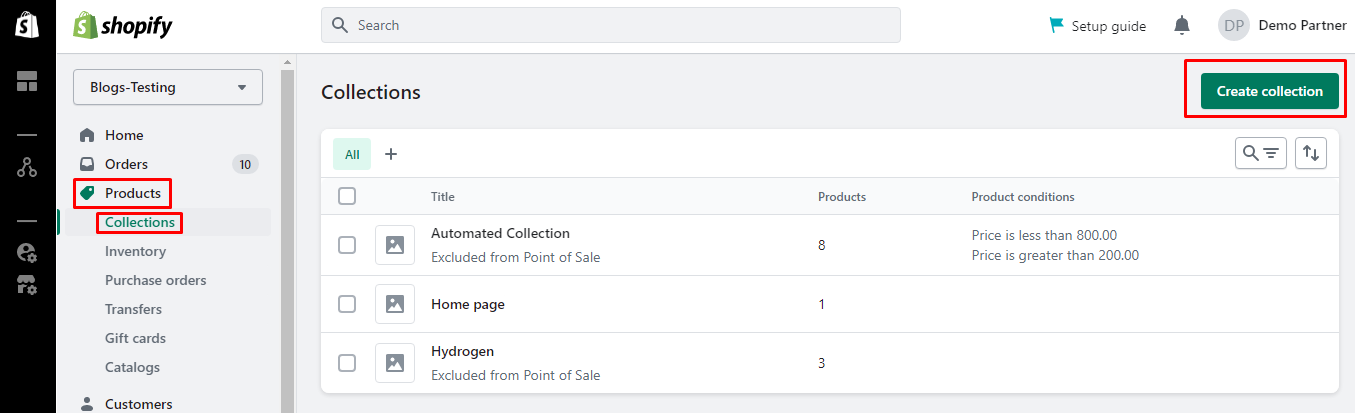
Step 2: From the left menu, go to Products > Collections. Then click on the Create collection button from the upper right corner.
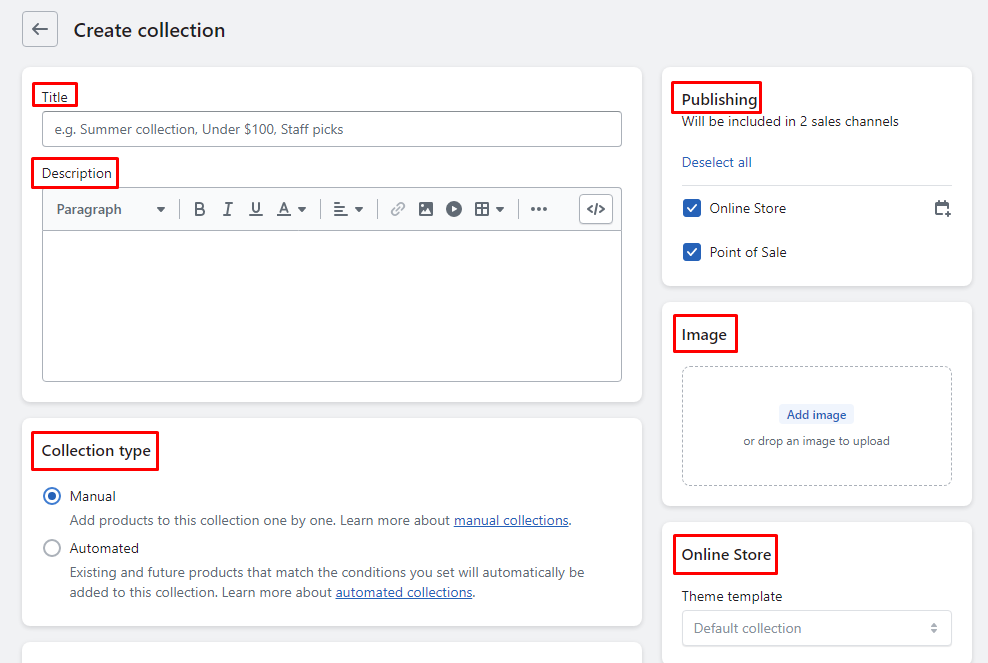
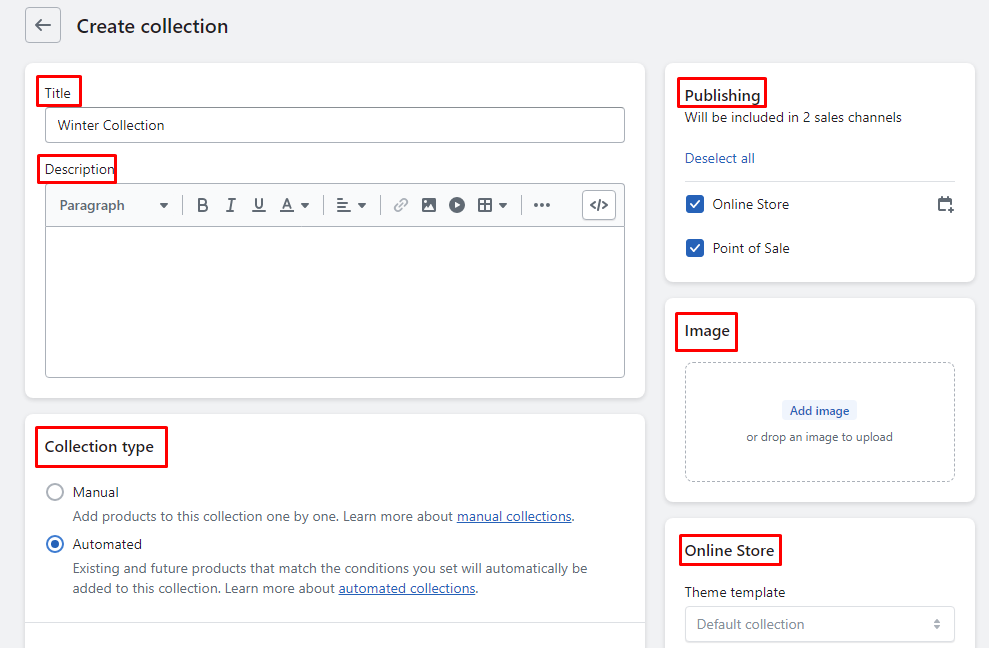
Step 3: Enter the details for collection in Shopify
- Title – Give a title to your Shopify collection.
- Description – Add a description stating what type of products this collection consists of.
- Collection type – Select the Manual option here. We will learn about Automated collection in Shopify later in this article.
- Publishing – This states in which sales channel you want to make your collection available.
- Image – Upload a collection image in this section.
- Online store – Set the theme template for the collection in Shopify.
- Search engine listing – Add the page title and meta description for this collection on Shopify to help search engines find your link easily. You can also update the URL of the collection.
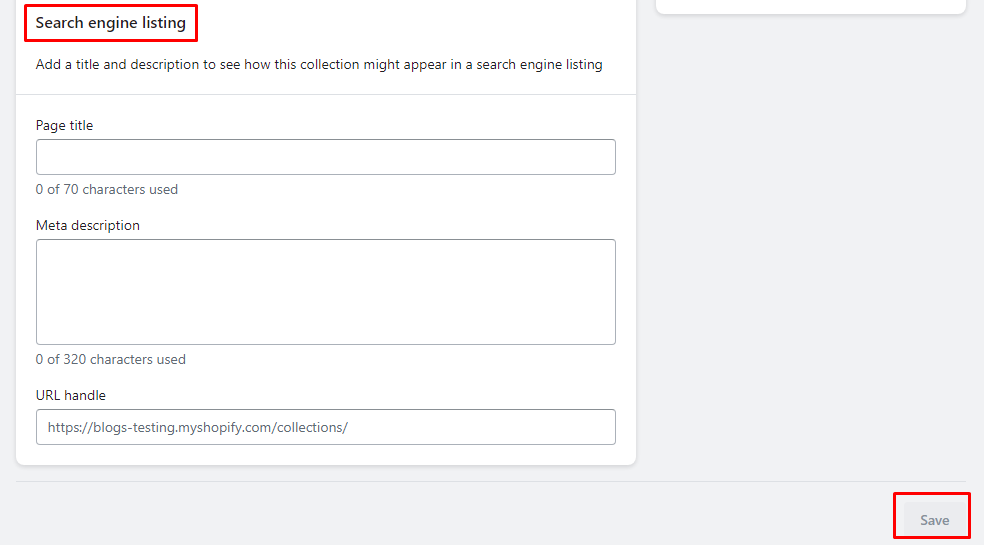
Once you complete all the settings of the manual collection in Shopify, click Save.
Step 4: Now, you will find a new section – Products added to the collection details page. Browse and search for products to add products to the collection in Shopify. You can also set the sorting order of the products that will be displayed within the collection.

Create an Automated Collection in Shopify
Step 1: Log in to your Shopify Admin Account.
Step 2: From the left menu, go to Products > Collections. Then click on the Create collection button from the upper right corner.

Step 3: Enter the details for collection in Shopify
- Title – Give a title to your Shopify collection.
- Description – Add a description stating what type of products this collection consists of.
- Collection type – Select the Automated option here. We have already discussed Manual collection in Shopify previously in this article.
- Publishing – This states in which sales channel you want to make your collection available.
- Image – Upload a collection image in this section.
- Online store – Set the theme template for the collection in Shopify.
- Conditions – Set conditions to automatically add products to this collection. Determine whether you want to match all conditions or not.
- Search engine listing – Add the page title and meta description for this collection on Shopify to help search engines find your link easily. You can also update the URL of the collection.
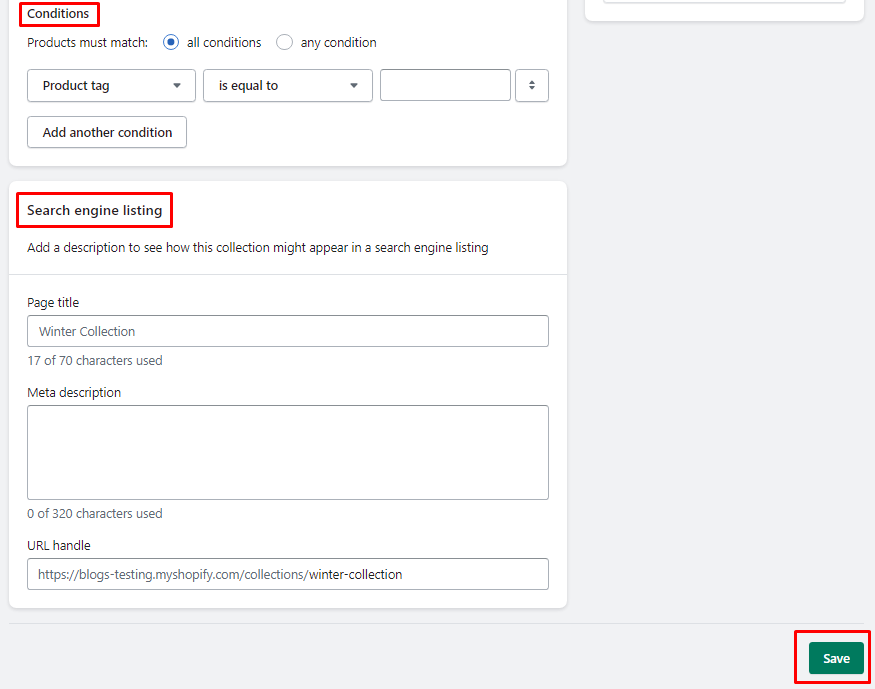
Once you complete all the settings of automatic collection in Shopify, click Save.
The products that match the conditions will automatically be added to this collection.
Final Words:
Hopefully, you can successfully add collection to Shopify store using the above step-by-step instructions. After adding a collection, you must Add Products in Shopify. For any customized needs, you can Hire Dedicated Shopify Developers.
Share the tutorial with your friends who have just started with Shopify. Let us know your comments and feedback in the comment section. Stay updated with us for more tutorials on Shopify.
Happy Reading!
—————————————————————————————————————————————–
Frequently Asked Questions
(1) What is a collection on Shopify?
Answer: A collection on Shopify is a way to organize and group related products together. It helps in creating a structured and intuitive shopping experience for customers.
(2) How do I create a collection on Shopify?
Answer: A: To create a collection on Shopify, follow these steps:
- Log in to your Shopify admin panel.
- From the left-hand menu, click on “Products” and then select “Collections.”
- Click on the “Create collection” button.
- Provide a title for your collection.
- Configure the collection settings, such as collection type, visibility, and sorting options.
- Specify the conditions for products to be included in the collection, such as product tags, product titles, or other criteria.
- Customize the collection’s appearance by adding an image and a description.
- Save the collection.
(3) What are the different collection types in Shopify?
Answer: Shopify offers three types of collections:
- Manual Collection: In this type, you manually select and add products to the collection.
- Automated Collection: This type of collection is created based on specific conditions you set, such as product tags, titles, or vendor.
- Smart Collection: Smart collections are dynamic collections that update automatically based on predefined rules and conditions.
(4) Can I change the order of products within a collection?
Answer: Yes, you can change the order of products within a collection. When editing a collection, you can drag and drop the products to rearrange their order.
(5) How can I add products to a collection?
Answer: There are two ways to add products to a collection:
- Manual Addition: In the collection editing page, you can click on the “Add products” button and manually select the products you want to include.
- Automated Addition: If you have an automated or smart collection, the products will be automatically added based on the conditions you set.
(6) Can I have products in multiple collections?
Answer: Yes, a product can be included in multiple collections. When adding products to a collection, you can select multiple collections for each product.
(7) Can I remove products from a collection?
Answer: Yes, you can remove products from a collection. In the collection editing page, locate the product you want to remove and click on the “x” button or delete icon next to it.
(8) Can I organize my collections into subcategories?
Answer: Shopify does not provide built-in subcategories for collections. However, you can use naming conventions or prefixes/suffixes in your collection titles to create a hierarchy-like structure.
(9) How can I make a collection visible or hidden on my Shopify store?
Answer: On the collection editing page, you can set the visibility of a collection. By default, collections are set to “Visible.” If you want to hide a collection, you can change the visibility option to “Hidden.”

(10) Can I customize the appearance of my collections?
Answer: Yes, you can customize the appearance of your collections. On the collection editing page, you can add an image and a description to provide visual context and information about the collection.