
Hello Magento Friends,
This blog will discuss How to Configure VAT ID Validation in Magento 2.
Value Added Tax (VAT) is added to goods and services. Check out How to Configure/Setup Value Added Tax (VAT) in Magento 2.
You can configure VAT ID Validation in Magento 2. You must set up customer groups and create the related tax classes, rates, and rules for that. After then, enable VAT ID Validation and complete the configuration.
Steps to Configure VAT ID Validation in Magento 2:
Step 1: Create VAT-related Customer Groups
Based on VAT ID Validation rules, it automatically assigns one of the following customer groups to customers:
- Domestic
- Intra-EU
- Invalid VAT ID
- Validation error
Create new customer groups or use existing ones.
Step 2: Create VAT-related tax classes, rates, and rules
The following three entities define the tax rules:
- Tax Rates
- Product Tax Classes
- Customer Tax Classes
Create tax rules that need to use VAT ID Validation.
- Tax rules comprise tax classes and tax rates.
- Tax classes are assigned to customer groups.
Step 3: Configure VAT ID Validation
- From your Magento 2 Admin Dashboard, go to Stores > Settings > Configuration.
- Set the Store View if necessary.
- From the left sidebar, expand CUSTOMERS and select Customer Configuration.
- Enlarge the Create New Account Options tab.
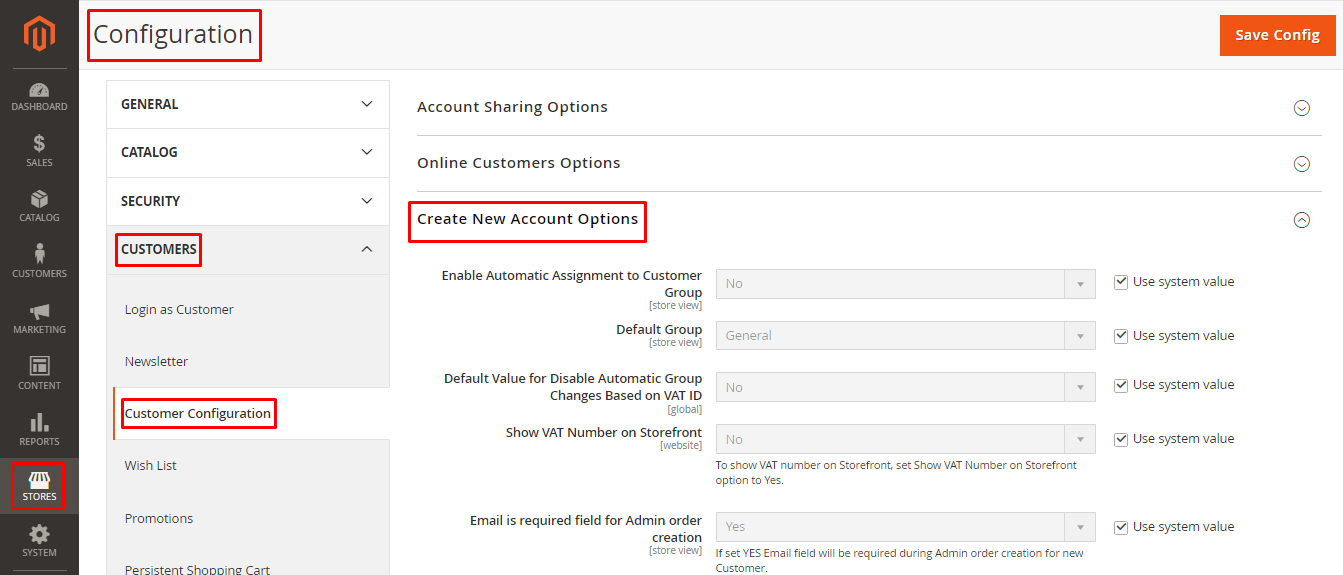
- Now set the Enable Automatic Assignment to Customer Group field to Yes.
- Now perform configuration settings for the following fields
1. Default Group
2. Default Value for Disable Automatic Group Changes Based on VAT ID
3. Show VAT Number on Storefront
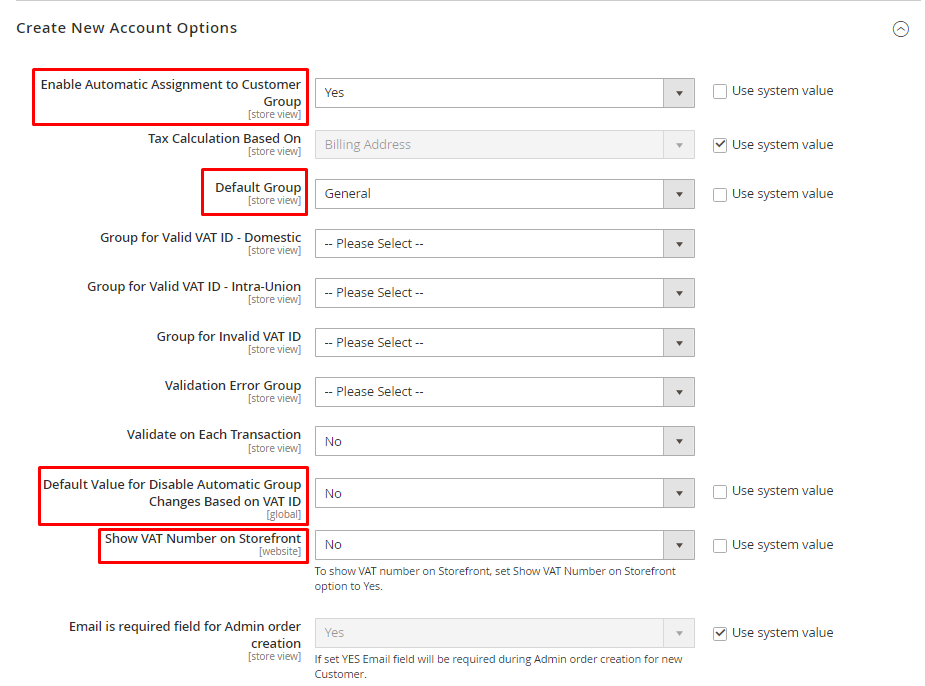
- After completing, click on Save Config.
Step 4: Set VAT ID and select Country
- Now from the left sidebar, expand General and select General.
- Enlarge the Store Information section.
- Select Country.
- Enter VAT Number and click on Validate VAT Number.
- At last, click Save Config.
Step 5: Verify EU Member Countries List
- Continue in the General tab and enlarge the Country Options.
- In the European Union Countries list, ensure each member of the EU is selected.
- Add or remove the state as per requirement using the CTRL key.
- After that, click Save Config.
Concluding Words:
Hence, using the above steps, you can easily configure VAT ID Validation in Magento 2. Share the tutorial with your friends and stay in touch with us.
Happy Reading!


Does these steps involve a check on the European VAT Validator database VIES ?
https://ec.europa.eu/taxation_customs/vies/#/vat-validation