Do you wonder how one can bind his Facebook content with his website? Not to worry because today, you will get a full-fledged idea of it by the end of this article. Let us first brush you all up with the primary what’s and why’s.
What is an API?
An API is an abbreviated name of the Application Program Interface. API basically helps us join with an outer system such as for example a website, an application, or an operating system. All the major social media platforms such as Twitter, Facebook, and so on reveal data to the developer community through APIs. an API can widen the feature-set of a product or portal enabling the third-party developers to write about functionalities they desire to.
What is Facebook API?
Facebook API is the primary way to link with an enormous Facebook platform. It makes all the functionalities accessible to the developers. Dive into the steps to know more about how a Facebook API can be configured.
So, let’s get started!
Steps to Configure Facebook API
Step 1:
Let’s begin with navigating to the below link:
https://developers.facebook.com/
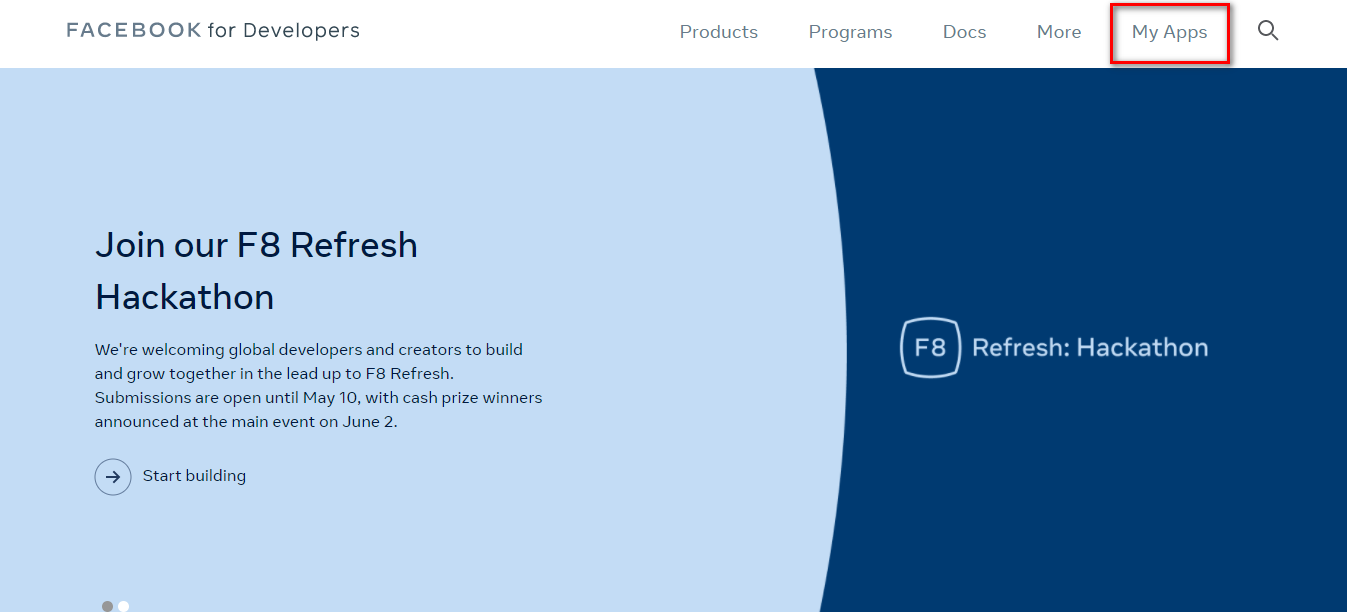
Step 2:
After that, log in to your Facebook account or create a new account. Thereafter, click on My Apps from the top right.
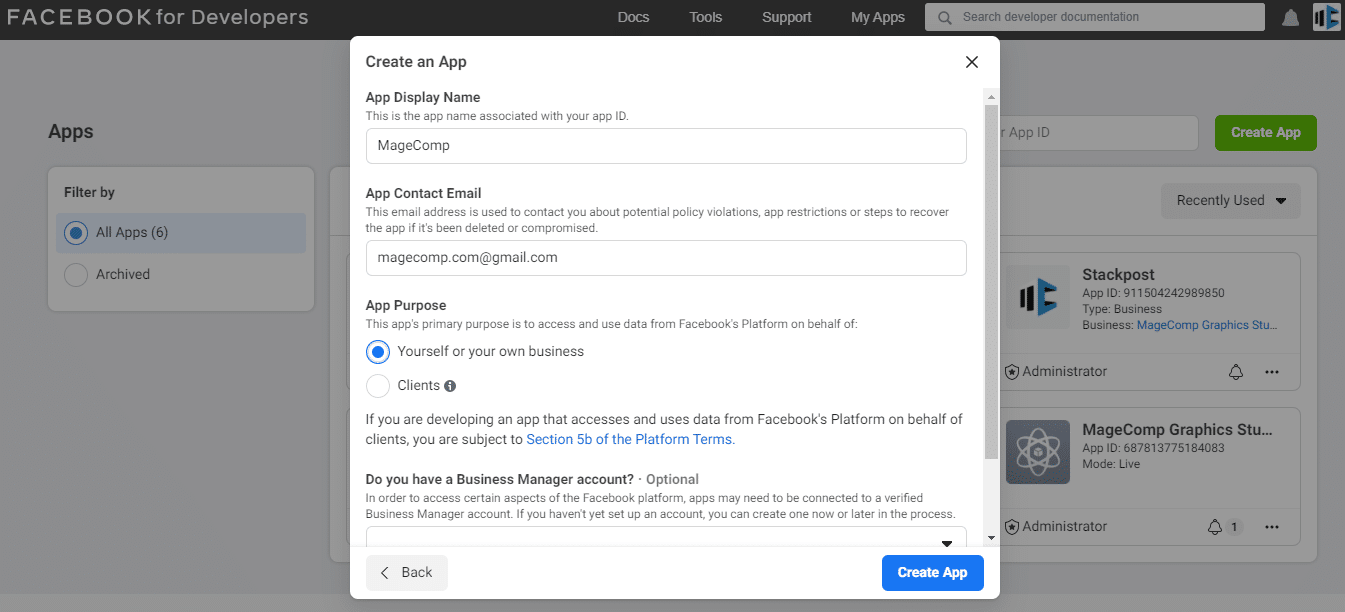
Step 3:
Tap on the Create App button. Select the category and click on the continue button. Afterward, enter the display name you want to give to your application and click on the Create App button.
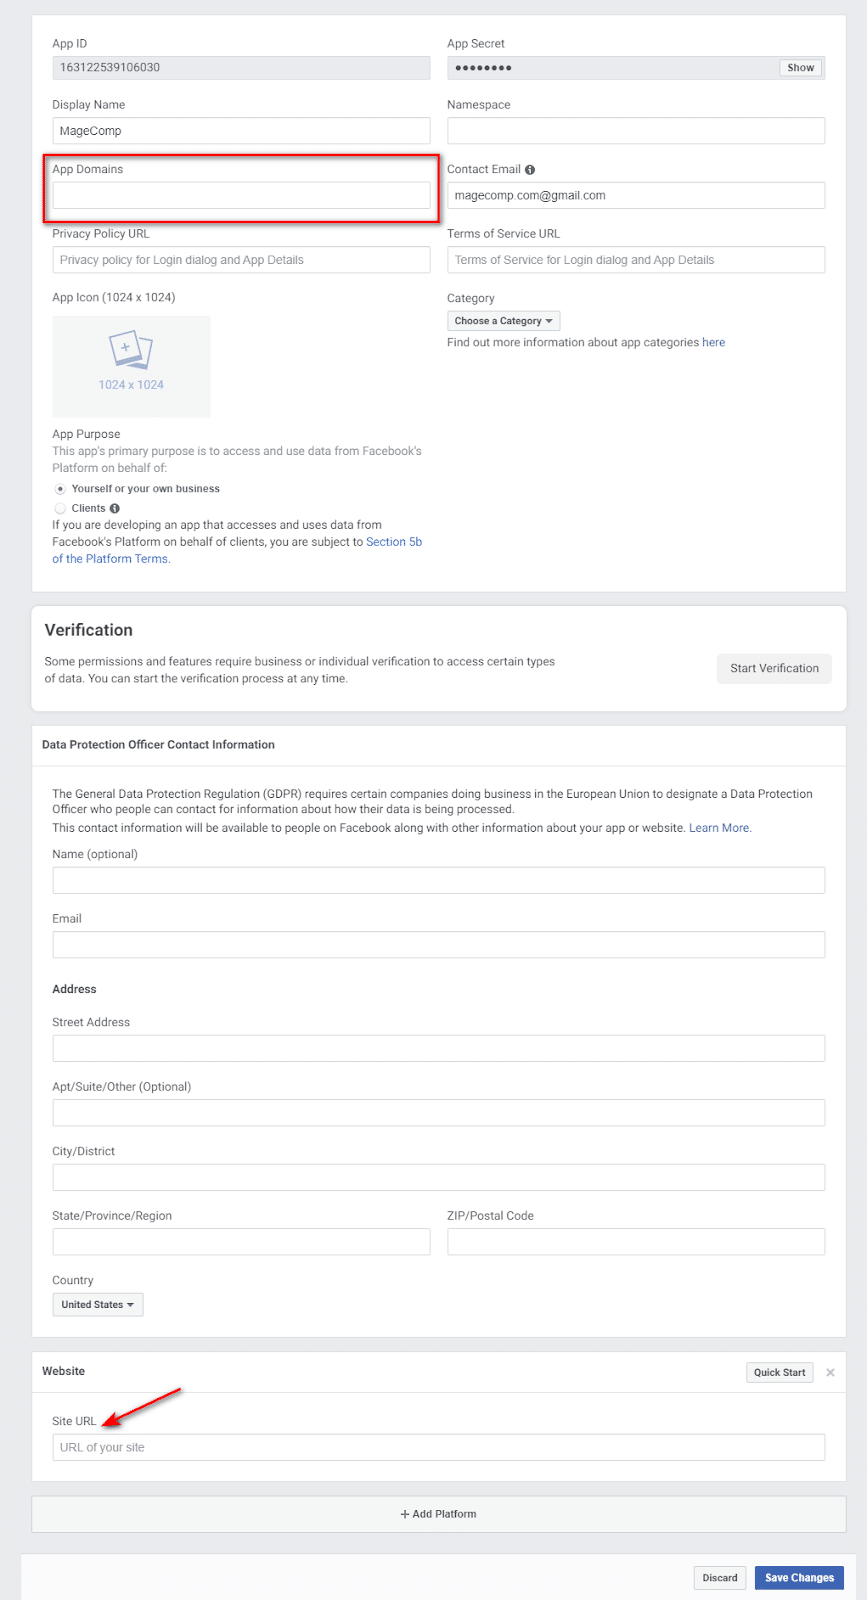
Step 4:
Navigate to Settings → Basic and tap on the Add Platform. Then, select the Website option.
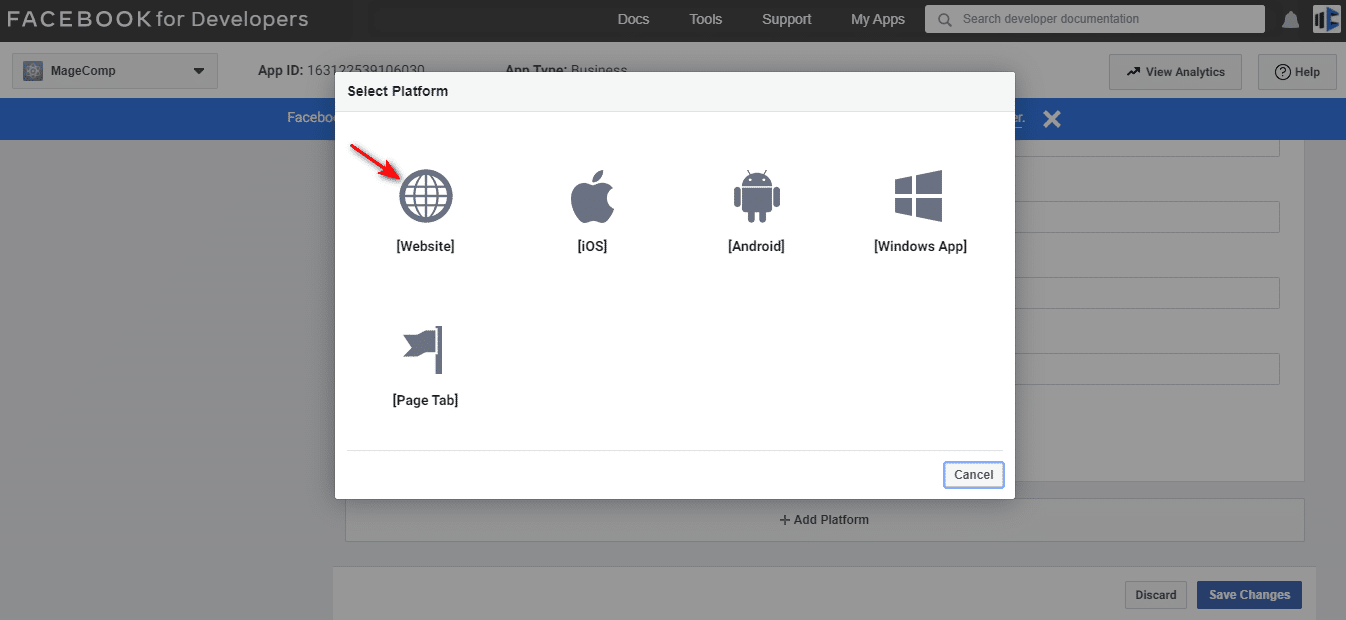
Following that, input the App Domains field, Site URL field, and Privacy Policy URL field.
Step 5:
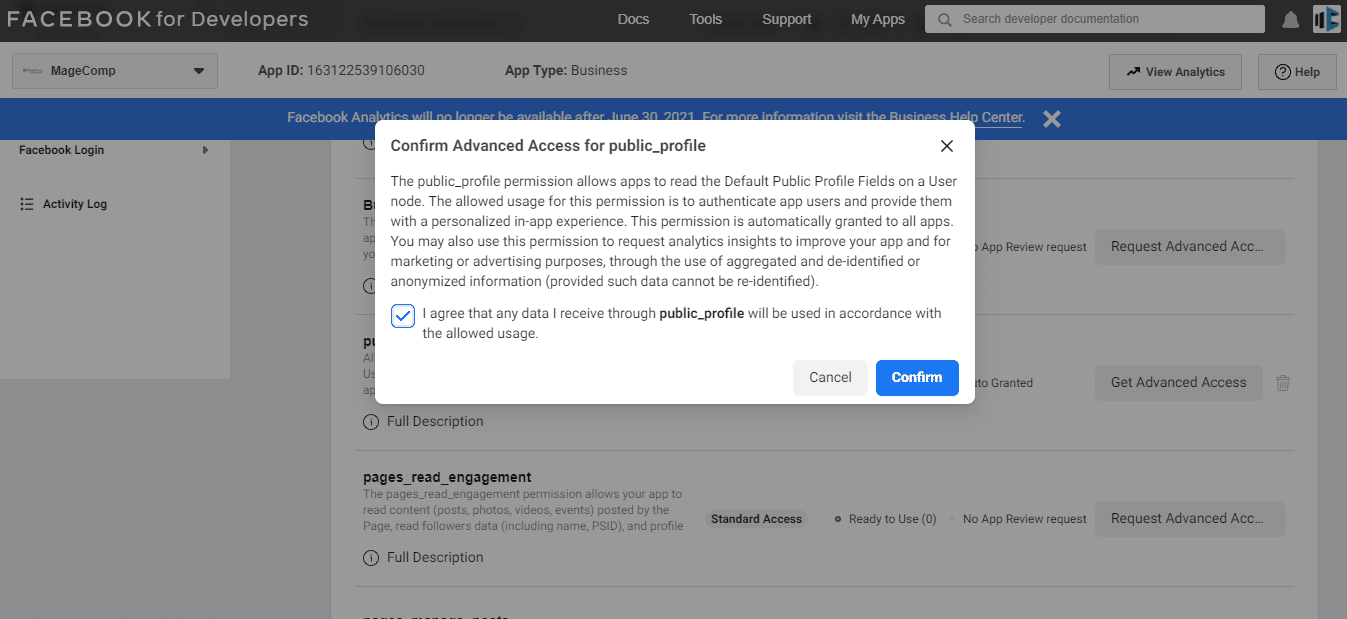
Next, Navigate to the App Review → Permissions and features and make the Public_profile to Advanced Access and click on Confirm as shown in the below image.
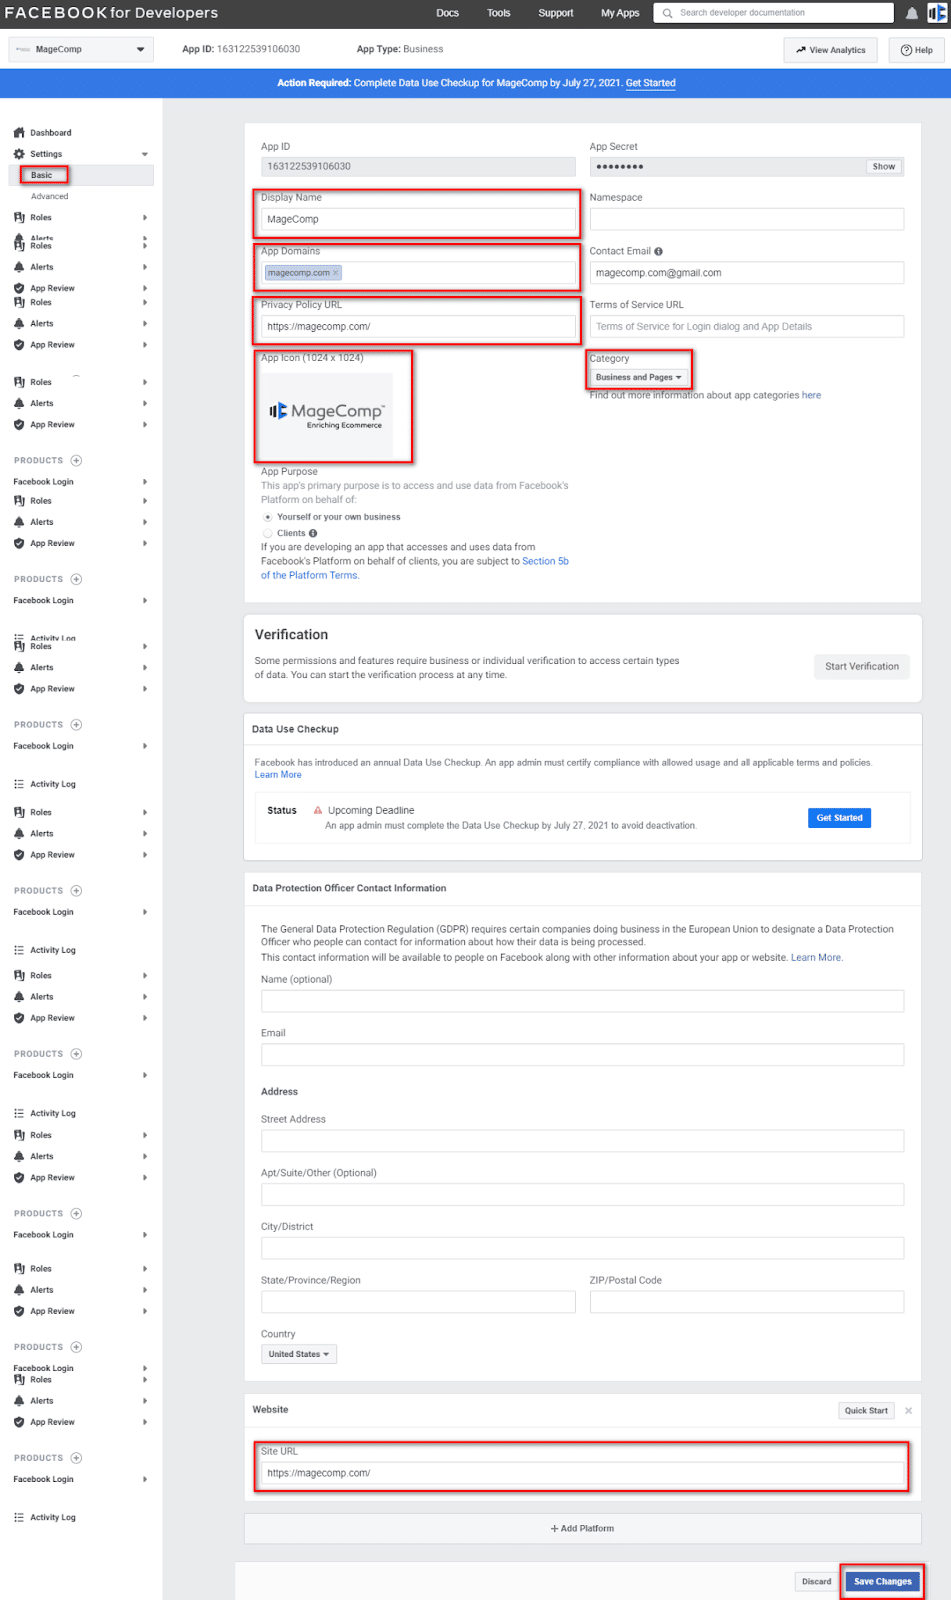
Step 6:
Again, go to the Settings → Basic page. The inserted APP ID and Secret will be shown as in the image below.
Step 7:
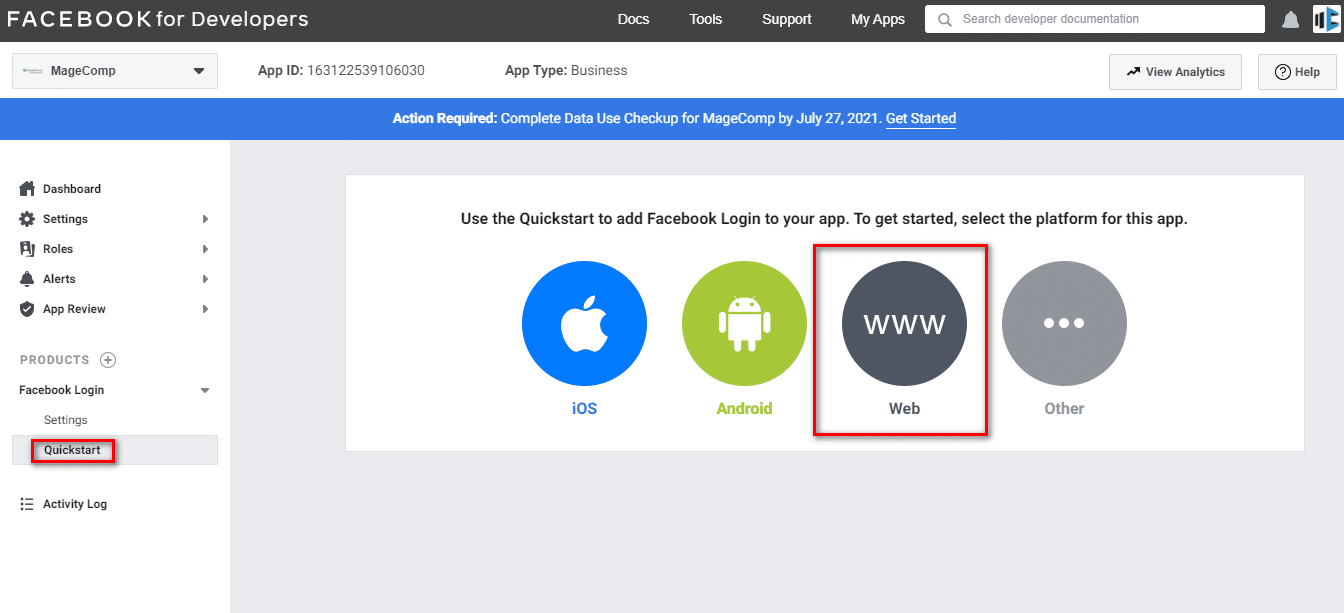
- Click on add product and click on facebook setup. Then, navigate to Facebook Login → Quickstart → Web.
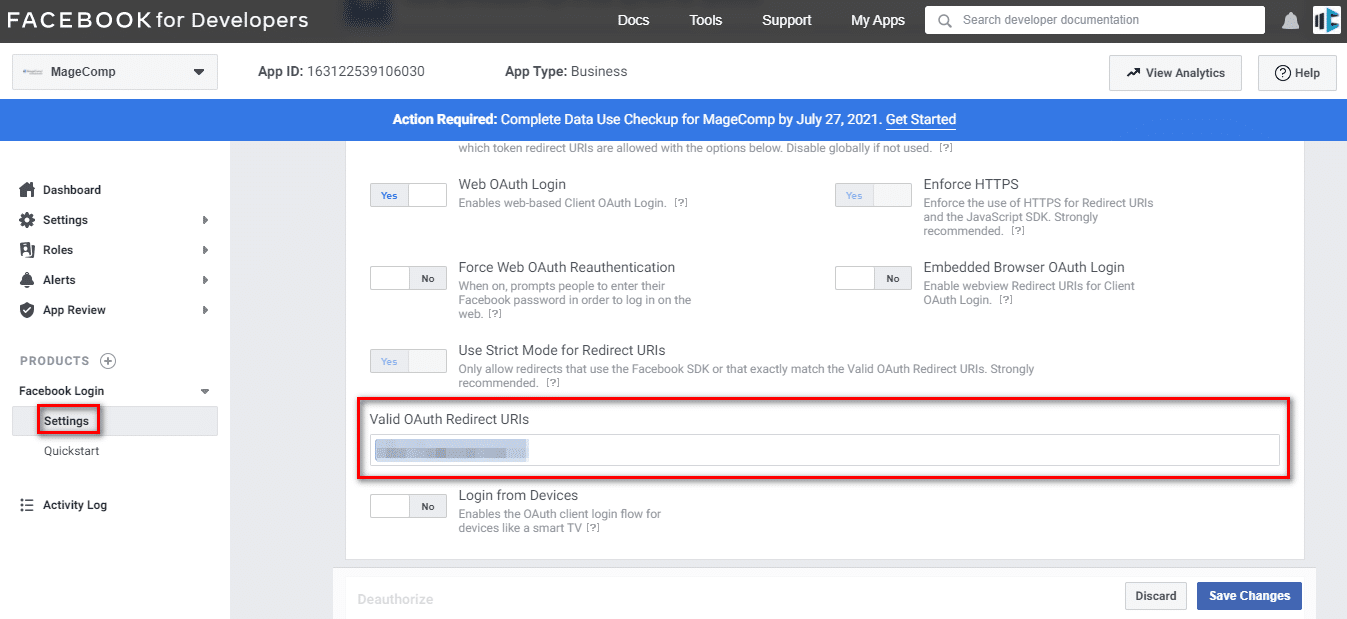
- Next, navigate to Facebook Login → Settings and input the Valid OAuth Redirect URIs and Save Changes.
Step 8:
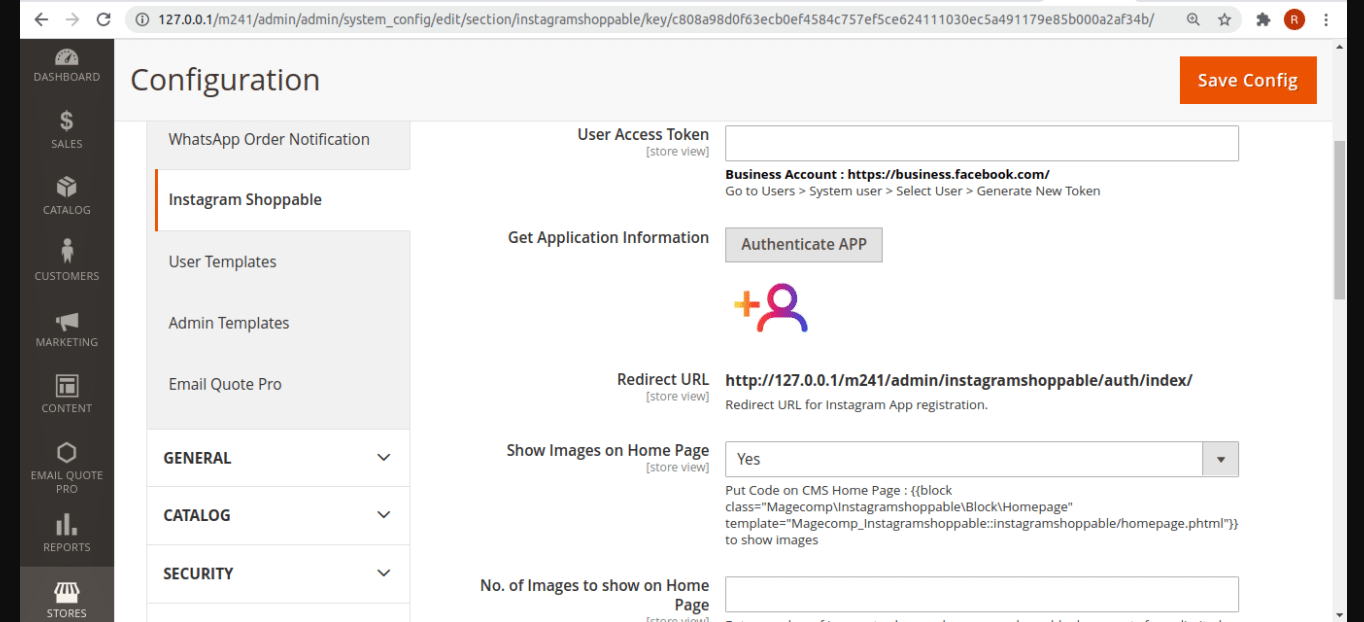
Enter the API into the extension’s setting under the admin panel as shown in the below image.
And, bingo! You are good to go!
Closure:
So, this was everything on How to Configure Facebook API. perform all the steps and you will be ready to configure. If you face difficulties in configuring, without hesitation, add them in the comments section below! Convert your Facebook into shoppable Facebook by using our Magento 2 Facebook Shop which is a must-have extension for your Magento 2 store.
Happy Reading!