Hello Magento Friends,
In this tutorial, I will explain How To Configure Credit Memo Emails In Magento 2.
When a refund is requested by customers, the seller creates a credit memo in Magento 2. Learn the step-by-step guide for Magento 2 Create Credit Memo.
Comments can be added to the Magento 2 credit memo mentioning the reason for the refund. Learn the step-by-step guide for Configure Credit Memo Comments in Magento 2.
After the process is completed for Magento 2 create credit memo, the seller can send emails to customers including information about the Magento credit memo.
Let’s learn How To Configure Credit Memo Emails In Magento 2
Steps to Configure Credit Memo Emails in Magento 2:
Step 1: First of all Login into your Magento 2 Admin Dashboard.
Step 2: Now from the sidebar menu select Stores > Settings > Configuration.
Step 3: From the left pane, expand SALES and select Sales Emails.
Step 4: Now enlarge the Credit Memo section.
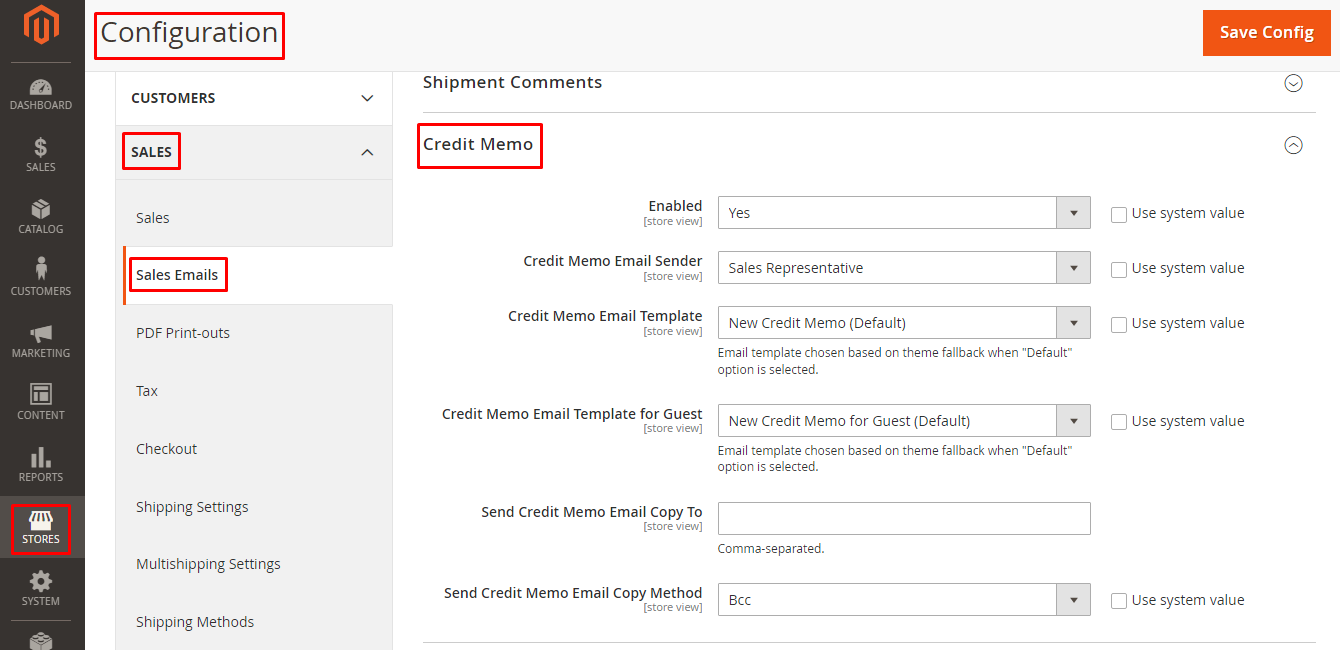
- Enabled – Select whether you want to send a credit memo to Magento 2 customers.
- Credit Memo Email Sender – Select the Magento 2 credit memo email sender.
- Credit Memo Email Template – Select the template for the Magento credit memo.
- Credit Memo Email Template for Guest – Select the template for the Magento credit memo for guest users.
- Send Credit Memo Email Copy To – Add the email addresses separated with commas that will receive the copy of the Magento 2 credit memo.
- Send Credit Memo Email Copy Method – Select the method for Magento credit memo copy as BCC or separate email.
Step 5: Hit the Save Config button from the upper right corner when you complete Configure Credit Memo in Magento 2.
Final Words:
Hence, this way you can Configure Credit Memo Emails in Magento 2. Share the article with your friends and stay in touch with us for more tutorials.
Happy Reading!