Hello Shopify Friends,
In today’s Shopify tutorial, we will learn How to Add or Change Favicon in Shopify.
Favicon is an acronym for “Favourites Icon” that helps Shopify stores make their online presence noticeable.
In this guide, you can explore particulars about Shopify Favicon and how you can add Favicon to your Shopify Store.
Contents
What is Favicon in Shopify?
Favicon is a small icon that appears in the browser tab next to the website title. Favicons are displayed on the tabs that are open in your browser, address bar and bookmarks. It helps users to identify and distinguish your Shopify website from other open tabs.
Favicon can be customized to match your brand identity. It may be a logo, a symbol, or a small icon representing your business. Hence, users can easily find and identify your brand with the help of favicon.
Why do you need Favicon for Shopify?
Having a favicon for your Shopify store brings plenty of benefits.
- Brand Awareness: Favicon helps to identify your brand by providing a visual sign beside your brand name on the webpage. Hence, users can easily remember your brand.
- Professionality: Favicons can make your brand look professional and give a classy appearance. This builds the trust of customers.
- Easy to navigate: When multiple tabs are opened on customers’ browsers, favicons help to find your store easily. This is more helpful when users are comparing products online.
- Increased involvement: Using favicon, your business stands out in the crowded browser window. This makes your store more memorable and engaging to the users.
Steps to Add or Change Favicon on Shopify:
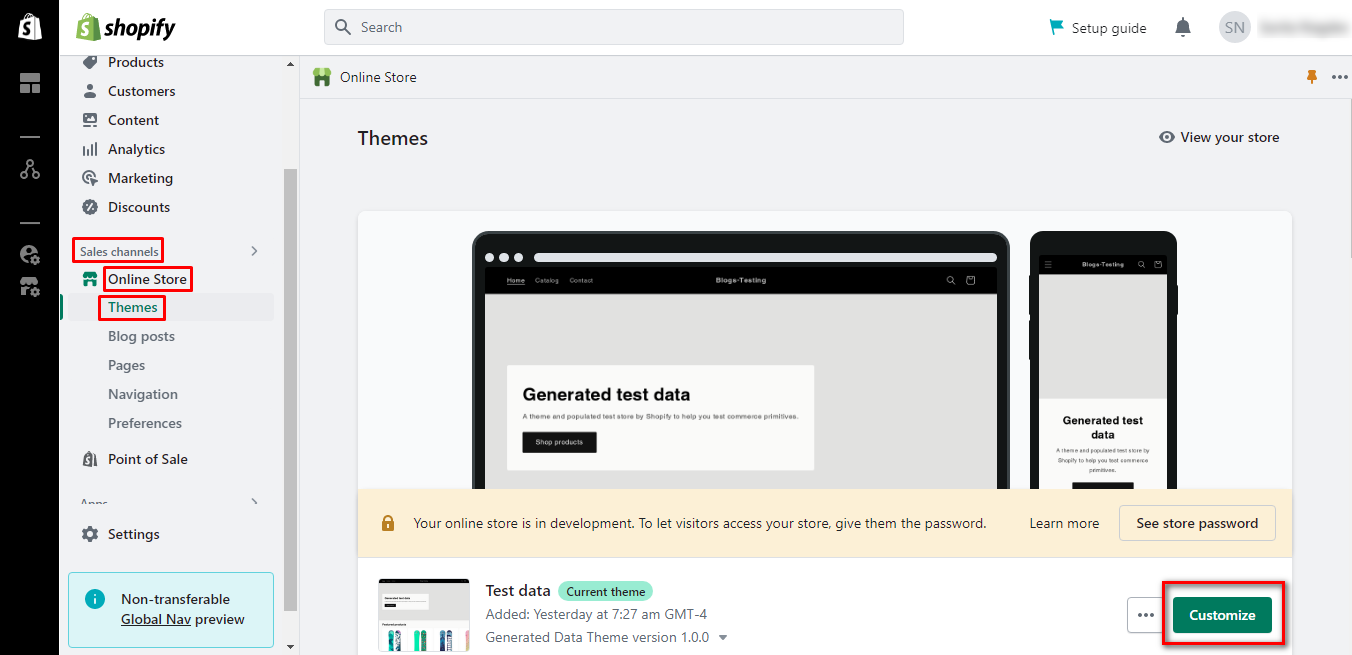
Step 1: Log in to your Shopify admin. Click the Online Store under the Sales Channels section from the left menu, then select Themes. Then click on the “Customize” button for the theme you want to add the favicon.
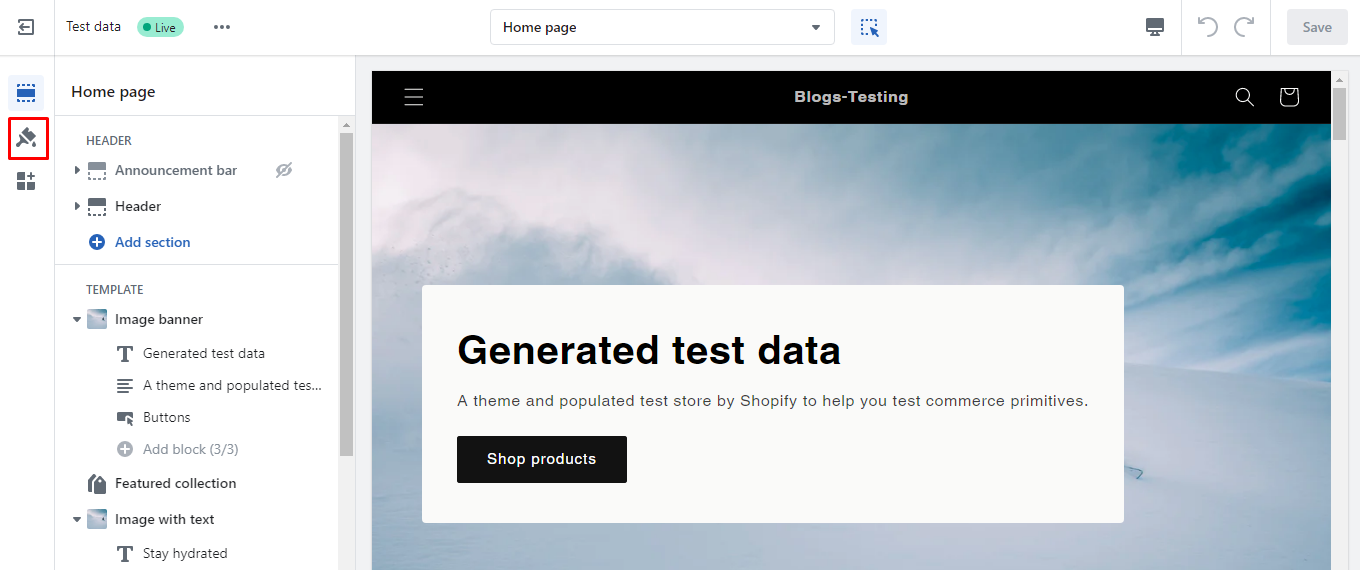
Step 2: You will be redirected to the Theme editor page. Click on the Theme settings icon, as shown below.
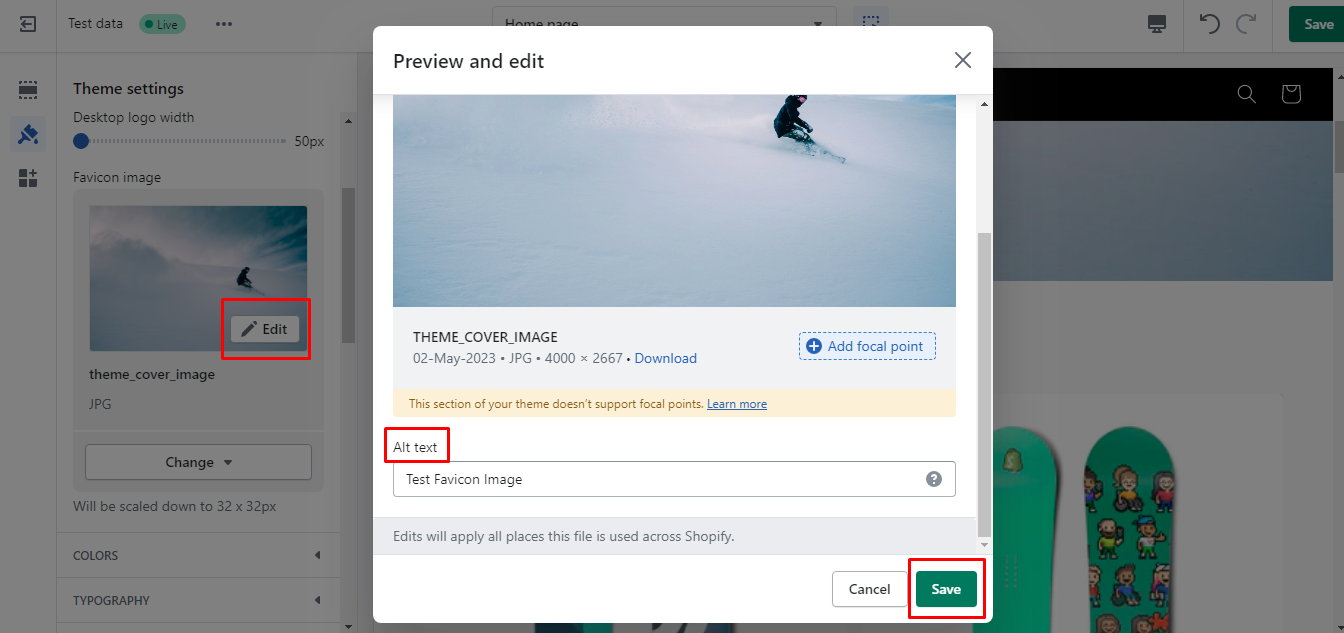
Step 3: Enlarge the LOGO option; you will find a Favicon Image section. You can upload your favicon image or use available free images from here.
Note – Accepted favicon image size is 32×32 pixels.
Step 4: Once you add the favicon image, click on Edit to add Alt text to the image. And then click on Save.
Step 5: Finally, click Save from the top right corner to add a favicon image to your Shopify store.
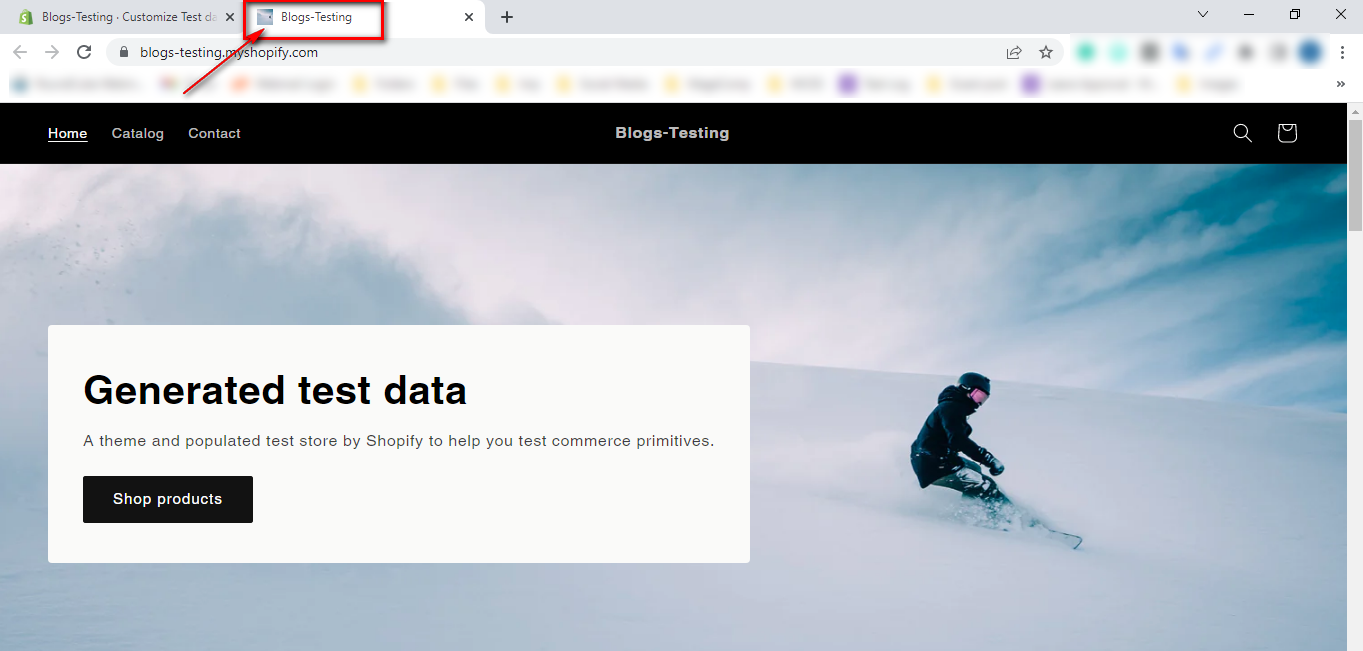
Now open the front of your store to check the favicon image.
Final Words:
Hence, this way, you can Change Favicon for Shopify. If you are unable to add favicon for Shopify, experienced Shopify Developers can help you successfully add favicon to Shopify or change favicon to Shopify.
Share this Shopify tutorial on How to Add or Change Favicon on Shopify with your friends and stay updated for more.
Happy Reading!
—————————————————————————————————————————————–
Frequently Asked Questions
1. What is The Ideal Size For a Favicon Image?
Ans. The ideal size for Favicon is 32×32 pixels. If the image is large, Shopify will scale it at the time of upload.
2. Why is Shopify Favicon Not Showing in The Browser?
Ans. Your browser may have saved the website before you added Favicon. Clear the cache, and try again. You can also try another browser.
3. How do I add a new favicon?
Ans. To add a favicon to your website, either save your favicon image to the root directory of your webserver, or create a folder in the root directory called images, and save your favicon image in this folder.
4. Which Image Types Are Supported For Favicon?
Ans. A Favicon supports PNG, GIF, and ICO image files. ICO image files are used more because they are smaller and supported by all major browsers.
5. How do I create a custom logo for Shopify?
Ans. Once you’re ready to use the logo generator, create your own logo by visiting https://www.shopify.com/tools/logo-maker and click ‘Get Started. ‘ Choose the category that best represents your business and the visual style that you like best.
6. Where is the favicon stored?
Ans. A favicon is a small image that is located in the browser tab to the left of a webpage’s title.


