Hello Shopify Friends,
In this tutorial, we will delve into an important topic for Shopify users: letterpressing Apple Wallet passes. In this post I will take you through the process of how to set up and manage Apple Wallet passes within your store using Shopify. Let’s get started!

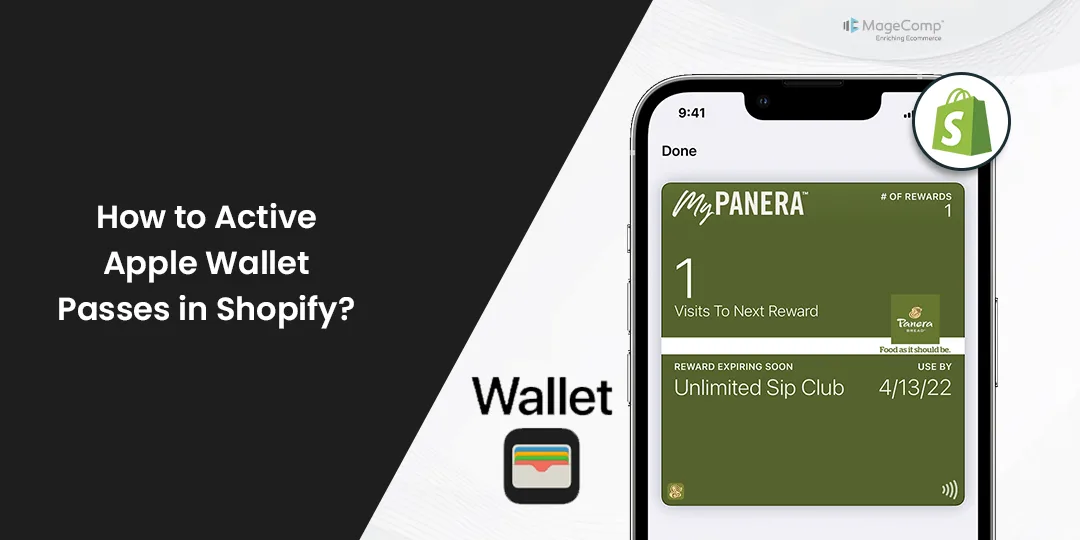
What are Apple Wallet Passes in Shopify?
Designed to be a modern solution for digital assets, Apple Wallet passes in Shopify let customers store things they may want to refer to quickly and conveniently, like boarding passes, event tickets, coupons, and loyalty cards on their Apple devices.
With this powerful integration, Shopify merchants make the offer of their products to their customers easy and friendly. The digital passes from these promotions, discounts, and loyalty programs from the store can be effortlessly added to Apple Wallet and their corresponding digital passes can be effortlessly accessed and managed once they’re in Apple Wallet, helping to simplify the experience of interacting with the promotions, discounts, and loyalty programs from the store. With paperless transactions, customers get to meet their paperless transaction needs, enjoy the benefits of less cluttered and remain organised and abreast of the coming event and special offers.
Let’s learn How to Enable Apple Wallet Passes in Shopify
Steps to Active Apple Wallet Passes in Shopify:
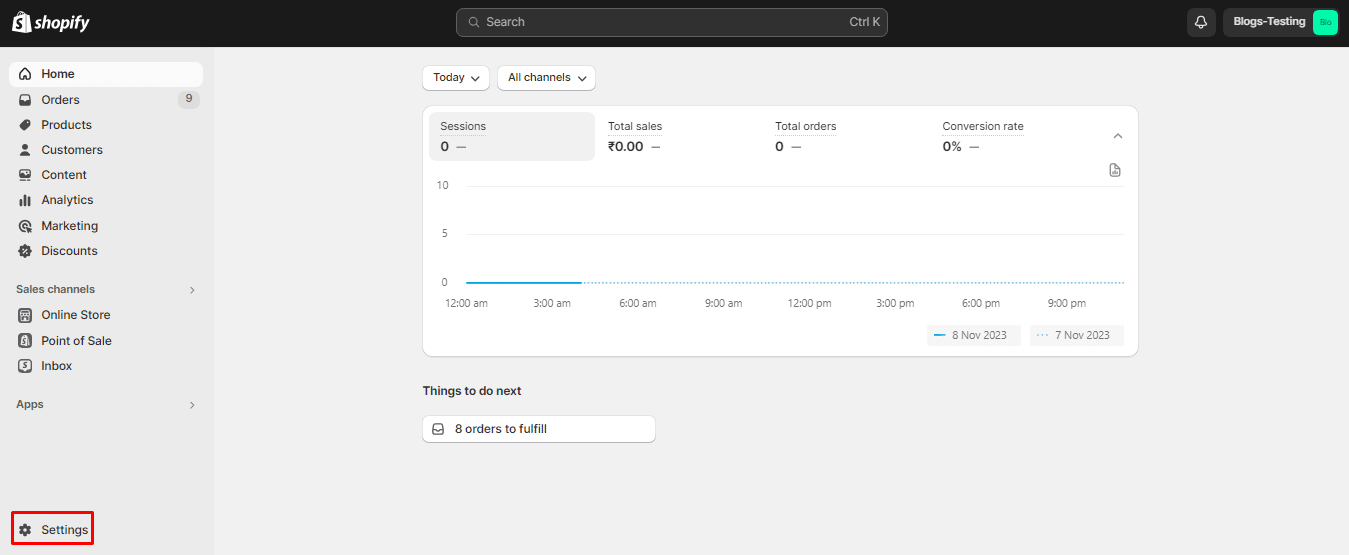
Step 1: Log in to your Shopify admin panel.
Step 2: Click on Settings from the left menu panel.
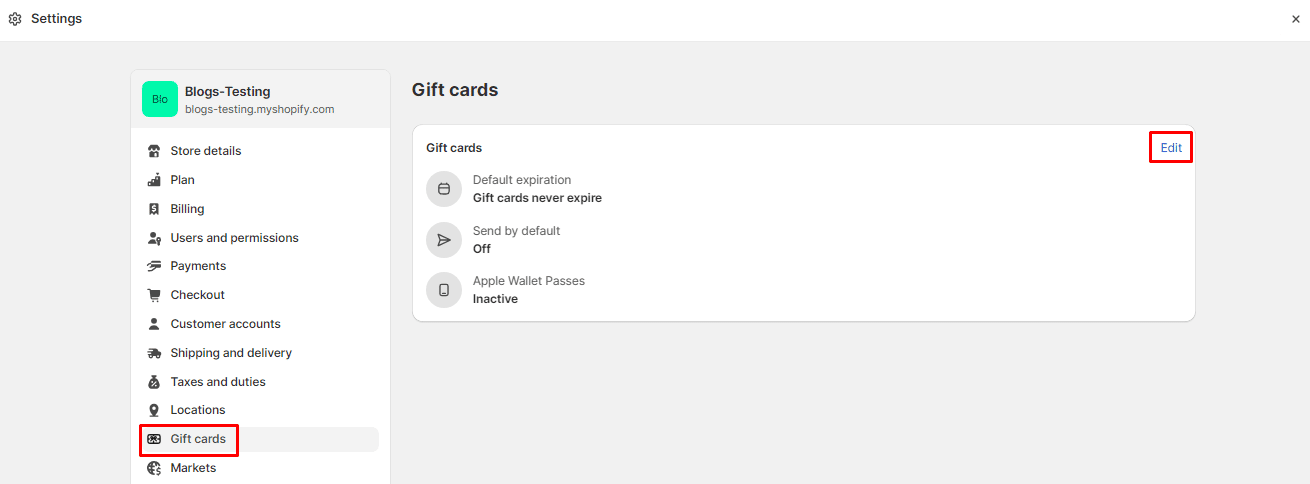
Step 3: Now, choose the Gift cards option from the Settings menu and click on Edit.
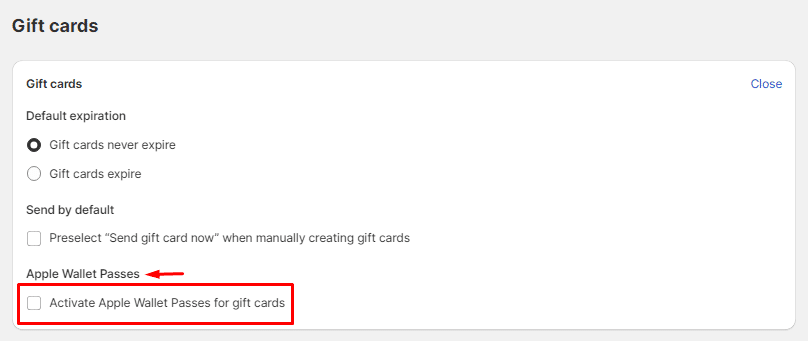
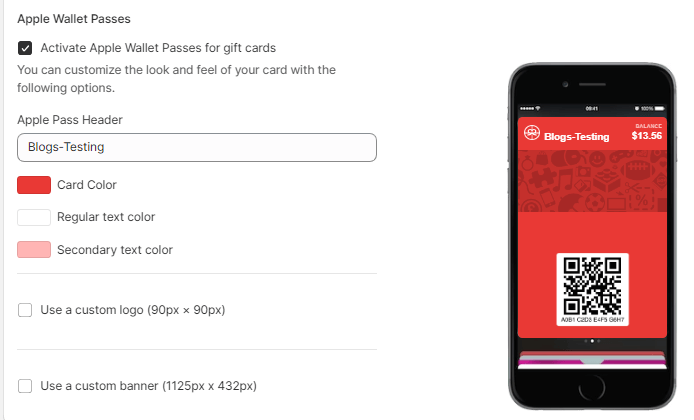
Step 4: In the Apple Wallet Passes section, check the Activate Apple Wallet Passes for gift cards.
Step 5: Once you enable Apple Wallet Passes, you will be able to customize the appearance of Apple Wallet Passes.
- Apple Pass Header – Add a custom name for Apple Wallet Passes.
- Card Color – Select any custom card color that matches your requirements.
- Regular text color – Change the color of regular text as per requirement.
- Secondary text color – Change the color of the secondary text as per requirement.
- Custom logo – Set a custom logo for the gift card displayed in the header. It allows an image size of 90 x 90px.
- Custom banner – Select a custom banner for the gift card displayed under the header. It allows an image size of 1125 x 432px.

Step 6: When you have completed customizing the Apple Wallet in Shopify, click on Save to apply the changes.
Step 7: Test them thoroughly to ensure that they work as intended and that customers can easily add them to their Apple Wallet.
Step 8: Once everything is set up and tested, promote the availability of Apple Wallet passes to your customers. You can do this through email marketing, social media posts, or banners on your website.
Final Thoughts:
To get Apple Wallet passes going off in your Shopify store, and provide your customers with a neat and digital way to access promotions, loyalty programs, and other offers, follow these directions. The effort to integrate this promotes shopping by letting customers track easier their rewards and special deals.
Relevant Read –
How to Create and Manage Gift Cards in Shopify?
Share the tutorial to activate Apple Wallet Passes in Shopify and stay informed.

Happy Reading!