If you are a retailer wanting to sell as many products as possible, then it makes sense that you always want to create new leads for your business.
With the rise of online shopping, there’s never been a great time to look at options like Google Shopping but now.
But how would Smart Shopping be beneficial for you?
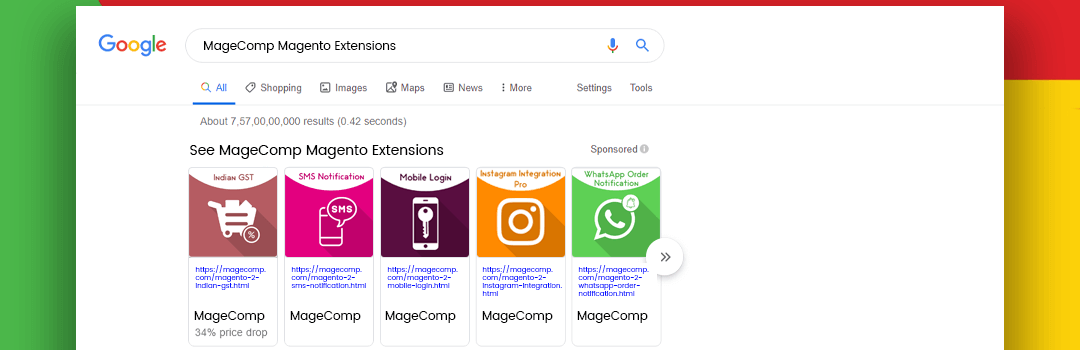
In case you have not noticed, more and more shopping related search results appear at the top of the page whenever you search for a particular product. This makes it easier for you to look for your desired product, as well as a trustworthy merchant.
Simply put, it is an effective way to generate more attention online, and hopefully, more leads and sales.
But the issue with Google Shopping is that sometimes, you lack control. That means, you are spending a lot of money on your end, although it is not profitable.
When it comes to Google advertising, sometimes you are bidding on keywords and your ads will only show up if users will look for those specific keywords. Google Shopping takes product information from your product title along with other information on your site. That way, your target keywords are more likely to drive website traffic.
What are Google Shopping Ads?
Google Shopping Ads is powered by the Google Merchant Center and AdWords.
At its core, Google Merchant Center is where your product feeds are found. Meanwhile, AdWords is a platform wherein your campaigns go live. This is also where you manage your insight, make optimizations, manage your bids, set your budget, and so on.
Take note that setting up and managing Google Shopping ads is quite different from traditional text ads. In the latter, your building campaigns, ads, and ad groups that revolve around the keywords that you select.
Meanwhile, in Google Shopping Ad’s case, Google will be the one to determine which of your product listing ads will show up. It first takes into consideration your bids, website, and feeds to know what specific search queries trigger your ads.
Setting up shopping ads have some strong similarities with Search Engine Optimization (SEO). In this post, we will walk you through how you can utilize Google Shopping Ads to drive sales and e-commerce conversions to your business:
1. Set up a Google Merchant Center Account
Google Merchant Center is a tool that lets you upload the product listings that you will use along with Google Product Ads, Google Commerce Search, and Google Shopping.
To be able to advertise your ads in Google Shopping, you first need to book it with Product Listing Ads with Google.
To utilize the Google Merchant Center, all you need to do is sign up for an account on Google. If you already set up an account, go to merchants.google.com and then sign in.
Keep in mind that in the process of creating your Merchant Center account, you will be asked to complete the following:
- Select a specific location
- Configure your account
- Agree with the Terms of Service
2. Optimize Your Product Imagery
Google Shopping utilizes product feeds that are uploaded to index search results. However, it pulls the featured images from its respective retail websites.
That’s why you need to optimize your product imagery (as well as listings) before even thinking to market them on Google Shopping.
Your product photos are one of the most vital parts of your listings. It helps you compel online users and buyers to buy from you instead of buying from other merchants.
Google inherently knows this. Thus, in order to provide an excellent shopping experience for the customers, the search engine giant will deny Google shopping campaigns that have low-quality images.
Therefore, low-quality product imagery does not just significantly affect your sales, but it prevents your campaign from happening altogether.
To make sure that you are featured on Google Shopping, follow Google’s image guidelines:
- Utilize a gray, white, or any light-colored background.
- Make use of an even and clear lighting.
- Use rear view and close up photos as additional images.
- Your product should take up between 75% and 90% of the entire image.
- Avoid excessive blurring, pixelation, fading out, and fringing.
- Try multiple product angles
- Use shadows to create more image depth
- Feature photos of real people using your product.
These product image specifications are excellent if you have already mastered selling your products on other online marketplaces like Etsy, eBay, Amazon, and the likes.
3. Collect and Input Your Product Data Feed
Once you have optimized your images, it is now time to set up your product data feed.
Your product data feed practically informs Google about your products. It is crucial because it helps Google look for and display your products when users search for specific terms or attributes.
To create a product feed, simply go to your Google Merchant Center account. Go to Products – Feeds, and then click the blue “+” icon.
Input your language and the country that you are in. Giving these necessary data control which specific demographic will see your products.
After that, name your product feed and select how you will input the product information.
When using Google Sheets, you either have the option of uploading your own spreadsheet or use a Google Merchant Center template. The spreadsheet is used to create product qualities that Google will utilize to index and show your products.
Moreover, this step lets you come up with an upload schedule that depends on how you update your inventory.
If you go with the template of the Google Merchant Center, then the column headers shows the product qualities. On the other hand, if you opt to build your own spreadsheet, you need to input the product attributes you have picked as column headers.
Fill out the necessary data with every product as its own row. If a specific product does not have a particular attribute, just skip the cell altogether.
Upload the file on Google Merchant Center and you are done!
4. Link Your Google AdWords Account
When looking up for products online, the Google Shopping results that you will come across are ads. So for you to get your products across Google Shopping, you need to pay.
While it is through Google Merchant Center that Google will take information about your products, Google AdWords is how users will see your products.
To get your products in front of the eyes of shoppers through Google Shopping ads, you first have to link your Google AdWords account.
You can do this by simply logging in on your Google Merchant Center account. Then you would see three vertical dots on the top right corner. To expand the menu, click on it and choose Account linking.
If you do not have a Google AdWords account yet, then you need to create one. If you already have, just click Link Account and then place your customer ID in Google AdWords, and voila!
Your Google AdWords account is now linked with your Google Merchant Center account.
5. Create a Google Shopping Campaign
After you have your AdWords account linked with your Google Merchant account, you are now ready to build a Google Shopping campaign and advertise your products.
Here’s how you can do it:
Step 1: Make a Google Shopping campaign via your Google Merchant Center account.
Once you link your AdWords account via the Account linking page, then you will be able to access it. All you need is to simply click the Create Shopping Campaign.
Step 2: Configure your campaign.
Place the name of your campaign, your budget, and the country of sale. Once you hit Create, there will be a prompt if you want to continue managing your campaign via Google AdWords.
As an alternative, you can make a Google Shopping campaign via Google AdWords. Simply login on your account and open the Campaigns tab found on the left side menu. Then, click the blue “+” icon and then select a New campaign.
Step 3: Select a campaign goal.
You can choose whether its Sales, Leads, or Website Traffic.
Usually, Sales campaigns help drive sales online and in person. Leads campaigns collect leads and other conversions by enticing the shopper to fulfill an action. Finally, Website Traffic campaigns bring the right audience to your website.
Google ensures that each campaign is specifically tailored to your goal, so you need to pick the one that is inline with your business goals.
Step 4: Wrap up your Shopping campaign.
After selecting what your campaign goal is, assign the campaign type as Shopping. See to it that your Google Merchant Center account shows up. That way, Google knows where to get your product data. Then, specify your country of sale.
Step 5: Pick a campaign subtype.
Remember that smart Shopping campaigns need conversion tracking. That way, it is easier for AdWords to track your ads that ultimately lead to sales on your site.
It is also you way of knowing whether your campaigns are effective and brings in ROI.
6. Place Bids on Your Shopping Campaign
After you are done organizing your ad groups, it is time to bid your product ads.
Take note that those product ads will be generated from your feed data. Therefore, you do not have to directly write ads on AdWords.
Shopping Campaign bidding is completely different from text ads on search results.
There are no keywords used in Shopping Campaigns. Instead, you are allowed to set bids on a particular product that you are selling.
This gives you an enormous amount of control because you can either opt to set the bid individually on products or set it on groups. Whatever it is, the thing that you will be setting the bid on is known as “Product Group.”
Imagine that you are placing all the products you are selling in a huge bin ‒ well that is precisely what Google calls “All Products” product group.
Google lets you take all those products in an enormous bin, and spill them into smaller bins. That way, it is possible for you to set bids on those smaller bins. If those bins are not small enough, you can even make smaller bins to set your bids on.
To make these bids, aka Product Groups, you need to utilize the specific attributes that you set on your product feed. That way, you can segment these products.
This concept is, by far, one of the complex parts of setting up a Shopping campaign.
7. Target and Schedule Your Shopping Campaign
One of the final sections of setting up your Google Shopping campaign is targeting and scheduling your shopping campaign.
This part is essential because it controls who will see your product, and when it will be seen.
Ideally, the first two settings ‒ Networks and Devices ‒ should not change. It’s because they are the ones telling you where will your products show up.
Next, choose the locations where you will target your ad. See to it that you are only choosing locations where you are located or where you can ship to. In the Location options, it is possible to change the Target and Exclude settings. However, it is recommended that you go with Google’s default choices. Unless you already have an advanced knowledge when it comes to Google Shopping ads.
Lastly, set your Shopping campaign’s start and end dates. Your ad will keep on running if you do not pick an end date, which could be costly on your part. So do not forget that section as well.
8. Build Ad Groups
Ad groups help you choose what type of ads you should be running. Moreover, it helps you organize the bidding for those ads.
Typically, you can run two different types of ad groups: Product Shopping ads and Showcase Shopping ads.
Product shopping ads promote a particular product. Meanwhile, Showcase Shopping ads let you advertise different products that represent your business or brand.
Think of the latter as a product category. If you have an ecommerce business, and you sell CCTV cameras, Showcase Shopping ads lets you advertise different models of CCTV cameras.
If you pick the Product Shopping ad group, place your ad group name and then place the optimal CPC bid. By doing so, you are making a single, big ad group for all of your products. To filter out your products, you can make separate ad groups for different categories.
Meanwhile, if you have chosen the Showcase Shopping ad group, put your ad group name and then set the maximum cost per engagement. Finally, select what products you want to advertise as a part of your Showcase Shopping ad.
Once you hit Save, then you have already submitted your campaign. Now, you are on your way to completing your first Google Shopping campaign!
Over to You
According to Greg Swan, “Showing your products at the very top of Google’s search engine results allows retailers to insert themselves early on in the buyer’s journey for broad product keywords and drive conversions directly from the Search Engine Results Page (SERP).”
And this is how the Smart Shopping Campaign can help you boost sales for your e-commerce business.
To summarize, here are the steps on running a Google Shopping Ads campaign:
- Set up a Google Merchant Center account
- Optimize your product imagery
- Collect and input your product data feed
- Link your Google AdWords and Google Merchant accounts
- Create a Google Shopping ad campaign
- Place bids on your campaign
- Target and schedule your campaign
- Build ad groups
Google’s Shopping Campaigns help boost your site’s traffic and sales. But despite being a powerful marketing strategy for e-commerce businesses, it is an overlooked method.
What business owners do not know is that they can leverage Google Shopping Ads to promote their products and meeting their customer’s needs.
With more and more people doing their shopping online, you need to create as many leads as possible. Therefore, there is not a better time to look for options like Google Shopping but now.