Hello Magento Friends,
In this article, I will explain How to Update Customer Profile in Magento 2.
The customer profile contains personal details, email, date of birth, addresses, orders, and other information. In Magento 2, customers can update their information from the My Account section. Allow customers to add profile image on your Magento 2 website to provide a personalized user experience.
Sometimes the admin needs to update customer information. The admin can manage all customer profiles from the admin panel. Let’s find out more.
Steps to Update a Customer Profile in Magento 2:
Step 1: Login to your Magento 2 Admin Panel.
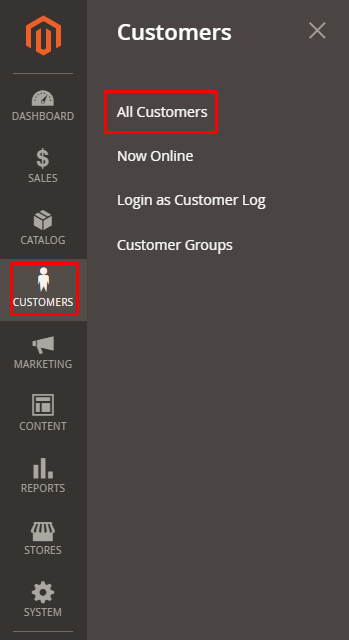
Step 2: Navigate to Customers > All Customers.
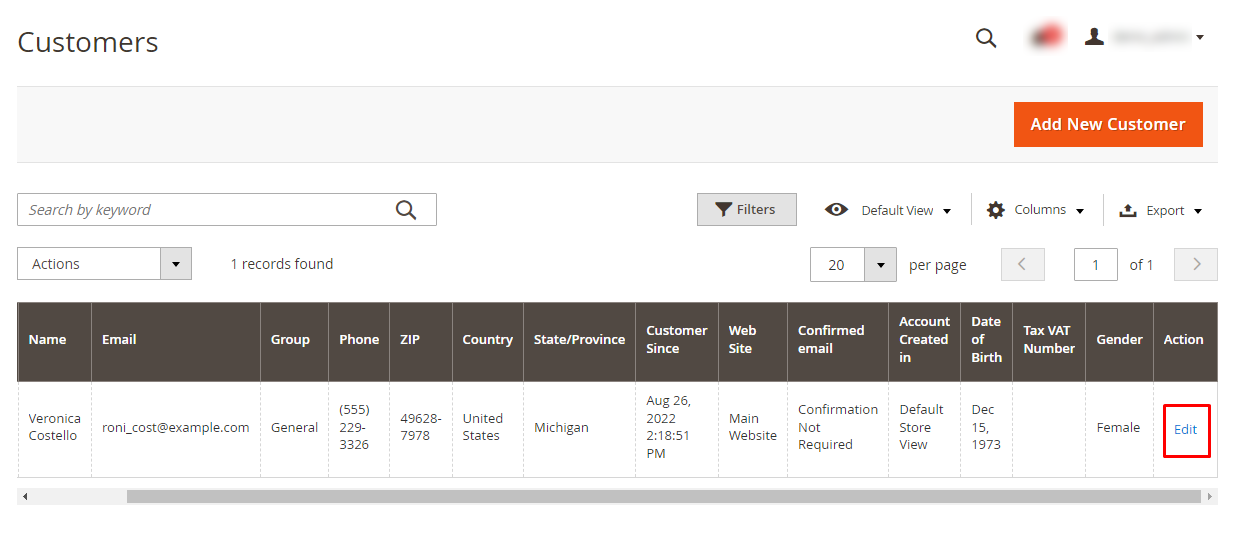
Step 3: Find the customer from the grid and click Edit in the action column.
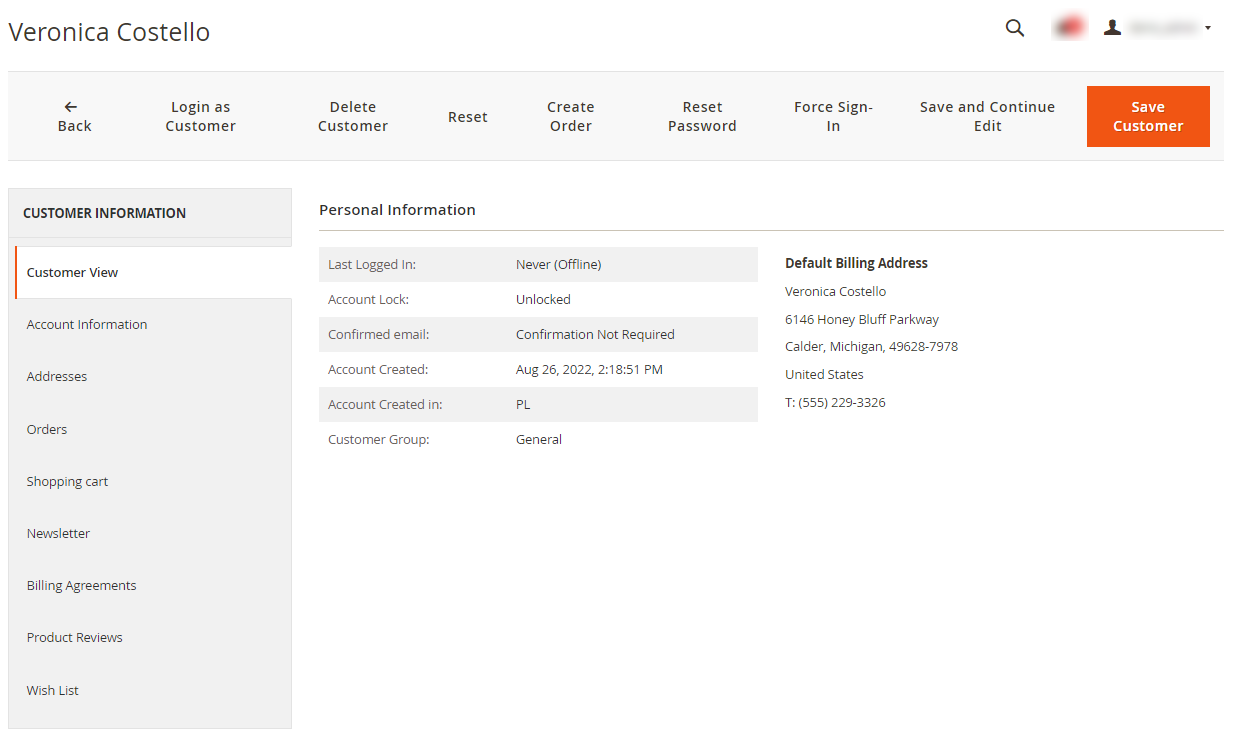
Step 4: Choose the type of information you want to edit from the left panel and make the necessary changes.
Customer Information
- Customer View – It shows the personal information of the customer.
- Account Information – It provides detailed information about the customer where the admin can edit the personal details, date of birth, email, and associate the customer to a website.
- Addresses – It allows editing default billing and shipping addresses and even adding a new address.
- Orders – It contains detailed information of customer orders.
- Shopping Cart – It shows the shopping cart of the customer. This means the products are currently in the cart and have not been purchased yet.
- Newsletter – It displays all the emails sent to the customer.
- Billing Agreements – Contain all the PayPal billing agreements between the customer and the store.
- Product Reviews – It shows the product reviews that the customer has submitted.
- Wish List – It shows a list of products the customer wishes to buy and can add to the cart later.
Step 5: When complete, click on the Save Customer button.
Final Words:
This is how the admin can update the customer profile in Magento 2. Share the tutorial with your other Magento 2 friends and stay updated with us.
Happy Reading!


