Hello Magento Friends,
In today’s blog file, we will learn about How to Add Custom Field in Newsletter Subscription in Magento 2.

A newsletter subscription helps to grow the customer base through email marketing. Grab customer attention and increase email subscribers using Magento 2 Newsletter Popup.
In default Magento, the newsletter subscription option contains only one field, i.e., email ID.

Sometimes you may need additional information from your newsletter subscribers like name, gender, city, occupation, or age.
Collecting extra details helps store owners in the following ways:
- Effective email marketing
- Better customer targeting
- Improve customer engagement
- Provide a personalized customer experience
In Magento 2, we can add custom fields in the newsletter using the below steps.
Steps to Add Custom Field in Newsletter Subscription in Magento 2:
Step 1: Create registration.php file in the given below path
{{magento_root}}\app\code\Vendor\Extension\registration.php
Now, add the following code
<?php

\Magento\Framework\Component\ComponentRegistrar::register(
    \Magento\Framework\Component\ComponentRegistrar::MODULE,
    'Vendor_Extension',
    __DIR__
);
Step 2: Now, create module.xml file at the following path
{{magento_root}}\app\code\Vendor\Extension\etc\module.xml
Then embed the below code
<?xml version="1.0"?>
<config xmlns:xsi="http://www.w3.org/2001/XMLSchema-instance" xsi:noNamespaceSchemaLocation="urn:magento:framework:Module/etc/module.xsd">
    <module name="Vendor_Extension" setup_version="1.0.0">
        <sequence>
            <module name="Magento_Newsletter" />
        </sequence>
    </module>
</config>
Step 3: Next, create db_schema.xml at the below-mentioned path to add a custom field in the database.
{{magento_root}}\app\code\Vendor\Extension\etc\db_schema.xml
Now, add the below code-snippet
<schema xmlns:xsi="http://www.w3.org/2001/XMLSchema-instance" xsi:noNamespaceSchemaLocation="urn:magento:framework:Setup/Declaration/Schema/etc/schema.xsd">
    <table name="newsletter_subscriber" resource="default" engine="innodb" comment="Newsletter Subscriber">
        <column xsi:type="varchar" name="customfield" nullable="false" comment="Custom Field"/>
    </table>
</schema>
Step 4: Create default.xml file at the path mentioned underneath to display form in all pages
{{magento_root}}\app\code\Vendor\Extension\view\frontend\layout\default.xml
Now include the code as mentioned-below
<?xml version="1.0"?>
<page xmlns:xsi="http://www.w3.org/2001/XMLSchema-instance" xsi:noNamespaceSchemaLocation="urn:magento:framework:View/Layout/etc/page_configuration.xsd">
    <body>
        <referenceBlock name="form.subscribe" template="Vendor_Extension::customsubscribe.phtml" />
    </body>
</page>
Step 5: Next, create customsubscribe.phtml at the below path
{{magento_root}}\app\code\Vendor\Extension\view\frontend\templates\customsubscribe.phtml
And add the following piece of code
<div class="block newsletter">
    <div class="title"><strong><?= $block->escapeHtml(__('Newsletter')) ?></strong></div>
    <div class="content">
        <form class="form subscribe"
              novalidate
              action="<?= $block->escapeUrl($block->getFormActionUrl()) ?>"
              method="post"
              data-mage-init='{"validation": {"errorClass": "mage-error"}}'
              id="newsletter-validate-detail">
            <div class="field newsletter">
                <div class="control">
                    <label for="newsletter">
                        <span class="label">
                            <?= $block->escapeHtml(__('Sign Up for Our Newsletter:')) ?>
                        </span>
                        <input name="email" type="email" id="newsletter"
                               placeholder="<?= $block->escapeHtml(__('Enter your email address')) ?>"
                               data-mage-init='{"mage/trim-input":{}}'
                               data-validate="{required:true, 'validate-email':true}"
                        />
                    </label>
                </div>
            </div>
            <div class="field newsletter">
                <div class="control">
                    <label for="customfield">
                        <span class="label">
                            <?= $block->escapeHtml(__('Enter Your Message:')) ?>
                        </span>
                        <input name="customfield" type="text" id="customfield"
                               placeholder="<?= $block->escapeHtml(__('Enter Your Message')) ?>"
                               data-mage-init='{"mage/trim-input":{}}'
                               data-validate="{required:true}"
                        />
                    </label>
                </div>
            </div>
            <div class="actions">
                <button class="action subscribe primary"
                        title="<?= $block->escapeHtmlAttr(__('Subscribe')) ?>"
                        type="submit"
                        aria-label="Subscribe">
                    <span><?= $block->escapeHtml(__('Subscribe')) ?></span>
                </button>
            </div>
        </form>
    </div>
</div>
<script type="text/x-magento-init">
    {
        "*": {
            "Magento_Customer/js/block-submit-on-send": {
                "formId": "newsletter-validate-detail"
            }
        }
    }
</script>
Step 6: Create di.xml at the below path
{{magento_root}}\app\code\Vendor\Extension\etc\di.xml
Next, incorporate the following code-snippet
<?xml version="1.0"?>
<config xmlns:xsi="http://www.w3.org/2001/XMLSchema-instance" xsi:noNamespaceSchemaLocation="../../../../../lib/internal/Magento/Framework/ObjectManager/etc/config.xsd">
    <type name="Magento\Newsletter\Model\SubscriptionManager">
        <plugin name="Newsletter_Subscriber_Custom_Field" type="Vendor\Extension\Plugin\Newsletter\SubscriptionManager"/>
    </type>
</config>
Step 7: Now create plugin file SubscriptionManager.php at the following path
{{magento_root}}\app\code\Vendor\Extension\Plugin\Newsletter\SubscriptionManager.php
Then add the below-mentioned code
<?php

namespace Vendor\Extension\Plugin\Newsletter;
use Magento\Framework\App\Request\Http;
use Magento\Newsletter\Model\SubscriberFactory;
use Magento\Store\Model\StoreManagerInterface;

class SubscriptionManager
{
    protected $request;
    protected $subscriberFactory;
    protected $storeManager;

    public function __construct(
        Http $request,
        SubscriberFactory
        $subscriberFactory,
        StoreManagerInterface $storeManager
    )
    {
        $this->request = $request;
        $this->subscriberFactory = $subscriberFactory;
        $this->storeManager = $storeManager;
    }

    public function aroundSubscribe(
        \Magento\Newsletter\Model\SubscriptionManager $subject,
        callable $proceed,
        $email,
        $storeId
    )
    {
        if ($this->request->isPost() && $this->request->getPost('customfield')) {
            $result = $proceed($email, $storeId);
            $customfield = $this->request->getPost('customfield');
            $websiteId = (int)$this->storeManager->getStore($storeId)->getWebsiteId();
            $subscriber = $this->subscriberFactory->create()->loadBySubscriberEmail($email, $websiteId);

            if ($subscriber->getId()) {
                $subscriber->setCustomfield($customfield);
                $subscriber->save();
            }
        }
        return $result;
    }
}
Step 8: Finally, create newsletter_subscriber_block.xml at the below path to display a custom field in the admin grid.
{{magento_root}}\app\code\Vendor\Extension\view\adminhtml\layout\newsletter_subscriber_block.xml
And add the code as follows
<?xml version="1.0"?>
<page xmlns:xsi="http://www.w3.org/2001/XMLSchema-instance" xsi:noNamespaceSchemaLocation="urn:magento:framework:View/Layout/etc/page_configuration.xsd">
    <body>
        <referenceBlock name="adminhtml.newslettrer.subscriber.grid.columnSet">
            <block class="Magento\Backend\Block\Widget\Grid\Column" name="adminhtml.newslettrer.subscriber.grid.columnSet.customfield" as="customfield">
                <arguments>
                    <argument name="header" xsi:type="string" translate="true">Custom Field</argument>
                    <argument name="index" xsi:type="string">customfield</argument>
                </arguments>
            </block>
        </referenceBlock>
    </body>
</page>
Step 9: At last, run the below commands
php bin/magento setup:upgrade
php bin/magento setup:static-content:deploy -f
php bin/magento setup:di:compile
php bin/magento cache:flush
Result:
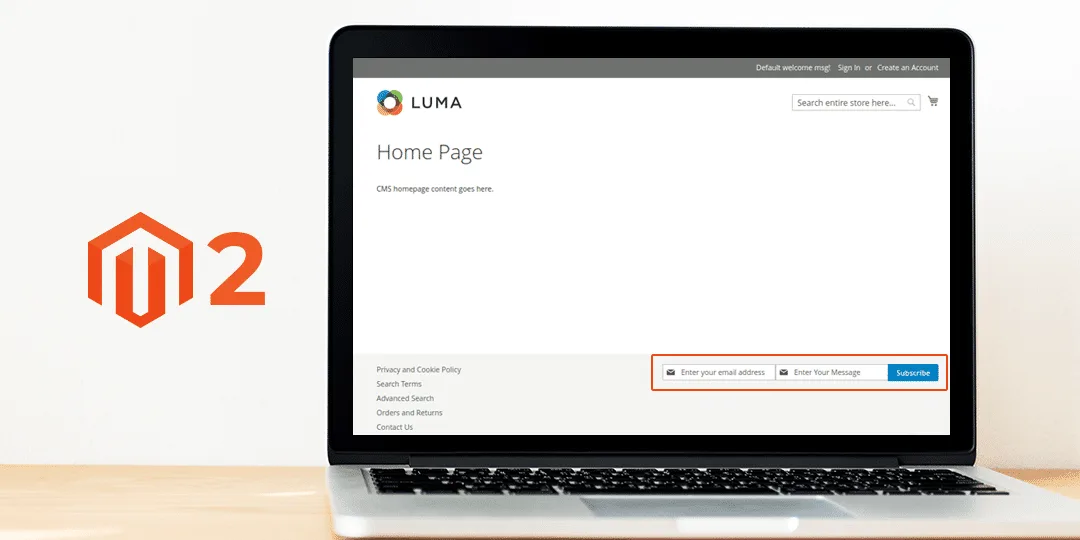
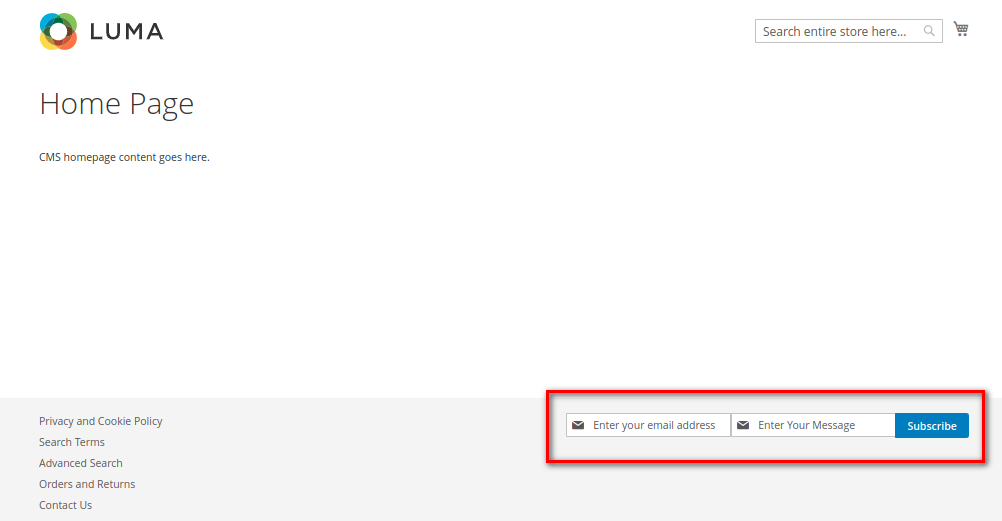
When you successfully complete the above steps, an additional custom field is added to the newsletter subscription along with the email ID field.
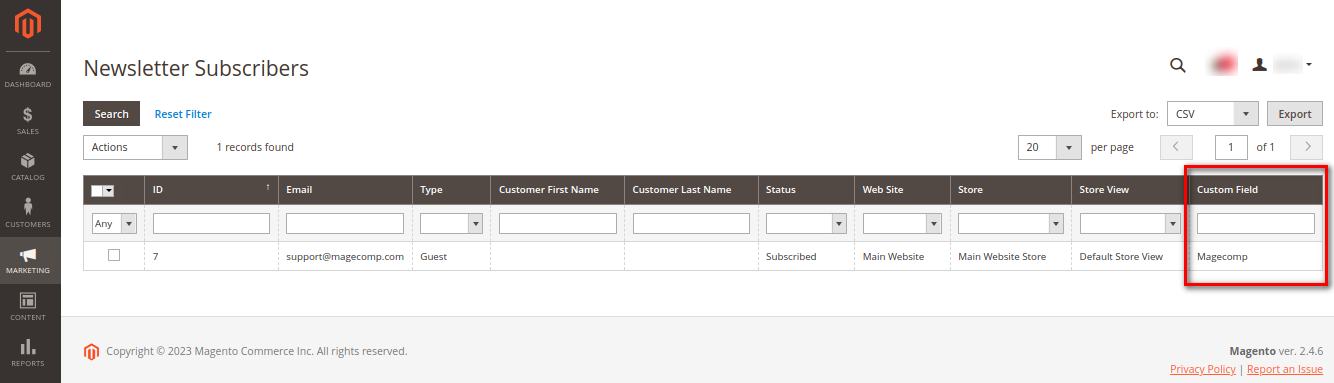
Admin also gets the details of the custom fields in the backend newsletter subscribers grid.
Conclusion:
Hence, this way, you can add custom fields to newsletter subscription in Magento 2. If you face any difficulty in the above steps, let me know through the comment section. I will be quick to resolve your errors and queries.

Share the solution with your friends and stay in touch with us for more Magento 2 tutorials.
Happy Coding!