Hello Magento Folks,
I hope you are doing well. Today We will see content management configuration in Magento 2.
This configuration is available at the store – configuration > General > Content Management > WYSIWYG
The first question that comes into your mind is that, What is WYSIWYG?
The full form of WYSIWYG is What You See is What You Get. In Magento, you might have seen the button ‘WYSIWYG’ editor at many places, and when you click on it, it’s something like a preview of code you have written there.
So Magento has given the configuration for that editor too, let’s see one by one.

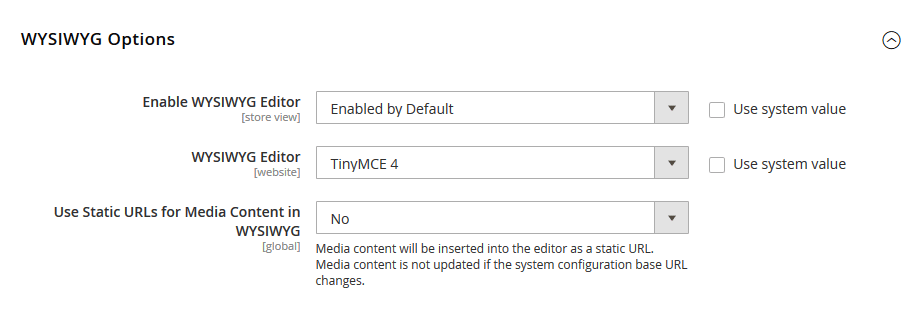
WYSIWYG Options
- Enabled WYSISYG Editor: In this category, we get three option one is “Enabled by Default”, second is “Disabled by Default”, and the third is “Disabled Completely”. By default, the first option is selected,” Enabled by default”.
- WYSIWYG Editor: You need to select the version of TinyMCE 4. If you have a question in mind that what is TinyMCE, then let me tell you that it’s the company that has developed this WYSIWYG editor. You can see more about it here. https://www.tiny.cloud/
So TinyMCE 3 is deprecated while I am writing this tutorial for Magento 2.3.2. So, You will have to keep it selected as TinyMCE 4.
- Use Static URLs for Media Content in WYSIWYG: This should be kept as No. Because when you insert the media in WYSIWYG editor, it automatically takes base URL, which you have set up while installing your Magento. The base URL will be your current domain URL. Taking base URL code by default helps you when you change the domain, from local to live environment. Just changing the base URL in Magento, it will change the media URL according to the base URL set.
In case if you have setup YES here, it will insert the media with a static domain. When you move from local to live, you will have to change all the Media URLs manually, So to save yourself from that hectic task, keep it as No as it is.
I hope you have enjoyed this article and this information. With our best intention, I will keep sharing tutorials like this in this series.
If you like this tutorial don’t forget to share with your Magento friends, Let’s me know if you have any question for me in comment section.

