Hello, Magento pals,
Today we are going to learn how you can create custom order status and state programmatically in default Magento2. So, let’s get started.
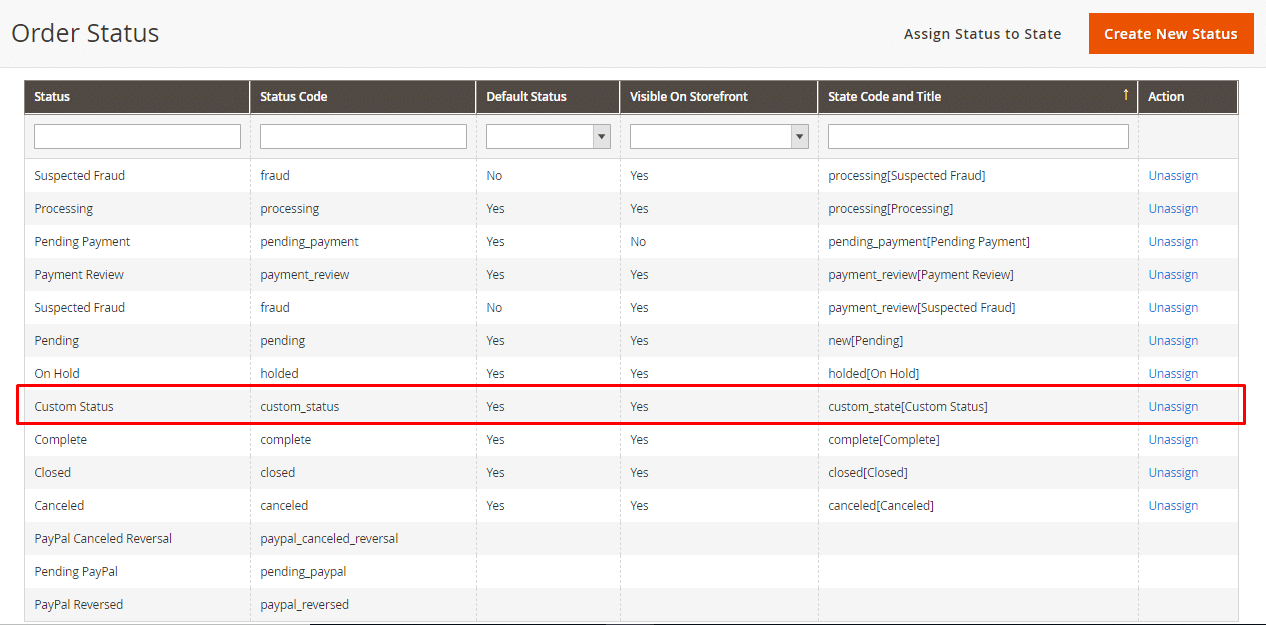
Every order has an order status, which is coupled with the order processing workflow stream. The position of an order in the workflow is described by the state. In default Magento store, order status, and order state settings are already defined. So, you can see all the order statues in your Back-end.
To see all the order status, use the below admin configuration tab,
Store > Settings > Order Status.
But often time, we have the need to create our custom order status and state. And today, we are going to figure out how to create order status and state programmatically in default Magento 2.
1. The first thing you should do is to create a file named “Registration.php” in extension. Create the file at app\code\Vendor\Extension\ with the following code.
|
1 2 3 4 5 6 |
<?php \Magento\Framework\Component\ComponentRegistrar::register( \Magento\Framework\Component\ComponentRegistrar::MODULE, 'Vendor_Extension', __DIR__ ); |
2. After creating the above file with the code, now create the “Module.xml” file in etc folder of extension at this path, app\code\Vendor\Extension\etc\ with the following code.
|
1 2 3 4 5 |
<?xml version="1.0"?> <config xmlns:xsi="http://www.w3.org/2001/XMLSchema-instance" xsi:noNamespaceSchemaLocation="urn:magento:framework:Module/etc/module.xsd"> <module name="Vendor_Extension" setup_version="1.0.0" schema_version="1.0.0"> </module> </config> |
3.Now, create a file named “InstallData.php” in the setup folder of the extension. Create the file at, app\code\Vendor\Extension\Setup\ with the following code.
|
1 2 3 4 5 6 7 8 9 10 11 12 13 14 15 16 17 18 19 20 21 22 23 24 25 26 27 28 29 30 31 32 33 34 35 36 37 38 39 40 41 42 43 44 45 46 47 48 49 50 51 52 53 |
<?php namespace Vendor\Extension\Setup; use Magento\Framework\Exception\AlreadyExistsException; use Magento\Framework\Setup\InstallDataInterface; use Magento\Framework\Setup\ModuleContextInterface; use Magento\Framework\Setup\ModuleDataSetupInterface; use Magento\Sales\Model\Order\StatusFactory; use Magento\Sales\Model\ResourceModel\Order\StatusFactory as StatusResourceFactory; class InstallData implements InstallDataInterface { /* CUSTOM_STATUS_CODE,CUSTOM_STATE_CODE and CUSTOM_STATUS_LABEL */ const CUSTOM_STATUS_CODE = 'custom_status'; const CUSTOM_STATE_CODE = 'custom_state'; const CUSTOM_STATUS_LABEL = 'Custom Status'; protected $statusFactory; protected $statusResourceFactory; public function __construct( StatusFactory $statusFactory, StatusResourceFactory $statusResourceFactory ) { $this->statusFactory = $statusFactory; $this->statusResourceFactory = $statusResourceFactory; } public function install(ModuleDataSetupInterface $setup, ModuleContextInterface $context) { $this->addCustomOrderStatus(); } protected function addCustomOrderStatus() { $statusResource = $this->statusResourceFactory->create(); $status = $this->statusFactory->create(); $status->setData([ 'status' => self::CUSTOM_STATUS_CODE, 'label' => self::CUSTOM_STATUS_LABEL, ]); try { $statusResource->save($status); } catch (AlreadyExistsException $exception) { return; } $status->assignState(self::CUSTOM_STATE_CODE, true, true); } } |
As you have noticed, the addCustomOrderStatus() method performs two steps. One, it will make a new customized order status and will save it so it can appear in the database of sales_order_status. And second, by adding a new database record in sales_order_status_state, it will link the created status to the order state.
Because there is no other database table available for order state, each unique value is considered as a separate order state in the state column of sales_order_status_state.
Now, to activate the module and execute the setup script, run the below setup upgrade commands,
php bin/magento setup:upgrade
Check Stores -> Settings -> Order Status.

So, today we learned how you can successfully create order status and state in default Magento 2. You can customize the code as per your need for fetching data. Let us know if you had any problems while implementing the code.
If you liked this article, then give it a thumbs-up and share your reviews in the comments below. Also, share this with your Magento colleagues and friends.
Lastly, if you want us to write on a topic, then give your suggestions in comments. In case you need Any help,We will be happy to help you ?


hi sir i want ho hire you for my magento project
Please reach out us at support@magecomp.com