Hello Magento Folks,
In this tutorial, I am going to explain How to Configure Persistent Shopping Cart In Magento 2.
How nice it would be when the customer has left items in the shopping cart, comes back after months, and finds the items just as there. A persistent Shopping Cart facilitates the retention of items in the shopping cart. The maximum time period to persist the shopping cart is one year.
With a persistent shopping cart, you can increase sales and decrease shopping cart abandonment.
Let’s look at the steps to Configure Persistent Shopping Cart In Magento 2.
Steps to Configure Persistent Shopping Cart In Magento 2:
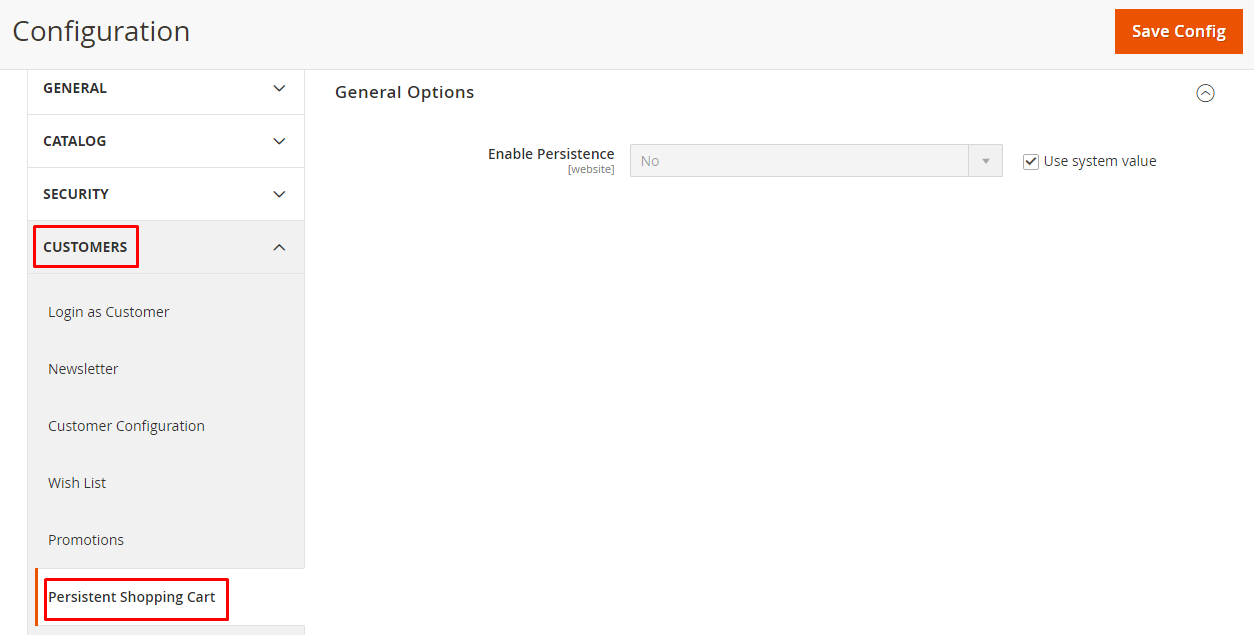
Step 1: Login to Admin Panel and navigate to Stores > Settings > Configuration
Step 2: Expand the Customers tab and select Persistent Shopping Cart.
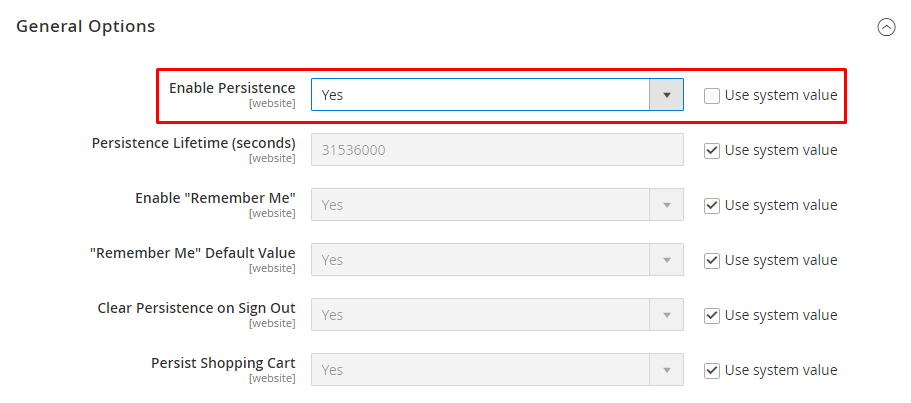
Step 3: Set Enable Persistence option to Yes in order to enable other options.
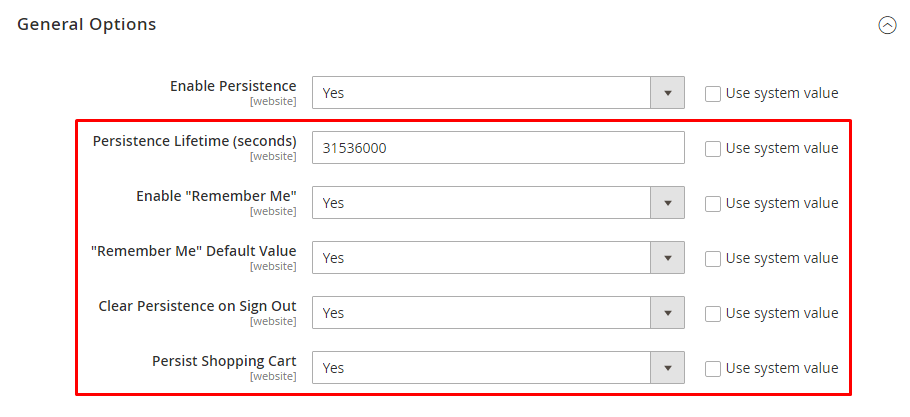
Step 4: Settings for Persistent Shopping Cart
- Persistence Lifetime (seconds) – Enter the time in seconds to allow persistent cookies to continue. The default value is 31536000 seconds which equals one year and it is the maximum length of time allowed.
- Enable “Remember Me” – Choosing Yes to this option will display a Remember Me checkbox on the login page to allow users to save their shopping cart information.
- “Remember Me” Default Value – Choosing Yes will keep the Remember Me checkbox already selected.
- Clear Persistence on Sign Out – Set whether or not the shopping cart is cleared when the user signs out.
- Persist Shopping Cart – The persistent cookie is reserved even if the session expires. When the user log in back or create a new account, the shopping cart is restored.
Final Words:
Hence, this way you can Configure Persistent Shopping Cart In Magento 2. Alternatively, you can integrate Magento 2 Save Cart Pro Extension to help customers purchase in the future from the saved items in their shopping cart.
Share the tutorial with friends and stay in touch with us for more Magento tutorials.
Happy Reading!


