Hello Magento Folks,
In this article, I will help you How to Add Social Widget without extension: Facebook Social Plugins in Magento 2. You can check How to Setup Facebook Messenger Live chat in Magento 2 or read How to Create Facebook APP -The Step by Step Guide (2021). Let’s get started with today’s blog.
Steps to Add Social Widget without extension: Facebook Social Plugins in Magento 2:
Step 1: Firstly, Get the Facebook Button Code:
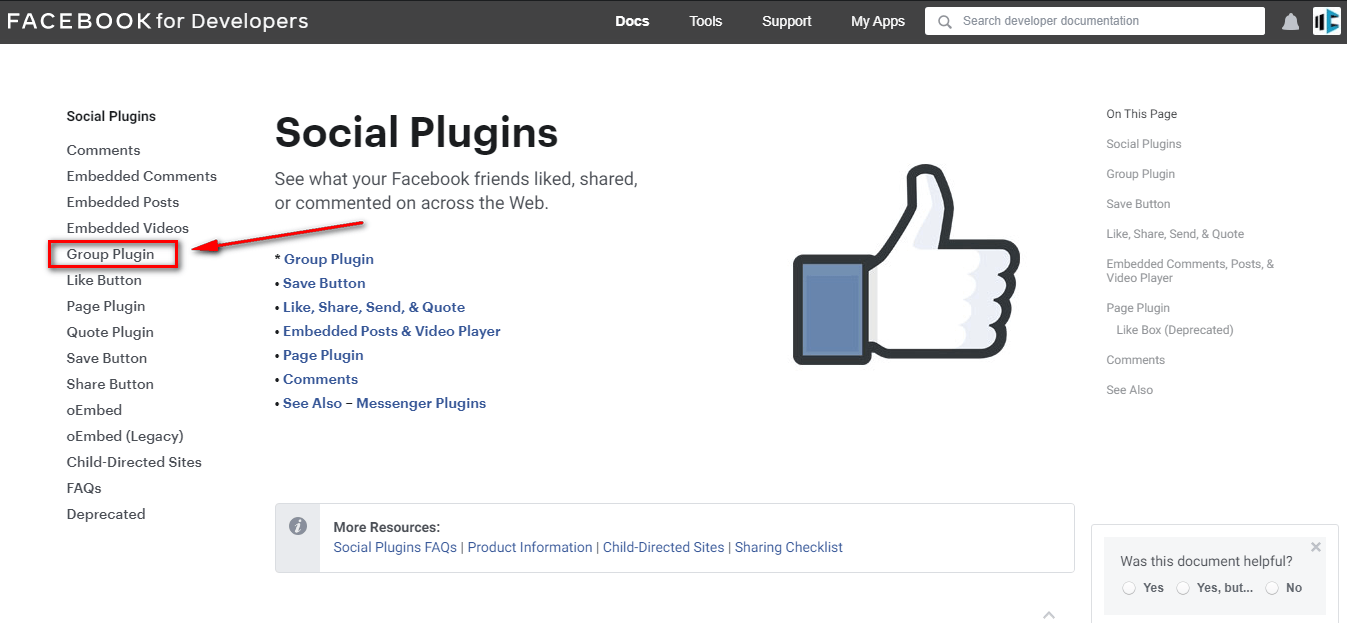
Navigate to Facebook for Developers and click on the like button as shown in the below screenshot.

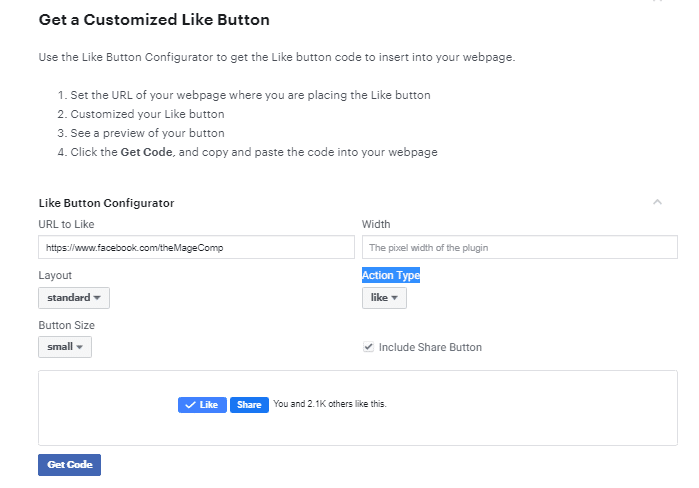
Add the URL of your store in the URL to the Like field that you require to like.
Set the Width for your Like button and select the layout according to your requirement and Enable the display of profile image when there are 2 or more than 2 likes.
In the action type field set Like or Recommended as per your requirement and tap the Get Code button.
You will be able to view the code now copy that code to your clipboard

Step 2: Add a Content Block
Navigate to the admin panel of your store and go to Content > Elements > Blocks
Tap to Add New Widget and add the Block Title for that specific button such as Facebook Like Button
Add the Identifier using the underscores and lower characters.
Select the Store View as per your requirement and select the enable in the Status field.
Now paste the code that you have copied in the above step into the Content box.
Save the Block
Step 3: Place the Block
Navigate to Admin>Content>Elements>Widgets
Tap to Add New Widget.
Select the CMS Static Block from the Type box.
Select the theme you require to implement from the Design Theme section.
And tap on Continue
Now in the Storefront Properties Field
Add the Widget Title for your reference
In the Assign to Store View section, you will need to Assign that specific block to the store view as per your requirement.
After that from the Layout Updates field tap on Layout Update to select the layout.
Select the page or category or product where you desire to display the block.
If you require to set for a specific page then you will have to select the page where you require to display and set the Container which means the position of the page where the block will appear.
Now from the Widget Options tap on Select Block to select the block from your list you desire to place.
That’s It
Save the Config.
And at last flush the cache from the Cache Management section.
Step 4: Check the Location in Your Store
Now you can verify the location by navigating to the frontend of your store.
Wrap Up:
Hopefully, all are able to learn How to Add Social Widget without extension: Facebook Social Plugins in Magento 2. In case any errors in the above method then let me know in the comment section below.
Happy Reading!


![Best 10 Steps for Magento 2 Speed Optimization [Ultimate 2022 Guide]](https://magecomp.com/blog/wp-content/uploads/2021/04/Best-10-Steps-for-Magento-2-Speed-Optimization-Ultimate-2021-Guide-400x225.webp)
