Hello, Friends!
Did you know? The first thing that a customer searches for is how many payment options a particular E-commerce site is offering. As the admin of the store, it is recommended to provide users with all the available payment options other than cash on delivery.
As per a study by Oberlo, nearly 44.5% of the total E-commerce expenses globally are paid with digital and mobile wallets, Which makes it the most used payment method.
But, it can be a laborious task if we tie up with banks or set up various payment gateways manually. For that reason, Shopify has made it as simple as possible. Besides, check the different payment options for an E-commerce store and their pros and cons from here.
Different Payment Options In Shopify
- Credit & Debit Cards
- Cash On Delivery
- Net Banking
- Wallets
- Bank Transfer
- UPI
- EMIs
- PayPal
Appears quite a lot to perform, right? Well, Shopify makes it all easier with just a few steps to be performed. Check out how!
How to Set up Multiple Payment Methods on your Shopify Store?
Enable Netbanking/ Debit Card/ Credit Card/ UPI
To set up multiple payment gateways like PayU, RazorPay, CCAvenue, and others, it offers single-click integration with Shopify. Every payment gateway provider supports the majority of the payment choices like UPI, debit card, credit card, and net banking.
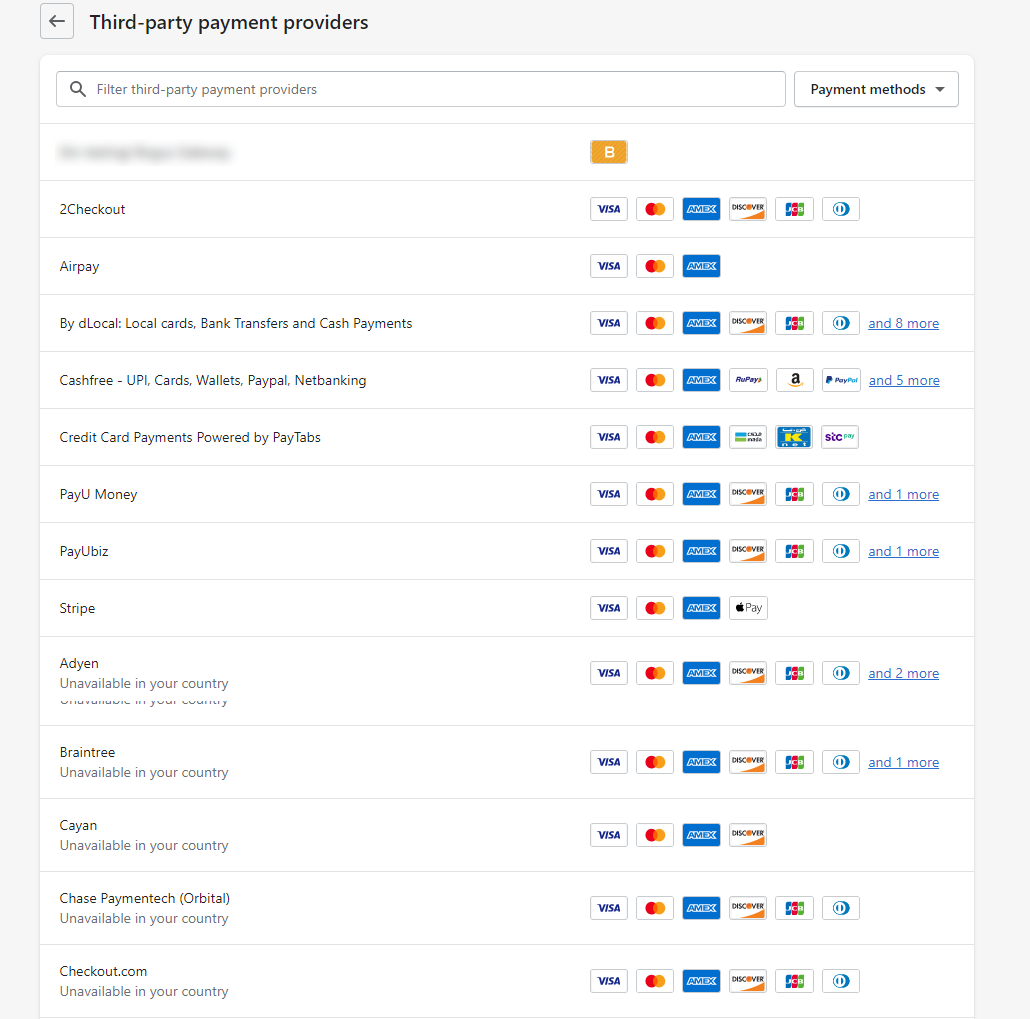
In order to allow third-party providers (Stripe, PayPal, Cashfree), perform the below steps:
- Navigate to Settings → Payments.
- Now, navigate to Third Party Providers.
- Next, click the Choose Third Party Provider option.
- From the list given, choose the provider of your choice.
- Now click on Activate.
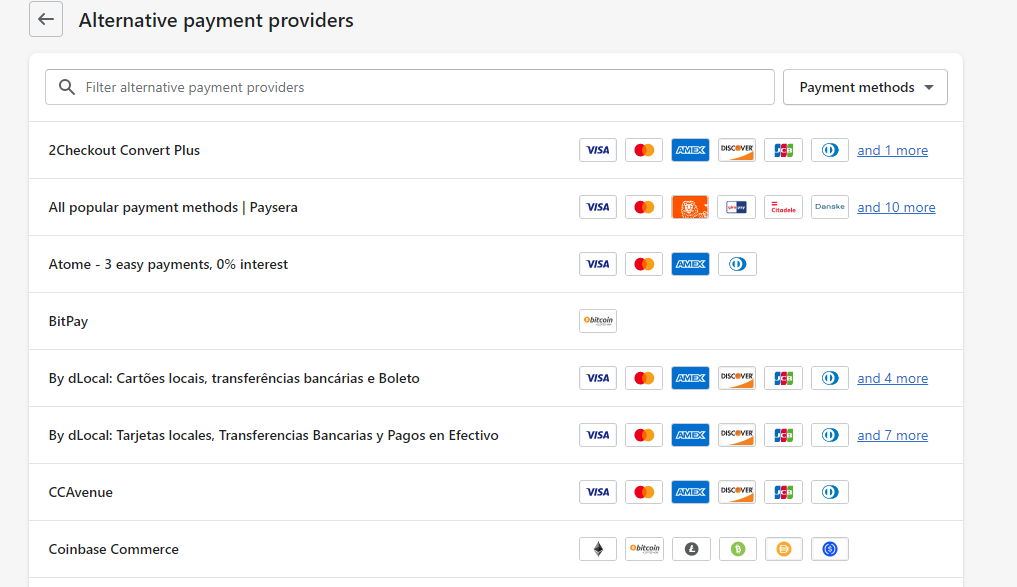
In order to allow alternative payment providers, (PayU, RazorPay, Paytm), perform the below steps:
- Navigate to Settings → Payments.
- Select the Alternative Payment Methods.
- from the list, select the provider of your choice and enter the account credentials of the selected provider.
- Click on Activate to enable the provider.
Enable cash on delivery manually
You can easily enable cash on delivery option for the users. You will have to execute an action plan stated below:
- Navigate to Settings → Payments.
- Choose the Manual Cash On Delivery option from the Payment Providers section.
- Enter the Payment Instructions for the customers to follow when making a payment.
- Click Activate.
Set up buy now, pay later
If you have products with huge amounts, you might be in a need to provide users with the buy now and pay later options to pay in installments. The Indian purchasers can easily do so with the help of Sezzle. You are required to create an alternative payment gateway for that. See the below-mentioned steps :
- Navigate to Settings → Payments.
- Click on Choose alternative payment from the Alternate Payments section.
- From the given list, choose Sexxle.
- Enter your account credentials for Sezzle.
- Click on Activate.
Offer wallet payments
Many people might prefer making payments via payment wallets like PayTm, PhonePe, Freecharge, and other wallets. To enable the wallet payments, you will have to ask the payment gateway providers to enable the payment options you choose. Perform the following steps for that.
- Pick a payment provider of your choice.
- Ask the provider to enable the digital wallet of your choice.
- Then, you will be able to accept customer payments through your wallet once it is enabled.
Bottom Line!
Well, the above mentioned were the different payment options. Understand your customer’s behavior closely and then select the payment methods most suitable to your targeted audience.
Hire a Shopify Developer to customize your Shopify website as per your requirements.
Happy Reading!


