Hello Magento Friends,
The way customers navigate checkout in an online store directly affects its success. By default, Magento 2 removes all header and footer content on checkout pages. The page design lets customers focus on their purchases by removing unnecessary components.
Store owners have various points for bringing back these features to their checkout process. By including headers and footers, you gain space to show contact details and promotional offers to customers.
In this post we will show you step-by-step instructions to add a header and footer to your Magento 2 checkout area. You will gain the instructions needed to customize your checkout interface so you can present the required details effectively while keeping the checkout fast and user-friendly.
Steps to Add Header and Footer in Checkout in Magento 2:
Step 1: Create the “checkout_index_index.xml” file inside the Extension view folder.
app\code\Vendor\Extension\view\frontend\layout
Then add the code as follows
<?xml version="1.0"?>
<page xmlns:xsi="http://www.w3.org/2001/XMLSchema-instance" layout="1column" xsi:noNamespaceSchemaLocation="urn:magento:framework:View/Layout/etc/page_configuration.xsd">
    <body>
        <move element="logo" destination="header-wrapper" before="-" />
        <referenceBlock name="minicart" remove="false" />
        <referenceContainer name="header.panel" remove="false" />
        <referenceBlock name="top.search" remove="false" />
        <referenceBlock name="catalog.compare.link" remove="false" />
        <referenceBlock name="catalog.topnav" remove="false"/>
        <referenceContainer name="footer-container"  remove="false"/>
    </body>
</page>
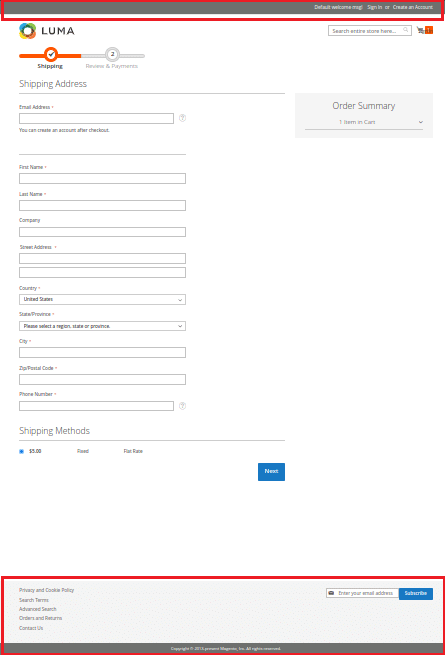
Output:

Conclusion:
Adding a header and footer to your Magento 2 checkout page requires theme customization or module development. Carefully consider the user experience and choose the approach that best suits your needs. Remember to prioritize a streamlined checkout process while providing valuable information to your customers.
You can even add a dynamic link to the footer in Magento 2.
Share the tutorial with your friends and stay in touch with us for more.
Happy Coding!


