Hello Magento Friends ?,
Hope everyone is safe and well. For the very first time, MageComp is introducing Magento 2 Tutorial Episodes. Interesting ?? , isn’t it?
Welcome to Magento 2 Newsletter- Episode 1. In this part, I will be explaining How to Create and Manage Newsletters in Magento 2. Let’s get rolling ?
Introduction:
A newsletter is a medium to keep a connection with your store customers. It is a tool to maintain a constant relationship with the subscribers, providing information about the store. The newsletter is one of the ways of email marketing that helps in more sales, increased profit margin, and an opportunity to build a healthy relationship with your customers. Thus, it is worth implementing newsletters for online websites.
Magento 2 supports different functions for Newsletters. The admin can create multiple newsletter templates and send them to the subscribers. Moreover, the store admin can manage the problems and import or export newsletter subscribers list.
Steps to Configure Newsletter in Magento 2:
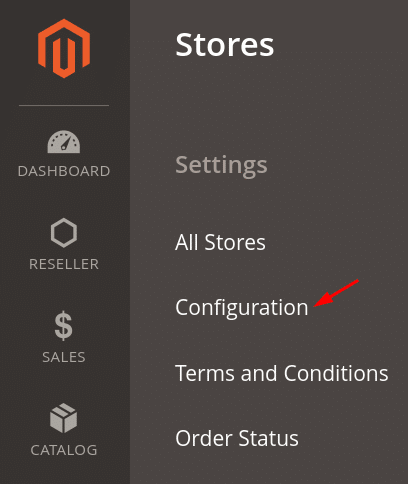
Step 1: Log in to the Admin Panel and navigate to Stores < Configuration
Step 2: From the left panel, expand the Customers tab and select Newsletter option.
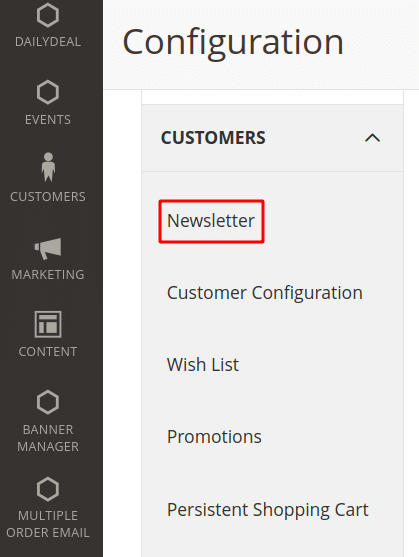
Step 3: Extend the Subscription Options and make the desired settings.
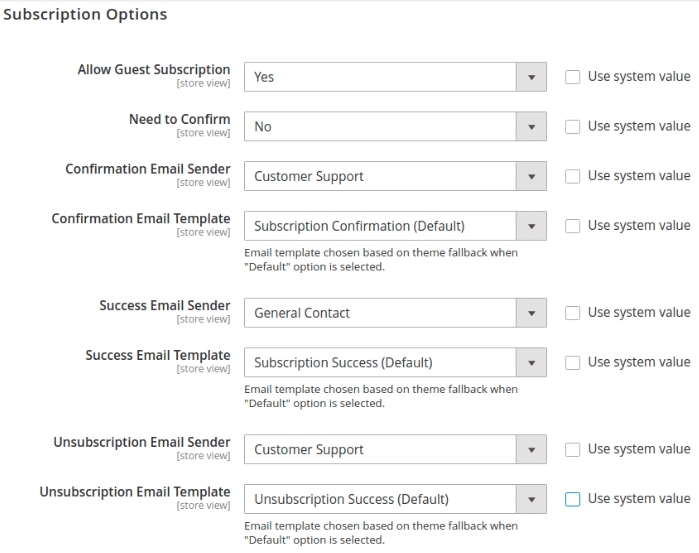
- Allow Guest Subscription-Select Yes if you want guests who do not have an account to subscribe for newsletters.
- Need to Confirm-Selecting the Yes option will send an email to the subscribers to confirm their newsletter subscription.
- Confirmation Email Sender-Select the sender’s name for sending the confirmation email to the subscribers.
- Confirmation Email Template-Select the template for the confirmation email.
- Success Email Sender-Select the sender’s name for sending the success email to the subscribers.
- Success Email Template-Select the template for the success email.
- Unsubscription Email Sender-Select the sender’s name for sending the unsubscription email to the subscribers.
- Unsubscription Email Template-Select the template for the unsubscription email.
At last, press the Save Config button to finish Newsletter Configuration.
Steps to Create a Newsletter Template in Magento 2:
Step 1: Log in to the Admin Panel and navigate to Marketing < Newsletter Template
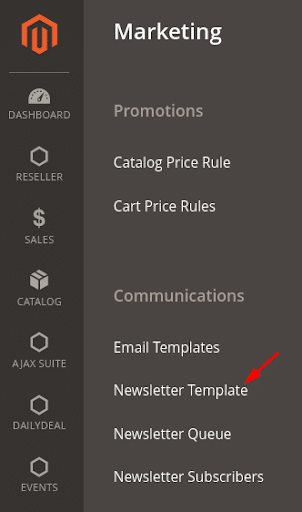
Step 2: Click the Add New Template button and fill the information.
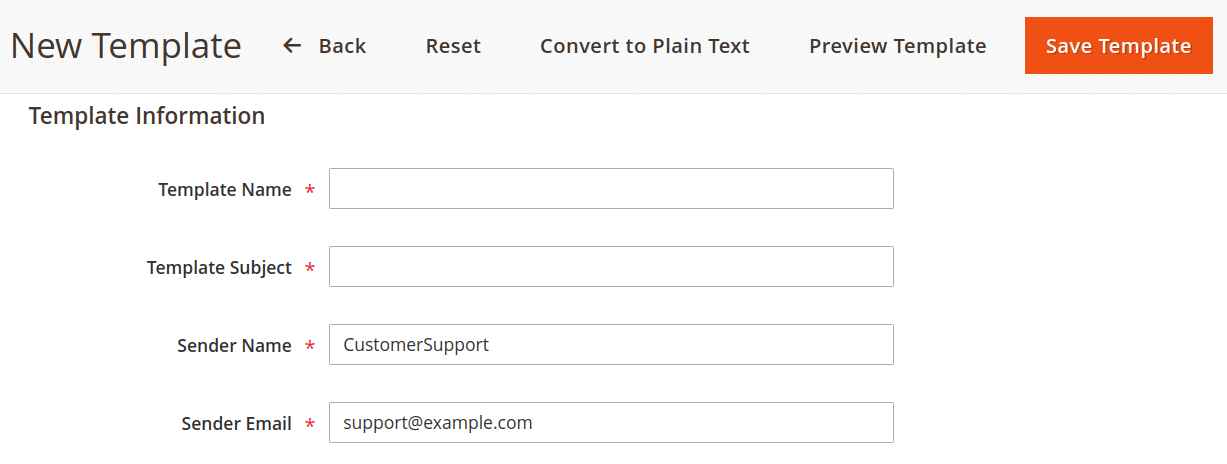
- Template Name-Give the name of the template that will be handled from the backend.
- Template Subject-The template subject will be shown to the customers describing what the template is about.
- Sender Name-Enter the name of the sender.
- Sender Email-Mention the email address for sending the email to subscribers.
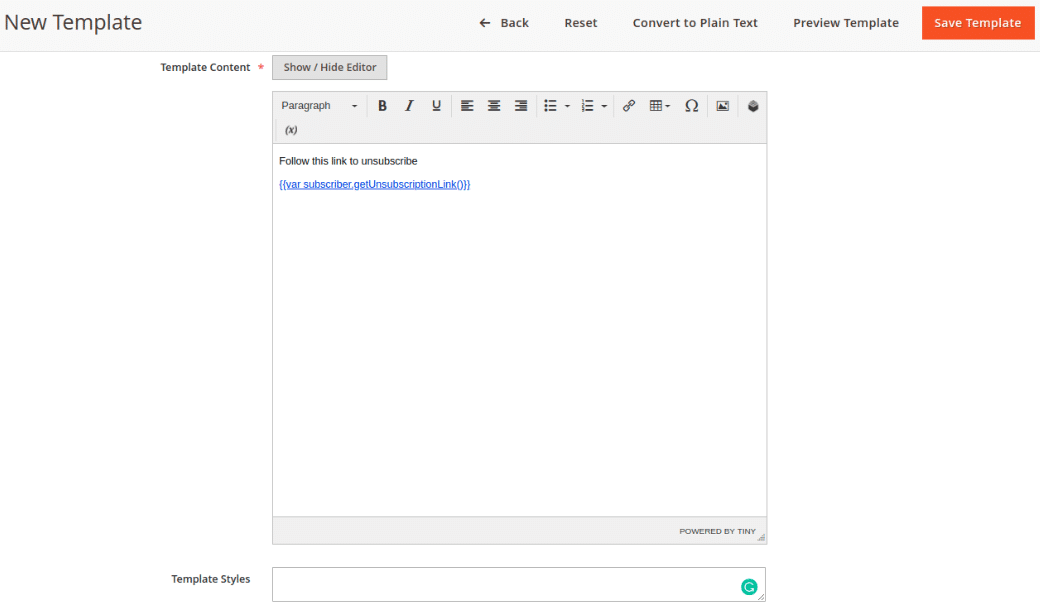
- Template Content-Here, you can add text, images, variables, links, tables, and format the content. It provides the unsubscription link also.
- Template Styles-It is an optional field, where the store admin can change the layout of the email template.
At last, Save Template.
Steps to Send Newsletter in Magento 2:
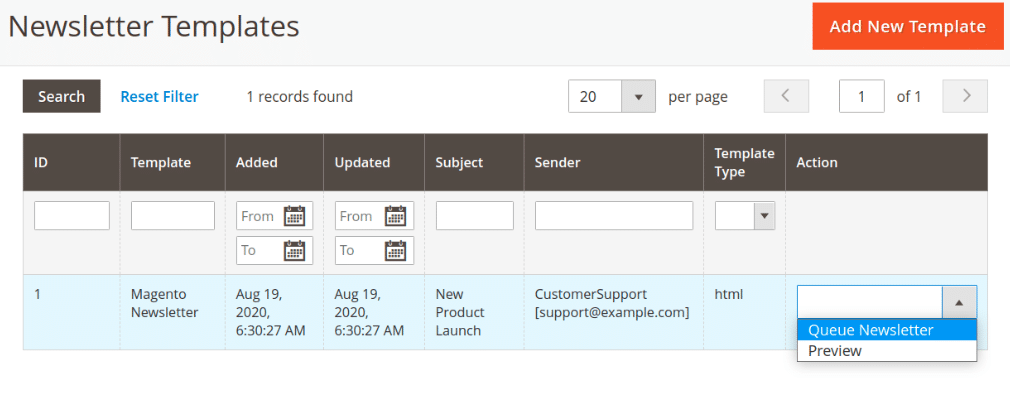
Step 1: When you Save the Template, it will open the Newsletter Templates Page. Select the template and in the Actions dropdown menu select Queue Newsletter.
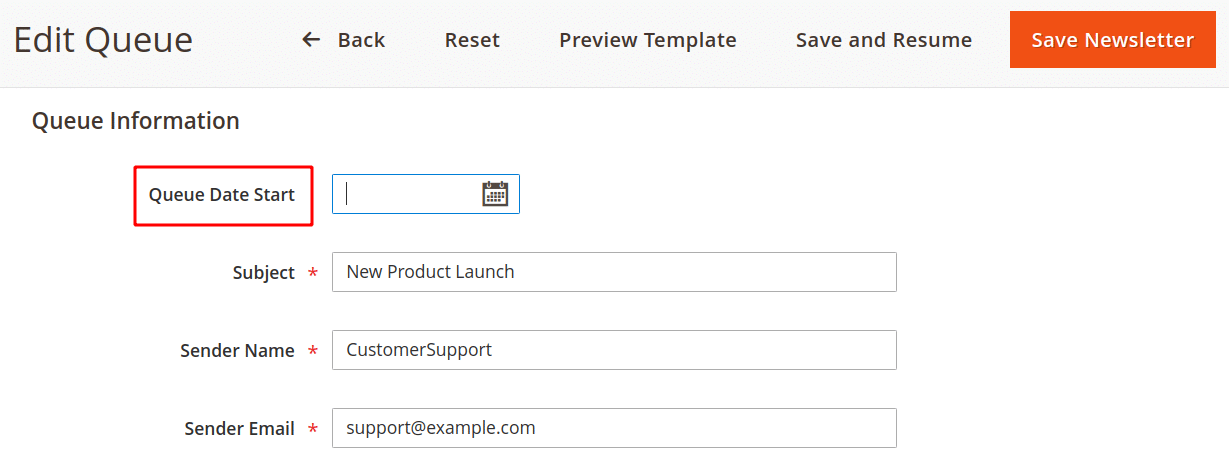
Step 2: From the Edit Queue Page, go to the Queue Information section, and set the date in the Queue Date Start field.
Finally, press the Save Newsletter button and you can see the newsletter queue list along with its details.
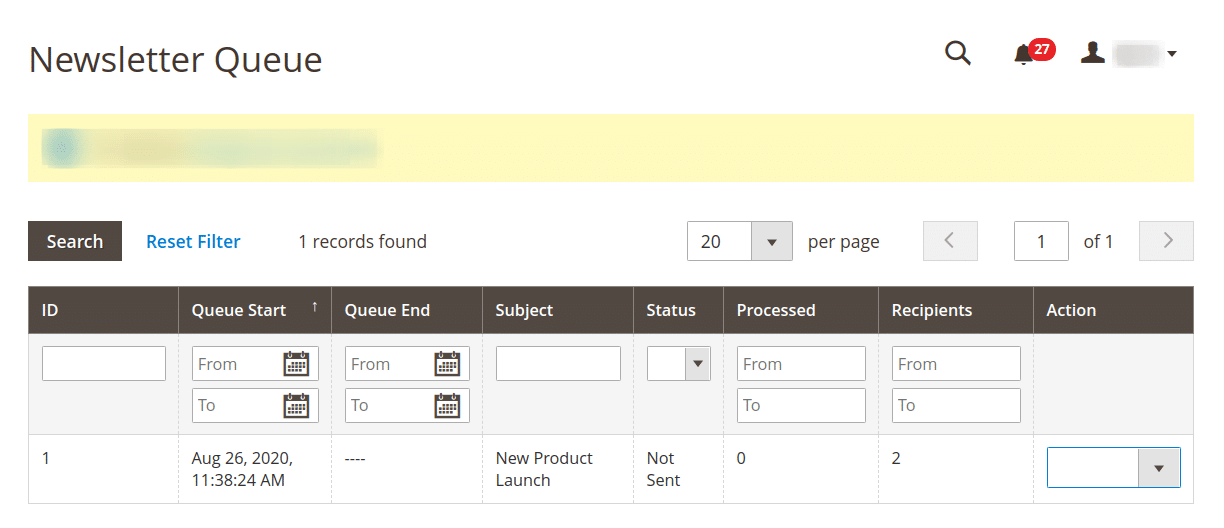
Note-Later on, if you need to view the newsletter queue list and its status, go to Marketing < Newsletter Queue from the Admin Panel.
Conclusion:
Hence, this was Magento 2 Newsletter-Episode 1 where everyone is able to Create and Manage Newsletters. Besides, you can also check FREE Newsletter Popup for Magento 2 on your website pages to grab customer’s attention. If you come across any difficulty comment below, so I can sort it out. Share the article with your friends.
We’ll back soon with the next episode, wherein I will show How to Import and Export Newsletters in Magento 2 (Episode 2). Stay Tuned, Stay Connected!
Happy Communicating ?


