Hello Magento Folks?,
Hopefully, all are safe and healthy. Welcome to Magento Tutorial Blog. Today I will guide you How to Configure the Wishlist in Magento 2. We are celebrating our 6th anniversary, get heavy discounts and bumper gift prices at MageComp turns 6! Join Our Anniversary Celebration with Big Bumper Deals. Let’s Dive In?
Introduction:
When purchasing any product all the customers will think many times. So it is very mandatory to set up a wishlist so the customer can essentially think and purchase on the next visit to your store. Therefore for better purchases in the next visit, it is a very useful option to create a wishlist where all the registered customers can effortlessly save their desired products and can easily place orders on the next visit or any time further. You can use Magento 2 Wishlist Rest API.
Steps to Configure the Wishlist in Magento 2:
Step 1: Configure the Wish List
Navigate to Stores > Settings > Configuration below Customer tap on wishlist and explore the general option.

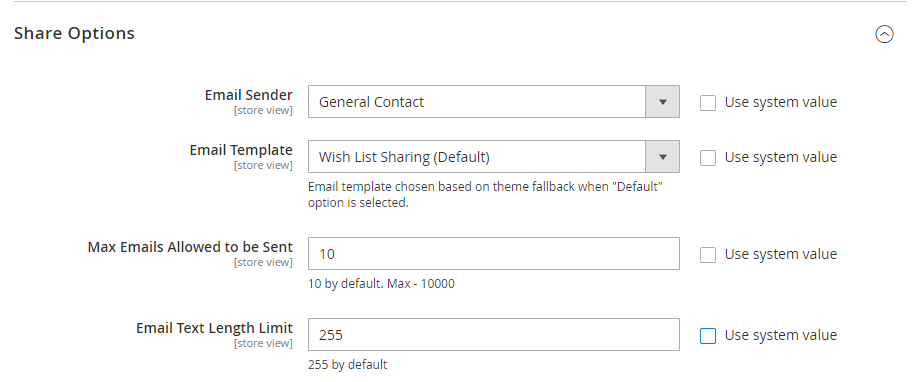
Step 2: Setup the share option section.

Email Sender: Add the Email sender information that will be displayed in the Email.
Email Template: Select your desired template for email.
Max Emails Allowed to be sent: Setup max limit to send an email.
Email Text Length: Setup max limit for text length of an email.
Step 3: Wishlist Summary Field: Explore My Wish List Link option and select displaying the number of items in a wish list or item quantities.

Sharing a Wishlist in Magento 2:
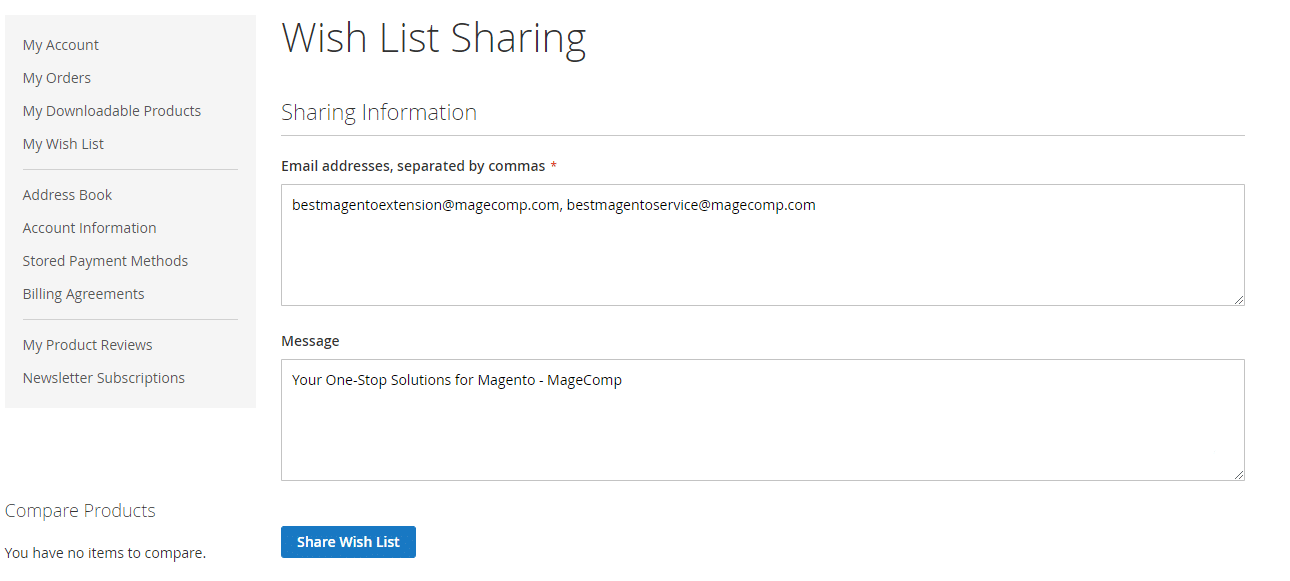
Enable your store to share a wishlist with the customer’s contacts with the help of an email.
Add products to the wishlist and tap on the share wishlist button.
Enter the recipient’s email id and add a message if any.
Click on Share Wishlist when done:

That’s It
Over to You:
Hence, after the implementation of the above steps, one can successfully configure the wishlist in Magento 2. Hopefully, all are able to apply the steps without any issues but in case of any issues do comment down in the comment section. Also, share with your Magento friends and make yourself helpful.
Happy Reading?


