Hello Magento Friends,
Today I am going to explain an important topic on improving the user experience of the store, How to Add Quick View Feature Programmatically in Magento 2.
When a user comes to shop on your website, they have to go through a long process. To make the process faster, you can allow customers to buy products quickly. The customers can view products directly from the category page with a quick view feature. Default Magento 2 does not provide this facility. The Quick View feature can improve the shopping experience and quicken the purchase decision.
You can Add Quick View Feature Programmatically in Magento 2 with the help of the below steps.
Steps to Add Quick View Feature Programmatically in Magento 2:
Step 1: Create catalog_category_view.xml file at the given below path
app\code\Vendor\Extension\view\frontend\layout\
Now add the below code
<?xml version="1.0"?>
<page xmlns:xsi="http://www.w3.org/2001/XMLSchema-instance" xsi:noNamespaceSchemaLocation="urn:magento:framework:View/Layout/etc/page_configuration.xsd">
    <body>
        <referenceContainer name="content">
            <referenceBlock name="category.product.addto">
                <block class="Magento\Catalog\Block\Product\ProductList\Item\Block" name="category.product.quickview" as="quickview" template="Vendor_Extension::product/productlist/item/quickview.phtml"/>
            </referenceBlock>
        </referenceContainer>
    </body>
</page>
Step 2: Create quickview.phtml file at the following path
app\code\Vendor\Extension\view\frontend\templates\product\productlist\item\
Then add the code as follows
<button class="quick_view" type="button" id="quick_view_button<?php echo $block->getProduct()->getId() ?>"
        data-mage-init='{ "Vendor_Extension/js/product/productlist/item/quickview": { } }'
        data-id="<?php echo $block->getProduct()->getId() ?>"
        data-url="<?php  echo $block->getProductUrl($block->getProduct()) ?>">
    <?php echo __('Quick View') ?>
</button>
<div class="row">
    <div id="quick_view_container<?php echo $block->getProduct()->getId() ?>"></div>
</div>
<style>
    #quick_view_container<?php echo $block->getProduct()->getId() ?> > #frame_product<?php echo $block->getProduct()->getId() ?>
    {
        width: 100%;
    }
</style>
Step 3: Create quickview.js file at the below path
app\code\Vendor\Extension\view\frontend\web\js\product\productlist\item\
After that add the code given below
define([
    'jquery',
    'Magento_Ui/js/modal/modal',
    'mage/loader',
    'Magento_Customer/js/customer-data'
    ], function ($, modal, loader, customerData) {
    'use strict';
    return function (config, node) {
        var product_id = jQuery(node).data('id');
        var product_url = jQuery(node).data('url');
        var options = {
            type: 'popup',
            responsive: true,
            innerScroll: false,
            title: $.mage.__('Quick View Title'),
            buttons: [{
                text: $.mage.__('Close'), class: 'close-modal', click: function () {
                    this.closeModal();
                }
            }]
        };
        var popup = modal(options, $('#quick_view_container' + product_id));
        $("#quick_view_button" + product_id).on("click", function () {
            openquickviewpopup();
        });
        var openquickviewpopup = function () {
            var modalContainer = $("#quick_view_container" + product_id);
            modalContainer.html(create_iframe_data());
            var iframearea = "#frame_product" + product_id;
            $(iframearea).on("load", function () {
                modalContainer.addClass("product-quickview");
                modalContainer.modal('openModal');
                observeAddToCart(this);
            });
        };
        var observeAddToCart = function (iframe) {
            var doc = iframe.contentWindow.document;
            $(doc).contents().find('#product_addtocart_form').submit(function (e) {
                e.preventDefault();
                $.ajax({
                    data: $(this).serialize(),
                    type: $(this).attr('method'),
                    url: $(this).attr('action'),
                    success: function (response) {
                        $(".close-modal").trigger("click");
                        $('[data-block="minicart"]').find('[data-role="dropdownDialog"]').dropdownDialog("open");
                    }
                });
            });
        };
        var create_iframe_data = function () {
            return $('<iframe />', {id: 'frame_product' + product_id, src: product_url + "?iframe=1"});
        }
    };
});
Step 4: Create a di.xml file at the following path
app\code\Vendor\Extension\etc\frontend\
Now add the below-mentioned code
<?xml version="1.0"?>
<config xmlns:xsi="http://www.w3.org/2001/XMLSchema-instance" xsi:noNamespaceSchemaLocation="urn:magento:framework:ObjectManager/etc/config.xsd">
    <preference for="Magento\Catalog\Controller\Product\View" type="Vendor\Extension\Controller\Product\View" />
</config>
Step 5: Create View.php file at the below-mentioned path
app\code\Vendor\Extension\Controller\Product\
Then add the following code
<?php
namespace Vendor\Extension\Controller\Product;

use Magento\Catalog\Controller\Product\View as CatalogView;

class View extends CatalogView
{
    public function execute()
    {
        if ($this->getRequest()->getParam("iframe"))
        {
            $layout = $this->_view->getLayout();
            $layout->getUpdate()->addHandle('quickview_product_view');
        }
        return parent::execute();
    }
}
Step 6: Create quickview_product_view.xml file at the below path
app\code\Bizspice\QuickView\view\frontend\layout\
Finally, add the below code
<?xml version="1.0"?>
<page xmlns:xsi="http://www.w3.org/2001/XMLSchema-instance" layout="empty" xsi:noNamespaceSchemaLocation="urn:magento:framework:View/Layout/etc/page_configuration.xsd">
    <update handle="empty"/>
    <html>
        <attribute name="class" value="quickview-scroll"/>
    </html>
    <body>
        <attribute name="class" value="quickview-override"/>
        <referenceContainer name="product.page.products.wrapper" remove="true" />
        <referenceContainer name="product.info.details" remove="true" />
        <referenceBlock name="reviews.tab" remove="true" />
        <referenceBlock name="product.info.details" remove="true" />
        <referenceBlock name="product.info.description" remove="true" />
        <referenceBlock name="product.info.overview" remove="true" />
        <referenceBlock name="authentication-popup" remove="true" />
    </body>
</page>
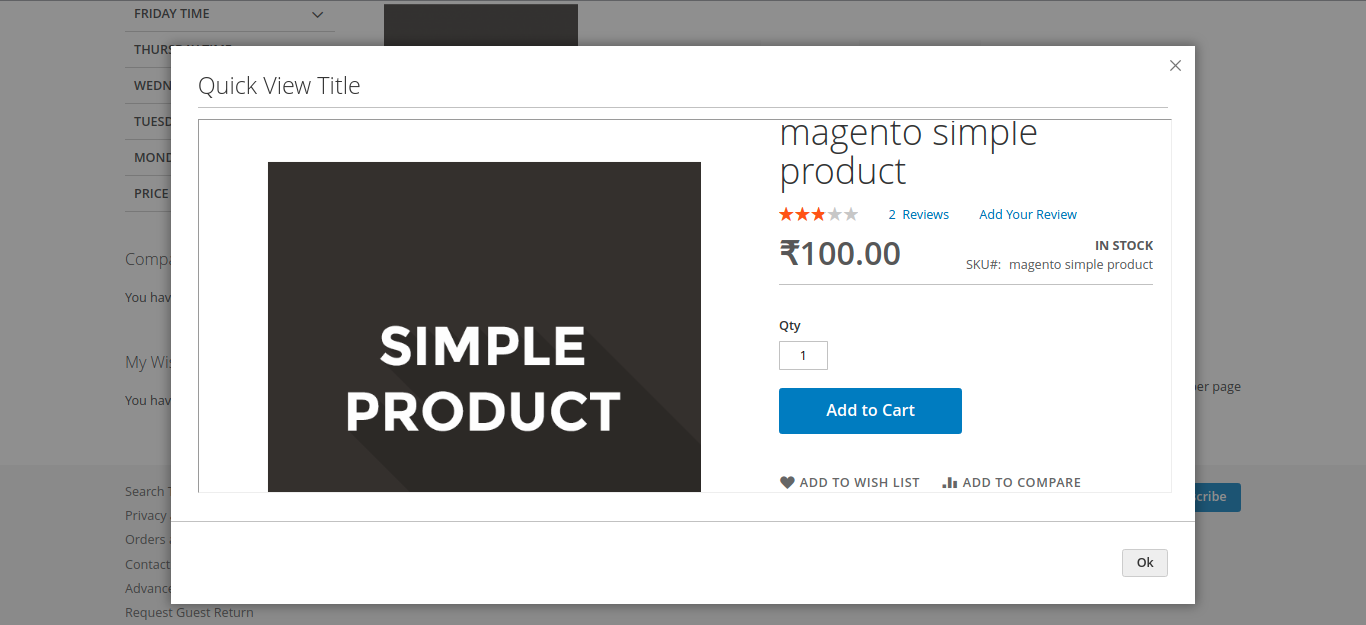
Result:
With the implementation of the above steps, the Quick View Button has been added to the category page where the user can directly view the product details.
Conclusion:
Accordingly, you can Add Quick View Feature Programmatically in Magento 2. Eliminate all these steps and let Certified Magento Developers help you add the Quick View feature to your Magento 2 store. If you have any doubts, feel free to mention them in the comment box. Share with your friends and stay connected till the next one.
Happy Coding!


Where did we need to mention the js file? How it will be rendered in the frontend?
Js file mention into these file : app\code\Vendor\Extension\view\frontend\templates\product\productlist\item\quickview.phtml
Hii , why are you create a controller and i just use three step and popup button display on my produts
For further customization, we have created the controller according to our requirement of the development.