Hello Magento Friends ?,
Today I am going to justify How to Add Date & Time Picker in Magento 2 System Configuration With Custom Format. In case you missed out our previous Magento article, find out here. Magento 2: How to Add Custom Mass Action in Product Grid.
Also, refer to our related article – How to Add Date & Time Picker in Magento System Configuration
Magento 2 provides default functionality to display date and time with a default format. But if you want to display Date & Time in a custom format as per your requirement, you can achieve it with the help of the below steps. So, let’s start ?
Steps to Add Date & Time Picker in Magento 2 System Configuration With Custom Format:
Step 1: Create system.xml file inside app\Code\Vendor\Extension\etc\adminhtml folder and add below code:
<?xml version="1.0"?>
<config xmlns:xsi="http://www.w3.org/2001/XMLSchema-instance"
        xsi:noNamespaceSchemaLocation="urn:magento:module:Magento_Config:etc/system_file.xsd">
    <system>
        <tab id="customtab" translate="label" sortOrder="100">
            <label>Custom Tab</label>
        </tab>
        <section id="datetimesection" translate="label" type="text" sortOrder="10" showInDefault="1" showInWebsite="1" showInStore="1">
            <class>separator-top</class>
            <label>Custom Date Time</label>
            <tab>customtab</tab>
            <resource>Vendor_Extension::config_extension</resource>
            <group id="datetimegroup" translate="label" type="text" sortOrder="10" showInDefault="1" showInWebsite="1" showInStore="1">
                <label>Configuration</label>
                 <field id="customdate" translate="label" type="date" showInDefault="1" showInWebsite="1" showInStore="1">
                    <label>Customized Date Field</label>
                    <frontend_model>Vendor\Extension\Block\Adminhtml\Date</frontend_model>
                </field>
            </group>
        </section>
    </system>
</config>
Step 2: Next, create Date.php inside app\Code\Vendor\Extension\Block\Adminhtml folder and add below code:
<?php

namespace Vendor\Extension\Block\Adminhtml;

class Date extends \Magento\Config\Block\System\Config\Form\Field
{
    public function render(\Magento\Framework\Data\Form\Element\AbstractElement $element)
    {
        $element->setDateFormat(\Magento\Framework\Stdlib\DateTime::DATE_INTERNAL_FORMAT);
        $element→setTimeFormat("HH:mm:ss"); //set date and time as per your need
        return parent::render($element);
    }
}
Step 3: Finally run the below command:
php bin/magento cache:flush
Result:
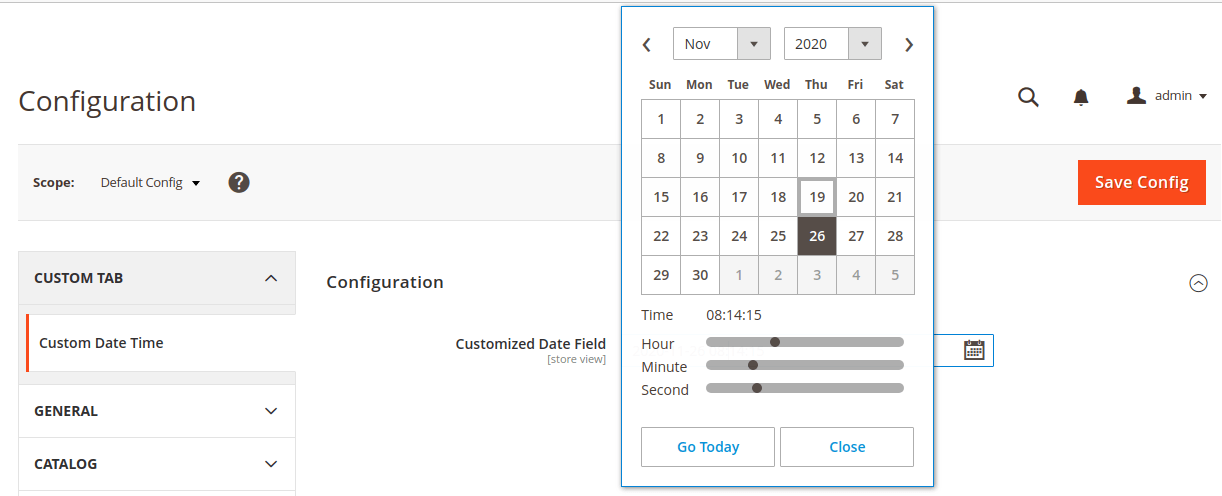
Once you are done with the implementation of the above code, check the output in the admin panel of Magento 2. The date and time picker with your custom format will be displayed in the system configuration as shown below.

Conclusion:
Therefore, everyone is able to successfully Add Date & Time Picker in Magento 2 System Configuration With Custom Format.
Feel free to ask your queries and questions in the comment section and I will be right back to you. If you found the article helpful, share it further. See you soon till then stay connected.
Happy Coding ?


Thanks much. This is the best way to add a date picker in the system configuration.