Hello Magento Friends,
Magento 2 contains many options that allow you to customize the layouts of your online store based on the needs of your brand and your clients. A similar customization is the ability to place custom text on the payment checkout page since your clients are most likely to be sensitive to messages right before making a payment. Including a note or featuring promotions through this symbol is one of the easiest ways to enhance the rate of satisfaction for your users as well as the overall conversion.
In today’s Magento 2 tutorial, we will provide you with a solution on How to Add Custom Text on the Checkout Payment Page in Magento 2.
So, without making you wait any longer, let us get started with adding custom text on the checkout payment page in Magento 2, empowering you to enhance user engagement and streamlining the buying process.
Steps to Add Custom Text on the Checkout Payment Page in Magento 2:
Step 1: Create a di.xml file inside the etc folder
app/code/Vendor/Extension/etc/frontend/
Add the following code
<?xml version="1.0"?>
<config xmlns:xsi="http://www.w3.org/2001/XMLSchema-instance"
        xsi:noNamespaceSchemaLocation="urn:magento:framework:ObjectManager/etc/config.xsd">
    <type name="Magento\Checkout\Model\CompositeConfigProvider">
        <arguments>
            <argument name="configProviders" xsi:type="array">
                <item name="custom_text_config_provider" xsi:type="object">Vendor\Extension\Model\ConfigProvider</item>
            </argument>
        </arguments>
    </type>
</config>
Step 2: Now, create a ConfigProvider.php file inside the Model folder.
app/code/Vendor/Extension/Model/
Then add the code as below
<?php

namespace Vendor\Extension\Model;

use Magento\Checkout\Model\ConfigProviderInterface;
use Magento\Framework\View\LayoutInterface;

class ConfigProvider implements ConfigProviderInterface
{
    protected $_layout;

    public function __construct(LayoutInterface $layout)
    {
        $this->_layout = $layout;
    }

    public function getConfig()
    {
        return [
            'custom_text' => $this->_layout->createBlock('Magento\Framework\View\Element\Template')->setTemplate("Vendor_Extension::custom_text.phtml")->toHtml()
        ];
    }
}
Step 3: Then create a custom_text.phtml file inside the view folder.
app/code/Vendor/Extension/view/frontend/templates
Include the following line of code
<?php echo "Custom Text !!!!"; ?>
Step 4: Next, create a checkout_index_index.xml file inside the view folder.
Vendor/Extension/view/frontend/layout
Then add the code as follows
<?xml version="1.0"?>
<page xmlns:xsi="http://www.w3.org/2001/XMLSchema-instance" xsi:noNamespaceSchemaLocation="urn:magento:framework:View/Layout/etc/page_configuration.xsd">
    <body>
        <referenceBlock name="checkout.root">
            <arguments>
                <argument name="jsLayout" xsi:type="array">
                    <item name="components" xsi:type="array">
                        <item name="checkout" xsi:type="array">
                            <item name="children" xsi:type="array">
                                <item name="steps" xsi:type="array">
                                    <item name="children" xsi:type="array">
                                        <item name="billing-step" xsi:type="array">
                                            <item name="component" xsi:type="string">uiComponent</item>
                                            <item name="children" xsi:type="array">
                                                <item name="payment" xsi:type="array">
                                                    <item name="children" xsi:type="array">
                                                        <item name="afterMethods" xsi:type="array">
                                                            <item name="children" xsi:type="array">
                                                                <item name="custom_text" xsi:type="array">
                                                                    <item name="component" xsi:type="string">Vendor_Extension/js/view/payment/custom-text</item>
                                                                </item>
                                                            </item>
                                                        </item>
                                                    </item>
                                                </item>
                                            </item>
                                        </item>
                                    </item>
                                </item>
                            </item>
                        </item>
                    </item>
                </argument>
            </arguments>
        </referenceBlock>
    </body>
</page>
Step 5: Then create a custom-text.js file inside the view folder.
app/code/Vendor/Extension/view/frontend/web/js/view/payment/
And add the following piece of code
define([
    'uiComponent',
    'ko',
    'jquery',
], function (Component, ko, $) {
        'use strict';
        return Component.extend({
            defaults: {
                template: 'Vendor_Extension/custom-text'
            },

            initialize: function () {
                var self = this;
                this._super();
            }

        });
    }
);
Step 6: Now, create a custom-text.html file inside the view folder.
app/code/Vendor/Extension/view/frontend/web/template/
And add the following line of code
<div data-bind="html: window.checkoutConfig.custom_text" style="color:red;"></div>
Step 7: In the last step, we need to run below command once.
php bin/magento setup:upgrade
php bin/magento cache:clean
php bin/magento cache:flush
Output –
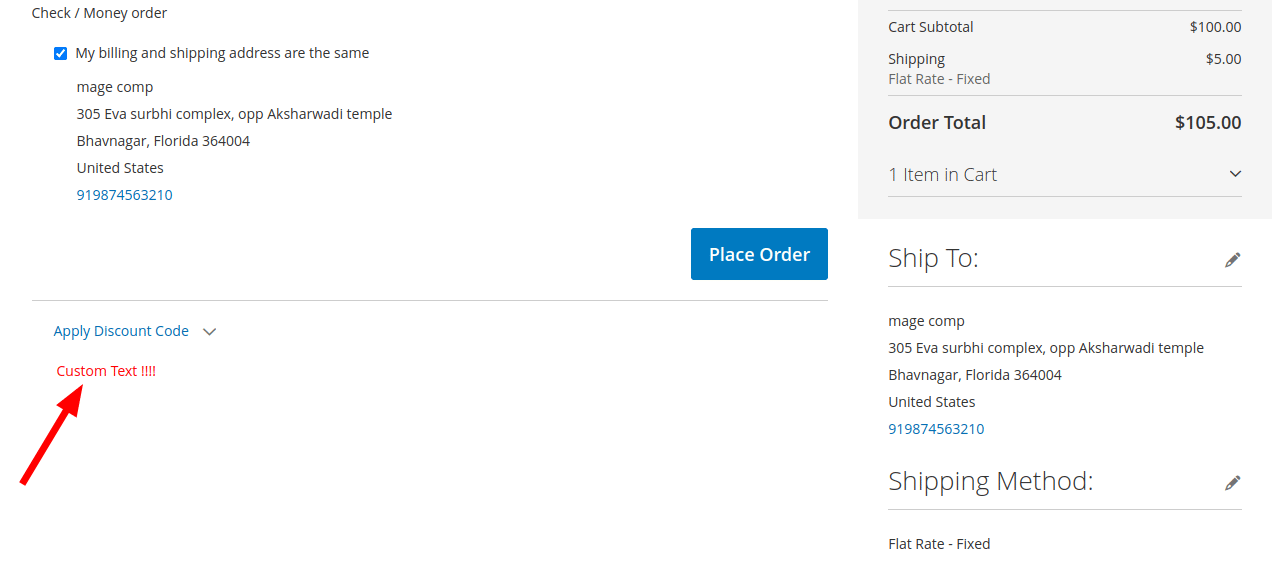
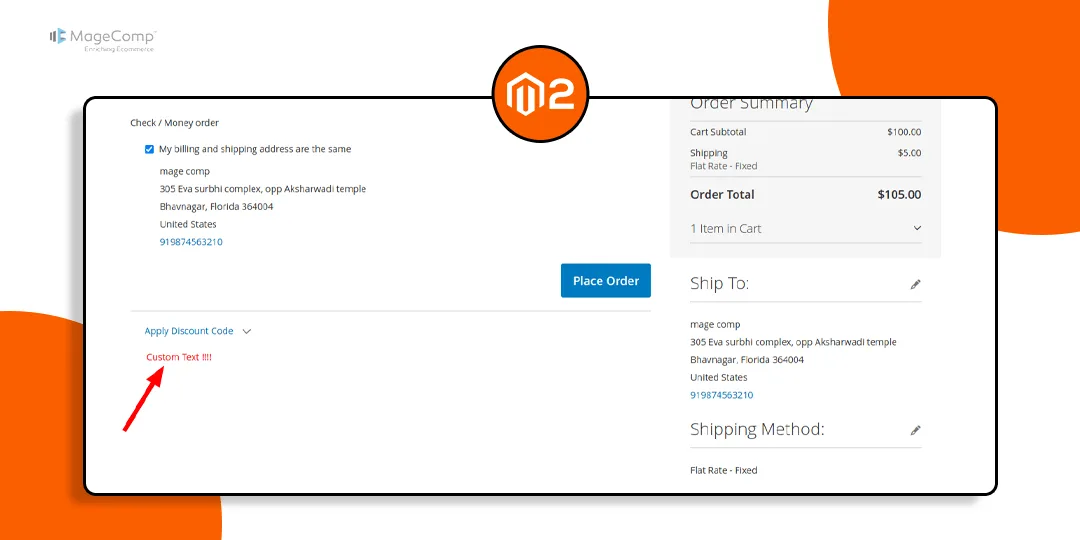
Check your Magento 2 storefront. You can see that the custom text is added to the checkout payment page, as shown in the image below.
Conclusion:
By adding custom text on the checkout payment page in Magento 2, you can create a more engaging and informative shopping experience for your customers.
Learn – How to Create an Attractive Checkout Page in the Magento 2 Store.
Stay tuned for more Magento 2 customization tips to optimize your e-commerce store and stay ahead in the competitive online marketplace.
Happy Coding!


