Hello Magento Friends,
Today I am here with a new topic on How to Add Custom Message to Login Page in Magento 2. Before we start, have a look at our previous article. How to Enable Gift Message in Magento 2.
Introduction:
With Magento 2, one can customize anything and everything. Customization is the pro feature provided by Magento. One such customization is possible by adding a custom message to the customer login page in Magento 2. It is used when merchants want to inform customers about any specific technical or business reasons.
You may also like to refer to our related article – How to Add Custom Notice to Page Top in Magento 2
Let us look at the steps to Add Custom Message to Login Page in Magento 2.

Steps to Add Custom Message to Login Page in Magento 2:
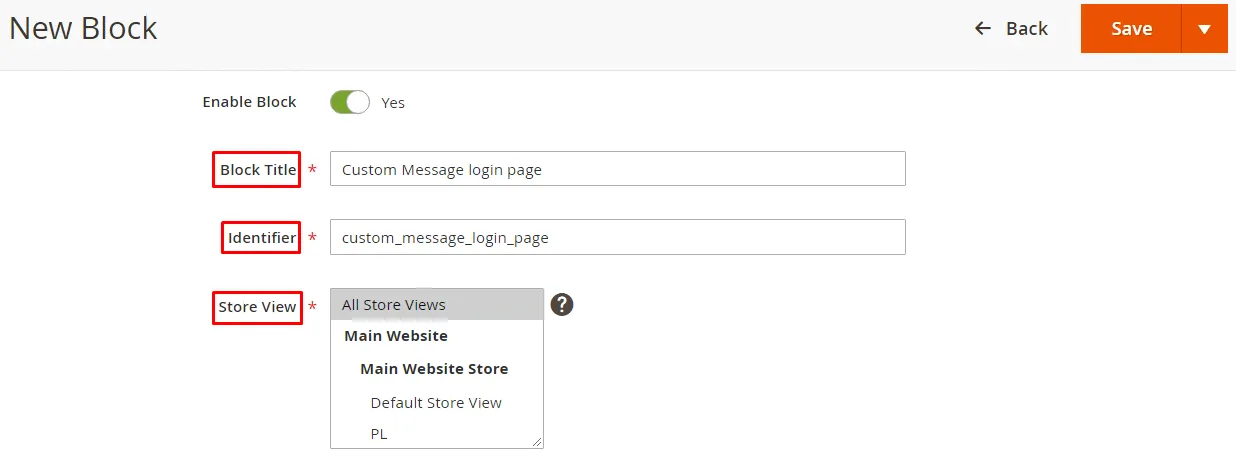
Step 1: From the Admin Dashboard and go to Content > Elements > Blocks. Click on Add New Block.
Step 2: Fill up the details
Block Title – Enter the title of the block
Identifier – Mention the identifier of the block
Store View – Select the store view to display the block

Enter the below code. You can change the code according to your needs.
<div class="message info">

<p><strong>Welcome to MageComp! Please login to continue</strong></p>

</div>
At last, click Save.
Step 3: Now, navigate to Content > Elements > Widgets. Click on Add Widget.
Step 4: Fill up the details
Type – Select CMS Static Block
Design Theme – Select Magento Luma
Then click Continue
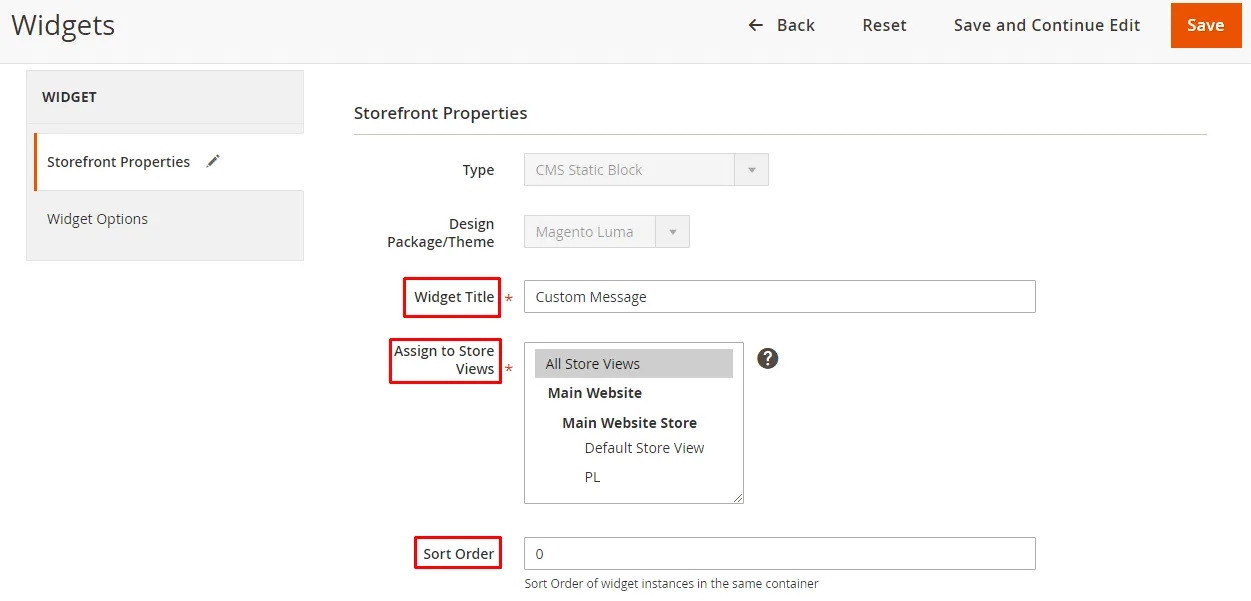
Step 5: Fill up the details under the Storefront Properties section
Widget Title – Give the title of the Widget
Assign to Store Views – Select the store view
Sort Order – Set the order of the widget

Step 6: Fill up the details under the Layout Updates section,
Display On – Select Specified Page option
Page – Select Custom Account Login Form
Container – Set as per your requirement

Step 7: From the Widget Options tab, select the Block which you have created previously.
Finally, click Save.
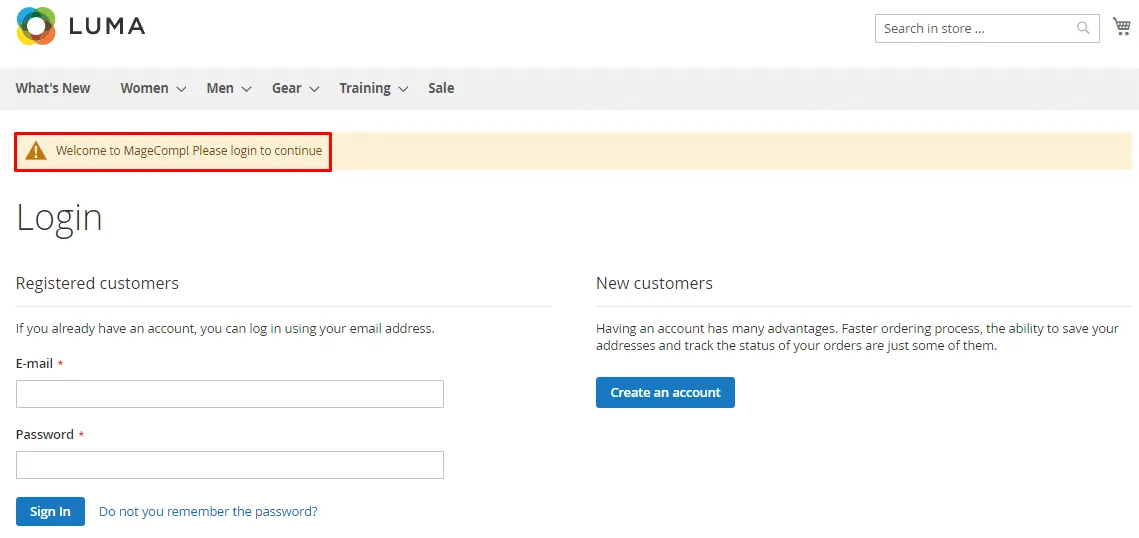
That’s it! Here we go –

Conclusion:
Hopefully, all are able to Add Custom Message to Login Page in Magento 2. Alternatively, secure your store login process with Mobile Login Extension for Magento 2. If you face any difficulty with the implementation of the above steps, feel comfortable letting me know in the comment section below. Also, share the article further via social media channels. Remain in touch till the next tutorial.
Happy Reading!


